
If you’re just getting started with Node.js and want to try your hand at building a web app, things can often get a little overwhelming. Once you get beyond the “Hello, World!” tutorials, much of the material out there has you copy-pasting code, with little or no explanation as to what you’re doing or why.
This means that, by the time you’ve finished, you’ve built something nice and shiny, but you also have relatively few takeaways that you can apply to your next project.
In this tutorial, I’m going to take a slightly different approach. Starting from the ground up, I’ll demonstrate how to build a no-frills web app using Node.js, but instead of focusing on the end result, I’ll focus on a range of things you’re likely to encounter when building a real-world app. These include routing, templating, dealing with forms, interacting with a database and even basic authentication.
This won’t be a JavaScript 101. If that’s the kind of thing you’re after, look here. It will, however, be suitable for those people who feel reasonably confident with the JavaScript language, and who are looking to take their first steps in Node.js.
What We’ll Be Building
We’ll be using Node.js and the Express framework to build a simple registration form with basic validation, which persists its data to a MongoDB database. We’ll add a view to list successful registration, which we’ll protect with basic HTTP authentication, and we’ll use Bootstrap to add some styling. The tutorial is structured so that you can follow along step by step. However, if you’d like to jump ahead and see the end result, the code for this tutorial is also available on GitHub.
Basic Setup
Before we can start coding, we’ll need to get Node, npm and MongoDB installed on our machines. I won’t go into depth on the various installation instructions, but if you have any trouble getting set up, please visit our forums and ask for help there.
Node.js
Many websites will recommend that you head to the official Node download page and grab the Node binaries for your system. While that works, I would suggest that you use a version manager instead. This is a program which allows you to install multiple versions of Node and switch between them at will. There are various advantages to using a version manager. For example, it negates potential permission issues which would otherwise see you installing packages with admin rights.
If you fancy going the version manager route, please consult our quick tip: Install Multiple Versions of Node.js Using nvm. Otherwise, grab the correct binaries for your system from the link above and install those.
npm
npm is a JavaScript package manager which comes bundled with Node, so no extra installation is necessary here. We’ll be making quite extensive use of npm throughout this tutorial, so if you’re in need of a refresher, please consult A Beginner’s Guide to npm — the Node Package Manager.
MongoDB
MongoDB is a document database which stores data in flexible, JSON-like documents. If you’ve never worked with Mongo before, you might like to check out our beginner-friendly introduction to MongoDB.
The quickest way to get up and running with Mongo is to use a service such as mLabs. They have a free sandbox plan which provides a single database with 0.5GB of storage running on a shared virtual machine. This is more than adequate for a simple app with a handful of users. If this sounds like the best option for you, please consult their quick-start guide.
You can also install Mongo locally. To do this, please visit the official download page and download the correct version of the community server for your operating system. There’s a link to detailed, OS-specific installation instructions beneath every download link, which you can consult if you run into trouble.
A MongoDB GUI
Although not strictly necessary for following along with this tutorial, you might also like to install Compass, the official GUI for MongoDB. This tool helps you visualize and manipulate your data, allowing you to interact with documents with full CRUD functionality.
Check that Everything is Installed Correctly
To check that Node and npm are installed correctly, open your terminal and type:
node -v
followed by:
npm -v
This will output the version number of each program (12.14.1 and 6.13.6 respectively at the time of writing).
If you installed Mongo locally, you can check the version number using:
mongo --version
This should output a bunch of information, including the version number (4.2.2 at the time of writing).
Check the Database Connection Using Compass
If you’ve installed Mongo locally, you start the server by typing the following command into a terminal:
mongod
Next, open Compass. You should be able to accept the defaults (server: localhost, port: 27017), press the CONNECT button, and establish a connection to the database server.

MongoDB Compass connected to localhost
Note that the databases admin, config and local are created automatically.
Using a Cloud-hosted Solution
If you’re using mLabs, create a database subscription (as described in their quick-start guide), then make a note of the connection details.
Open Compass, click New Connection, then Fill in connection fields individually. Select Username / Password as the authentication method, then fill out the rest of the details. Finally, click CONNECT and you should be off to the races.
Note: if you wish to use a connection string, it should look like this: mongodb://<dbuser>:<dbpassword>@ds211709.mlab.com:11709/?authSource=<dbname>.
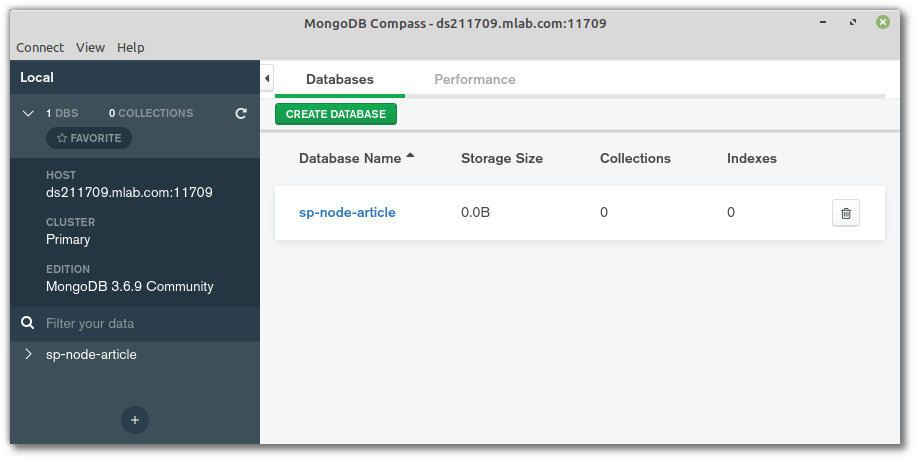
MongoDB Compass connected to mLabs
Note that I called my database sp-node-article. You can call yours what you like.
Initialize the Application
With everything set up correctly, the first thing we need to do is initialize our new project. To do this, create a folder named demo-node-app, enter that directory and type the following in a terminal:
npm init -y
This will create and auto-populate a package.json file in the project root. We can use this file to specify our dependencies and to create various npm scripts, which will aid our development workflow.
Install Express
Express is a lightweight web application framework for Node.js, which provides us with a robust set of features for writing web apps. These features include such things as route handling, template engine integration and a middleware framework, which allows us to perform additional tasks on request and response objects. There’s nothing you can do in Express that you couldn’t do in plain Node.js, but using Express means we don’t have to re-invent the wheel and it reduces boilerplate.
So let’s install Express. To do this, run the following in your terminal:
npm install express
This will see Express added to the dependencies section of the package.json file. This signals to anyone else running our code that Express is a package our app needs to function properly.
Install nodemon
nodemon is a convenience tool. It will watch the files in the directory it was started in, and if it detects any changes, it will automatically restart your Node application (meaning you don’t have to). In contrast to Express, nodemon is not something the app requires to function properly (it just aids us with development), so install it using:
npm install --save-dev nodemon
This will add nodemon to the dev-dependencies section of the package.json file.
Create Some Initial Files
We’re almost through with the setup. All we need to do now is create a couple of initial files before kicking off the app.
In the demo-node-app folder create an app.js file and a start.js file. Also create a routes folder, with an index.js file inside. After you’re done, things should look like this:
.
├── app.js
├── node_modules
│   └── ...
├── package.json
├── package-lock.json
├── routes
│   └── index.js
└── start.js
Now, let’s add some code to those files.
In app.js:
const express = require('express');
const routes = require('./routes/index');

const app = express();
app.use('/', routes);

module.exports = app;
Here, we’re importing both the express module and (the export value of) our routes file into the application. The require function we’re using to do this is a built-in Node function which imports an object from another file or module. If you’d like a refresher on importing and exporting modules, read Understanding module.exports and exports in Node.js.
After that, we’re creating a new Express app using the express function and assigning it to an app variable. We then tell the app that, whenever it receives a request from forward slash anything, it should use the routes file.
Finally, we export our app variable so that it can be imported and used in other files.
In start.js:
const app = require('./app');

const server = app.listen(3000, () => {
  console.log(`Express is running on port ${server.address().port}`);
});
Here we’re importing the Express app we created in app.js. (Note that we can leave the .js off the file name in the require statement.) We then tell our app to listen on port 3000 for incoming connections and output a message to the terminal to indicate that the server is running.
And in routes/index.js:
const express = require('express');

const router = express.Router();

router.get('/', (req, res) => {
  res.send('It works!');
});

module.exports = router;
Here, we’re importing Express into our routes file and then grabbing the router from it. We then use the router to respond to any requests to the root URL (in this case http://localhost:3000) with an “It works!” message.
Kick off the App
Finally, let’s add an npm script to make nodemon start watching our app. Change the scripts section of the package.json file to look like this:
"scripts": {
  "watch": "nodemon ./start.js"
},
The scripts property of the package.json file is extremely useful, as it lets you specify arbitrary scripts to run in different scenarios. This means that you don’t have to repeatedly type out long-winded commands with a difficult-to-remember syntax. If you’d like to find out more about what npm scripts can do, read Give Grunt the Boot! A Guide to Using npm as a Build Tool.
Now, type npm run watch from the terminal and visit http://localhost:3000.
You should see “It works!”
The post Build a Simple Beginner App with Node, Bootstrap and MongoDB appeared first on SitePoint.
by James Hibbard via SitePoint
No comments:
Post a Comment