LuminJS is a JavaScript library to progressively highlight any text on a page. Great for when you want users to pay attention to some important text.
by via jQuery-Plugins.net RSS Feed
LuminJS is a JavaScript library to progressively highlight any text on a page. Great for when you want users to pay attention to some important text.

Want more people to comment on your Facebook posts? Looking for ways to encourage meaningful discussion on Facebook? In this article, you’ll find three ways to get more comments on your Facebook page posts. Why Facebook Comments Still Matter In the fast-paced world of social media, it’s not easy to get people to stop and [...]
The post 3 Ways to Get More Facebook Comments on Your Facebook Posts appeared first on .

Cloudflare is an industry leader in the content-delivery space, reducing load and speeding up millions of websites.

What is peculiar about this provider is that it didn't start as speed-up/performance tool, but was instead born from Project Honeypot, which was conceived as a spam and hacking protection service. To this day, this is one of Cloudflare's major selling points: DDoS detection and protection. Their algorithms take note of visitors' IP addresses, payloads, resources requested, and request frequency to detect malicious visitors.
Because it sits as a proxy between websites and all incoming traffic, Cloudflare is able to reduce strain on servers significantly, so much so that DDoS attacks won't even reach the origin websites, as explained in this introduction. Cloudflare also provides the Always Online option, which caches a version of the user's website and serves a limited version of it in case of origin server outage --- when the original website returns 5xx or 4xx errors. It also features a full-fledged page cache.
These features can be a huge advantage: they can salvage a struggling web server under heavy load, and in case of server errors, can give some breathing room to developers to figure things out.

It's also available free. There are premium tiers, of course, and there are things (like additional page rules) that require paying, but the scope of Cloudflare's free tier alone makes it worthwhile to learn its ins and outs.
Comparison benchmarks put Cloudflare somewhere in the middle in regard to speed, but it would be hard to argue that it is the best value CDN on the market.
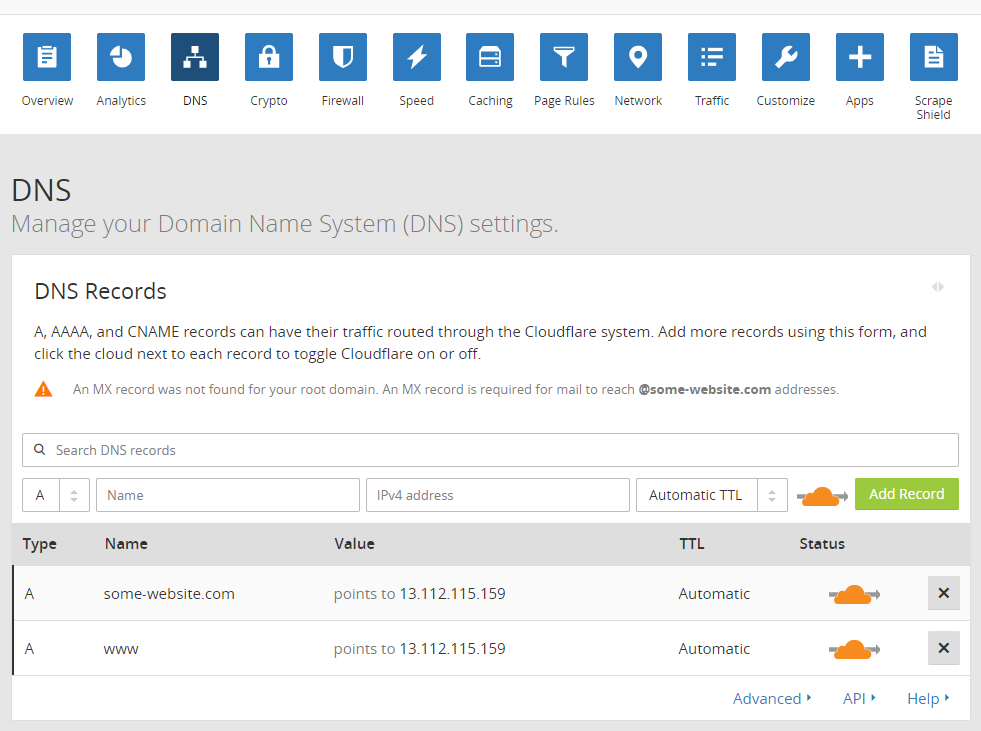
Setting a site up with Cloudflare is very straightforward. After registering at (cloudflare.com)[https://ift.tt/ghWyhd], we can add a new website. While the system scans for the given domain's IP and other details, we're offered an introductory video. Upon completion, we're given new nameservers to set up with our registrar.
We need to register these nameservers with our registrar and wait for changes to propagate across the internet. It may take up to 24 hours.
This change means giving all control over our domain to Cloudflare. This also means that, if we have email on this domain (MX records), we need to transfer these records to Cloudflare. If we have any subdomains, they also need to be set up as respective A records in Cloudflare's dashboard.
All existing domain records set up with our domain registrar or hosting provider need to be moved/copied to Cloudflare.
Some managed hosting providers may simplify/automate this transition process even more.
For each of our domain records, we can decide to simply let all the traffic pass through directly to our servers --- which means we can set exceptions for certain subdomains --- or we can turn off all Cloudflare functionality --- for example, while we're making some changes on the website.

Once we've set the domain up, that's basically all the work required outside of Cloudflare's dashboard. There's nothing more to do on the website itself, or the origin server. All further tuning is done on the Cloudflare website.
An SSL certificate is part of the free plan on Cloudflare. There are four options for SSL setup, and we can find them under the Crypto tab in the dashboard.
With these settings, we need to make sure the setup is sensible because we have two layers between our end users and our server content, so omissions here can result in a redirect loop, or too many redirections which can end up slowing the website.
Cloudflare also offers the option to buy a custom certificate, and for premium users who require extra safety or care about their market image, it gives the option of uploading custom/premium certificates. This is a part of premium plans.
This is one area where Cloudflare shines: it gives unprecedented value for free. Across the hosting landscape, DDoS protection is a premium service, and not always provided, even for paying customers.
Cloudflare offers unmetered DDoS protection on the free tier, together with some other, rather sophisticated tools that protect websites on an infrastructure level before malicious traffic even reaches it. It offers rate limiting --- throttling of visits
according to user-defined, customizable rules. It offers smart firewall rules, country blocks, browser integrity checks, captcha protections, and more.
Today, when botnets rule the internet and freshly installed websites or servers are sometimes drowned in brute-force break-in attempts within minutes of going online, when spammers automatize web comments, and referrer spam is rampant even without any break-ins, POST attacks and slow attacks utilizing unorthodox means are not rare. This kind of protection can make or break smaller- or medium-sized websites.
There's also scraping protection, denying certain resources to certain visitor profiles, or obfuscating emails.
Premium tiers offer even more options.
The post Making Your Website Faster and Safer with Cloudflare appeared first on SitePoint.
In this article, I want to take you through an example project that I built recently — a totally original type of visualization using the D3 library, which showcases how each of these components add up to make D3 a great library to learn.
D3 stands for Data Driven Documents. It’s a JavaScript library that can be used to make all sorts of wonderful data visualizations and charts.
If you’ve ever seen any of the fabulous interactive stories from the New York Times, you’ll already have seen D3 in action. You can also see some cool examples of great projects that have been built with D3 here.
The learning curve is pretty steep for getting started with the library, since D3 has a few special quirks that you probably won’t have seen before. However, if you can get past the first phase of learning enough D3 to be dangerous, then you’ll soon be able to build some really cool stuff for yourself.
There are three main factors that really make D3 stand out from any other libraries out there:
As an economics major in college, I had always been interested in income inequality. I took a few classes on the subject, and it struck me as something that wasn’t fully understood to the degree that it should be.
I started exploring income inequality using Google’s Public Data Explorer …

When you adjust for inflation, household income has stayed pretty much constant for the bottom 40% of society, although per-worker productivity has been skyrocketing. It’s only really been the top 20% that have reaped more of the benefits (and within that bracket, the difference is even more shocking if you look at the top 5%).
Here was a message that I wanted to get across in a convincing way, which provided a perfect opportunity to use some D3.js, so I started sketching up a few ideas.
Because we’re working with D3, I could more or less just start sketching out absolutely anything that I could think of. Making a simple line graph, bar chart, or bubble chart would have been easy enough, but I wanted to make something different.
I find that the most common analogy that people tended to use as a counterargument to concerns about inequality is that “if the pie gets bigger, then there’s more to go around”. The intuition is that, if the total share of GDP manages to increase by a large extent, then even if some people are getting a thinner slice of pie, then they’ll still be better off. However, as we can see, it’s totally possible for the pie to get bigger and for people to be getting less of it overall.
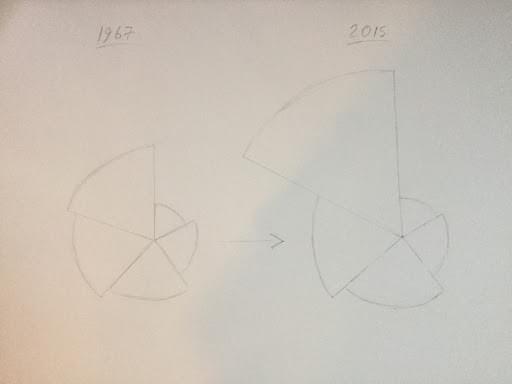
My first idea for visualizing this data looked something like this:
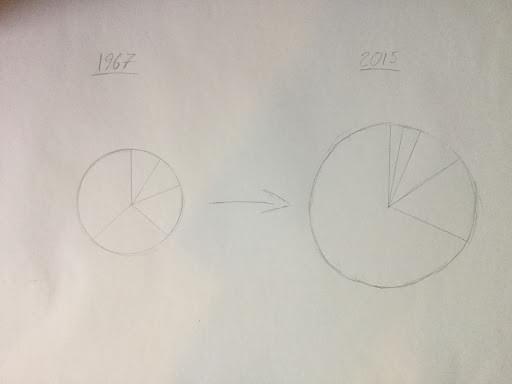
The idea would be that we’d have this pulsating pie chart, with each slice representing a fifth of the US income distribution. The area of each pie slice would relate to how much income that segment of the population is taking in, and the total area of the chart would represent its total GDP.
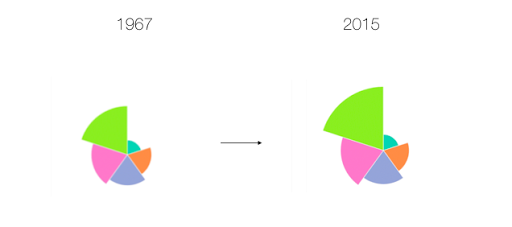
However, I soon came across a bit of a problem. It turns out that the human brain is exceptionally poor at distinguishing between the size of different areas. When I mapped this out more concretely, the message wasn’t anywhere near as obvious as it should have been:
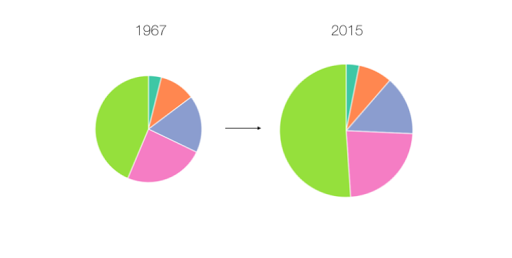
Here, it actually looks like the poorest Americans are getting richer over time, which confirms what seems to be intuitively true. I thought about this problem some more, and my solution involved keeping the angle of each arc constant, with the radius of each arc changing dynamically.
Here’s how this ended up looking in practice:
I want to point out that this image still tends to understate the effect here. The effect would have been more obvious if we used a simple bar chart:
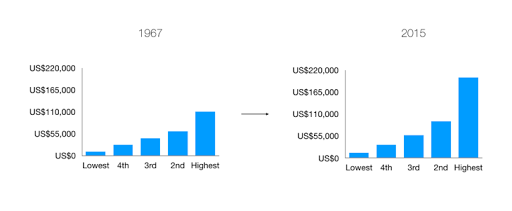
However, I was committed to making a unique visualization, and I wanted to hammer home this message that the pie can get bigger, whilst a share of it can get smaller. Now that I had my idea, it was time to build it with D3.
So, now that I know what I’m going to build, it’s time to get into the real meat of this project, and start writing some code.
You might think that I’d start by writing my first few lines of code from scratch, but you’d be wrong. This is D3, and since we’re working with D3, we can always find some pre-written code from the community to start us off.
We’re creating something completely new, but it has a lot in common with a regular pie chart, so I took a quick look on bl.ocks.org, and I decided to go with this classic implementation by Mike Bostock, one of the creators of D3. This file has probably been copied thousands of times already, and the guy who wrote it is a real wizard with JavaScript, so we can be sure that we’re starting with a nice block of code already.
This file is written in D3 V3, which is now two versions out of date, since version 5 was finally released last month. A big change in D3 V4 was that the library switched to using a flat namespace, so that scale functions like d3.scale.ordinal() are written like d3.scaleOrdinal() instead. In version 5, the biggest change was that data loading functions are now structured as Promises, which makes it easier to handle multiple datasets at once.
To avoid confusion, I’ve already gone through the trouble of creating an updated V5 version of this code, which I’ve saved on blockbuilder.org. I’ve also converted the syntax to fit with ES6 conventions, such as switching ES5 anonymous functions to arrow functions.
Here’s what we’re starting off with already:
I then copied these files into my working directory, and made sure that I could replicate everything on my own machine. If you want to follow along with this tutorial yourself, then you can clone this project from our GitHub repo. You can start with the code in the file starter.html. Please note that you will need a server (such as this one) to run this code, as under the hood it relies on the Fetch API to retrieve the data.
Let me give you a quick rundown of how this code is working.
The post Interactive Data Visualization with Modern JavaScript and D3 appeared first on SitePoint.