[ This is a content summary only. Visit our website https://ift.tt/1b4YgHQ for full links, other content, and more! ]


by Zia Zaidi via Digital Information World
Personal website portfolio of Slobodan Zdravkov, designer and front end developer
Niels.to is creative portfoliowebsite.
Co Collective helps businesses turn from storytelling (traditional advertising) to storydoing (creating improved + memorable customer experiences).


In this post, I'm going to review the WordPress Responsive YouTube Playlist Video Player plugin, which allows you to integrate a video player which is capable of playing YouTube playlists seamlessly.
For websites that deal with a lot of video streaming content, it’s important that they should organize their content in a way which is appealing and intuitive to end users. Also, it should be a part of their advertising strategy as well. Specifically, if you’re looking for a better way to represent your niche YouTube content, you’re at the right place!
When it comes to embedding YouTube content, there are thousands of free plugins and scripts available online. You’ll also find commercial options that provide ready-to-use features and extended support. In the case of commercial options, you should also expect quality code, bug fixes, and new enhancements.


Today, we’re going to explore one of the most popular plugins available at CodeCanyon: WordPress Responsive YouTube Playlist Video Player. It allows you to embed your YouTube content in different ways, whether as a playlist, channel or single video. Also, it comes with a custom designed interface instead of YouTube’s default interface.
Let’s quickly go through the important features WordPress Responsive YouTube Playlist Video Player brings:
This plugin provides a lot of useful features that allow you to embed your YouTube content effortlessly.
There are different ways you could use this plugin and customize your output. Although in this post, we’re going to build a full-fledged horizontal YouTube player by embedding a YouTube playlist by id.
The outcome of our process will look like this:

Throughout this tutorial, we’ll explore different aspects of this plugin while moving closer to our goal to build a YouTube playlist video player. In the next section, I'll show you how to download and install this plugin.
In this section, you’ll see how to install and configure the WordPress Responsive YouTube Playlist Video Player plugin once you’ve purchased and downloaded it from CodeCanyon. For this post, I’ve used WordPress 5.2.3, and the plugin version is 1.11.0. I recommend that you install the plugin if you want to follow along with this post.
The player uses YouTube’s Data API V3 and in order to use the API you will need an API key. If you do not register your own private API key, the default key will be used. However, the default key is used by lots of other users who haven’t entered their own key, and the API only has a limited number of requests it can make per key. So it’s always a good idea to have your own key to make sure there’s no outage if you’ve a high traffic website.
If you don’t know how to register the YouTube API key, the plugin provides a nice guide which explains it in detail. When you access the main plugin page on the admin side, there’s a message telling you to enter your own API key. Click on the REGISTER KEY button to open the guide. Follow the instructions in the guide and get your key.

Once you get your API key, you just need to enter it in the GENERAL SETTINGS section of the plugin as shown in the following screenshot.

In the next section, we’ll go through the different configuration sections this plugin provides.
In this section, we’ll quickly go through the different configuration options provided by the WordPress Responsive YouTube Playlist Video Player plugin.
Once you install this plugin, you can access it by clicking on the YouTube link in the left sidebar.
In this section, you can configure generic settings related to pagination, autoplay and GDPR. And as we discussed earlier, you can register your YouTube API key in this section.
As the name suggests, you’ll find settings related to the visual aspects of your player in this section. A couple of important settings includes playlist layout, player width, HD display, and a few text-related settings.
When you want to customize a player, it’s important that you should be able to choose among the different player controls. This section allows you to hide or show different player controls as per your requirements.
This section allows you to configure colors of almost each and every player control.
So that was a brief introduction of the configuration options provided by this plugin. In the next section, we'll build a full-fledged horizontal YouTube player by embedding a YouTube playlist by id.
YouTube playlists can be added onto your posts or pages by using the shortcode button in the editor as shown in the following screenshot:

When you click on that button, it opens up the popup as shown in the following screenshot.

As you can see, there are different ways you can add your YouTube content to your site. In our case, as we’re going to embed the YouTube playlist, we’ll use the first option: YouTube Playlist. To embed the YouTube playlist you’ll need a playlist URL, which and you can easily get it from your YouTube channel page. Of course, if you haven’t created any playlists yet, you’ll have to create one first. In any case, you should end up with a playlist URL like https://www.youtube.com/playlist?list={YOUR_PLAYLIST_ID}.
Once you get your playlist URL, insert it into the YouTube Playlist field as shown in the following screenshot and click on the INSERT button.

Your shortcode will be generated and added to your page or post. In my case, I’ve created a new page. The shortcode should look like:
[ytp_playlist source="PLMP2_J2lf0P1P7pjwaDe1ki-XQjaP5P1j"]
Go ahead and publish the page to see how it looks like in the front-end.

So that’s the default view of what it looks like. The main video is on the left side and the other videos in the playlist are on the right sidebar. You can click on any of them to play it. It’s the vertical playlist type in the terminology of this plugin.
In our case, we want to show the other videos in the playlist horizontally. You can control this layout by supplying the playlist_type parameter in the embed code. In fact, this plugin provides a lot of customization options through the shortcode that allows you to control different aspects of the YouTube player. It’s not possible to discuss all the options, but we’ll highlight the ones that are required for our use-case.
Firstly, let’s add the playlist_type parameter as shown in the following snippet.
[ytp_playlist source="PLMP2_J2lf0P1P7pjwaDe1ki-XQjaP5P1j" playlist_type=”horizontal”]
Next, we want to make sure the player is responsive—this is done by using the width_type parameter.
[ytp_playlist source="PLMP2_J2lf0P1P7pjwaDe1ki-XQjaP5P1j" playlist_type=”horizontal” width_type=”responsive”]
Next, we want to make sure that the video quality is HD and the YouTube logo is hidden.
[ytp_playlist source="PLMP2_J2lf0P1P7pjwaDe1ki-XQjaP5P1j" playlist_type=”horizontal” width_type=”responsive” force_hd hide_youtube_logo]
The settings we have done so far are specific to player controls customization. Somehow, I feel that we also need to change the color of a few controls so that they look more intuitive. So let’s change a couple of color settings at YouTube > COLORS.
When it comes to changing colors, this plugin allows you to change colors of different controls. In my case, I have tried to change colors as shown in the following screenshot. Of course, you could experiment on your own to find a color theme which works for your site.

With all the changes we’ve done so far, the player should look as follows:
As you can see, there are customization options for each and every aspect of the player. In this post, we embedded a YouTube playlist, but you can also embed a channel or a single video. I'll leave that to you as an exercise! Of course, you could always ping me using the feed below if you’ve any queries.
In this post, we discussed how you can add a player for a YouTube playlist to your WordPress site. As we discussed earlier, the WordPress Responsive YouTube Playlist Video Player plugin is also capable playing different kinds of YouTube content. You could also use it to integrate:
If you're looking for other WordPress media scripts that you could use right away, I recommend that you check out the following scripts that are available for a low cost.
Today, I took an opportunity to introduce the WordPress Responsive YouTube Playlist Video Player plugin available at CodeCanyon. It’s a commercial media player plugin which allows you to embed different types of YouTube content effortlessly. Moreover, it also allows you to customize the look and feel of the player as per your requirements.
I hope that you've enjoyed this article, and feel free to post your thoughts using the feed below!


Websites often need to let users know about any upcoming events like movie shows, exhibitions and classes. Listing the schedule for upcoming events helps everyone save time and plan their activities. With a good event listing calendar, your users will be able to see upcoming events along with their timing, location, availability and pricing at a single place. This helps you avoid answering a lot of repetitive inquires, and makes users more likely to buy tickets for events.
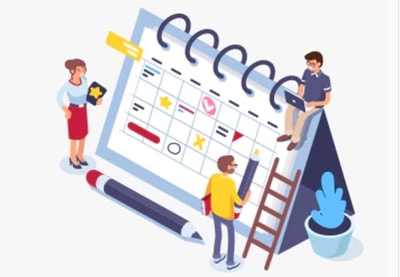



The usefulness of these event calendar and scheduling plugins makes them very popular among website owners. There are a lot of free and paid plugins out there which can help you create such schedules and post them on your website. One of the best is Timetable Responsive Schedule for WordPress, available from CodeCanyon. In this tutorial, I'll show you how to use Timetable Responsive Schedule to create a weekly schedule to list different courses and their details.
The plugin offers a lot of nice features that we will be using when creating our own course schedule. The image below shows the final result that you will have at the end of this tutorial.

As suggested by the name of the plugin, the timetable that we create will be responsive and look great on all devices. The plugin also provides booking functionality out of the box. This means that users will be able to register for different courses by clicking a button in the schedule itself.
In this section, we will simply cover some of the basics that will help you understand how the plugin works.
After installing the plugin, you will notice that there are four new menu options in your WordPress admin dashboard: Timetable, Timetable Bookings, Timetable Columns, Events.
The Timetable Columns menu option is used to specify the content that goes in the head of our table. It can be anything that you like. For example, you could create columns for months, days, dates, or places.
The Events menu option contains different settings to help you set up and create events. There is an option to create different categories to group events together. Just like the timetable columns, the event categories can also have different values with any names you want. For example, if the events are happening at different places, you could categorize them with locations. If the schedule is for movies currently being shown in different movie theaters, the category could be the movie genre.
There is no right or wrong way to set timetable columns or event categories. The important thing is to group the events together in an organized manner that makes it easier for people to find quickly find information about events that they like.
Right now, we just need to know about these two menu options to create our events and categorize them. We will discuss the remaining options later.
After getting familiar with the basics, we can now start creating our responsive schedule.
First, we will create seven columns—one for each day of the week. To do so, simply go to Timetable Columns > Add New. You will just have to fill in the title of the column and click Publish. This will add the weekday to the list of columns. Do this for all seven days of the week to get seven different columns.

Now it is time to define some categories for our courses. We will use the subjects and categories for our courses. For example, both Algebra and Statistics courses will fall under the category Mathematics. Similarly, French Revolution and World War 2 will fall under the category History in our schedule.

Remember that you can create your own categories depending on how you want to organize the courses. As I said earlier, there is no absolute right or wrong here. The aim is to make the information easier to find.
Finally, we can start creating the course schedule that will appear on the website. Just go to Events > Add New and start filling out all the details. Some information that you fill out is shown only when the users click on the event link to read about it in more detail. Other information will appear in the timetable itself.
You can begin by filling the title and description of the course. The title appears in a lot of places like the tooltip, the course schedule as well as on the course details page. Try to keep it short. The description will only appear on the details page.

There are a couple of options below the description like the Subtitle and the background and text colors. The subtitle only appears on the detail page and is located right below the title. In our case, we will use it to specify the name of the instructor who will teach that course.

If you don't want people to click on the event title and go to the details page, set the value of Disable timetable event URL to Yes. We will leave it as No for our tutorial.
Now, we will set some value for the fields in Event Hours section. Here, we simply provide the basic details of the event along with the exact time when it will take place.

Select one of the weekdays from the dropdown menu next to Timetable column. It will show all the columns that you created earlier. The Start hour and End hour values specify when the classes for the course begin and end. You have to specify them in 24 hour format without adding any AM and PM at the end. This means that 9:00 AM has to be specified as 09:00 and 2:00 PM has to be specified as 14:00. However, the final format in which the date appears in the timetable can still be set to display other formats.
You don't have to fill out both the description fields. The text inside Description 1 appears before the event title. The text inside Description 2 appears after the event title. The text inside Tooltip appears as a tooltip when users hover over the event.
Set the number of available slots to the maximum number of students who are allowed to take a class. Users will be able to register for a class as long as total registered students are below the specified limit.
Click on the Add button once you have filled out all the details. This will add the event to our schedule. Once you have added all the occurrences of the event, click on the Update button at the top.
You need to use shortcodes to add the schedule to any page or post on your website. The shortcodes for adding the timetable can get pretty big and complicated when you configure a lot of options. To make sure that you don't make any mistakes, the plugin comes with a shortcode generator that you can access by going to Timetable > Shortcode Generator.
You need to create a unique identifier for each schedule that you create. In this case, we will enter course-schedule in the shortcode id field.
Under the Main Configuration tab, we can set different options to determine what appears inside our course schedule. In Events, select all the courses that you have created. In Event Categories, select all the categories whose events you want to show in the schedule. You can select specific days for which you want to show the schedule from Columns. I have selected all days of the week except Sunday.

We will allow our users to filter the courses so that they can just see the courses that they want to take. Set the Filter Style to Tabs to show the event categories as tabs at the top of the table. The text inside Filter Label determines what text should users be shown when they want to see unfiltered schedule table. We will set it to All Courses.

These are the most important options under the Main Configuration section. You can leave the rest of the fields to their default values. Now, click on the Save button on the Shortcode Generator page and copy the generated shortcode.
Paste the copied shortcode in any page or post where you want the schedule to appear. You should get a result similar to the image below.
In this tutorial, we learned how to use the Timetable Responsive Schedule plugin to create a course schedule. The plugin comes with a lot of features which make it a perfect scheduling solution for many projects. We used the plugin in this tutorial to create a course schedule but you can use it for many other things like scheduling and booking, movie tickets across different movie theaters, or showing the schedule of different exhibits around the city in a week.
You can read about all the features of the plugin on the description page. Buying the plugin will give you access to six months of free support and lifetime updates. How do you plan on using this plugin? Let us know in the comments below.


