[ This is a content summary only. Visit our website https://ift.tt/1b4YgHQ for full links, other content, and more! ]


by Saima Salim via Digital Information World
Whether you are running a blog, business, or any type of website, you will need to attract and keep your audience's attention to be successful. A major part of attracting and keeping users' attention is to display eye-catching photos on your website.
While displaying these images in a gallery is the usual way to present them, there are other creative and interactive ways to not only show these images but other text and documents. One creative way to display your website's content is with flipbooks.
Flipbooks give your audience a fun and interactive way to view your website's content by allowing them to feel like they have a book in front of them. Flipbooks also help you display your content in an organized way that is not possible with the use of a gallery or other ways of displaying your content.



In this post, we'll be working with the number one best selling WordPress flipbook plugin on CodeCanyon: Real3D FlipBook. This plugin will help you create a stunning-looking flipbook within minutes and help keep your audience interested in what your website has to offer.
In this article, I am going to show you just how simple it is to create a 3D flipbook with the Real3D FlipBook plugin to grab and keep the attention of your audience.
The flipbook that we will be creating is going to be for our travel blog. In one of our posts in the blog, we are going to add a 3D flipbook created by the Real3D FlipBook plugin to show off the photos that were taken on our last trip to Europe.
We visited four different countries in Europe and are going to show off our top four photos for each country in the flipbook to show our travel blog audience. To make this flipbook visually appealing and easy to navigate we are going to change around the styling of the flipbook, how the actual 3D book flipping functions, add a table of contents, and enable a few other features that will enhance the viewer's experience.

To create this travel flipbook, you'll need to have the Real 3D Flipbook plugin installed. Select Real 3D Flipbook from the WordPress admin sidebar and click Flipbooks.
This will open up the Flipbook creation page where we will then click the Add New button next to the title, Flipbooks, on the top of your screen. We will label our new flipbook European Travel Flipbook.
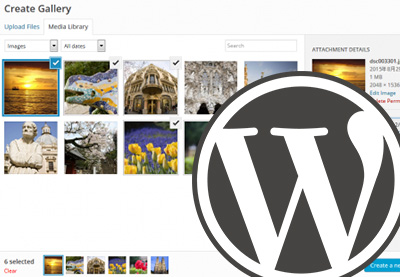
Now it is time to start creating the pages in the flipbook. There are two options to choose from here. We can create our flipbook pages from a PDF or from JPEG images. Seeing as we took these photos and have them in the JPEG format, we will click the Select Images button below JPG Flipbook which will bring up the WordPress media library. From there we are going to select our sixteen images. We are going to have four images for each of the four countries that we visited. Once we have selected our images, click the Send to Flipbook button at the bottom right-hand corner of the media library.

Now that we have all the images that we would like included in our flipbook, we need to create a table of contents so our viewers will know what country each image is from. On the top of the flipbook dashboard, click the Table of Contents tab.
This will bring up the table of contents editor where we can add in as many titles and page numbers as we need. Each grid represents a line of the table of contents. Again, we want to let our audience know where each country's photos begin and end. The first four photos are from Italy, so we will type in Italy in the first field and then the page that it starts on in the next field which is 1. Next, click the Add Item button to add another table of contents line and we will repeat this process for the other three countries. Here is what our final table of contents will look like.

The next step for creating our flipbook is to adjust the general settings. Click the General tab at the top of the Real3D FlipBook dashboard. From here we are going to adjust two different settings, the view mode and the page flip sound. For the view mode, click the webgl setting from the drop-down menu. This will make sure that the flipbook that is displayed contains realistic 3D page-flipping with lights and shadows to create a realistic effect. Moving on to the page flip sound setting, we will simply click the enabled setting to allow the page sound to play. Adjusting these settings ensures that we create as realistic as a flipbook as we possibly can to keep our viewers interested in viewing the flipbook. Here is what our flipbook looks like now.

Our flipbook is really starting to come together, but the styling of the entire flipbook is rather bland and we would like it to be more pleasing to the eye, so we are now going to adjust the user interface in the UI tab on Real3D FlipBook dashboard. Once you click this tab, you will be directed to the UI menu where will change the background color and side navigation bars to really make the flipbook pop out of the screen.
First, click on the Flipbook Background accordion and then click on color. We will choose the default blue color at the bottom right of the color selector. Next, click on the Side Navigation Buttons accordion menu to expand out the menu. To highlight the navigation button, we will change the background color to be red which will contrast nicely with the blue background color.
To make the navigation buttons more appealing to click we are going to change the radius so the button will be a circle instead of a square. We will type 30 into the radius field. The last styling change on the button is going to be the size. Again, we want this navigation button to invite the user to keep navigating, so we will bump up the size to 48. Finally, click the update button at the bottom right-hand corner of the plugin dashboard to save all of the updates that we just made.
The last setting we are going to change is in the Menu Buttons tab. Click on the Menu Buttons tab and head down to the Download PDF accordion menu and click it. We would like our travel blog audience to be able to download this flipbook so they can share it with their friends and view it offline. To allow this, we are going to click Enabled from the drop-down menu next to the Enabled menu item at the top of the Download PDF accordion menu.
There you have it, we have just created a stunning looking flipbook for our European travels to be displayed on our travel blog. You can see this entire flipbook creation process in the video below.
In this article, we looked at how you can use the flipbook plugin to create a virtual book of travel photos. The Real3D FlipBook plugin has countless more uses though. Here are a few ideas for the different types of flipbooks that you can create with the plugin.
The Real3D FlipBook plugin is great for catalogs. They allow you to create a realistic catalog in the digital world that can be downloaded by your customers and potential customers. Having an online catalog is a must for today's internet-driven businesses and adding your products to a catalog created by Real3D Flipbook will give you complete control over how you want to present your products.
A book or magazine can easily be created with this plugin. The average attention span of your online audience is continually going down, so creating an eye-catching and interesting book or magazine is necessary. The Real 3D FlipBook gives you complete control over the customization of your book or magazine and makes it much more visually appealing to read your material as opposed to just reading a static looking PDF.
The Real3D Flipbook plugin is completely customizable. In this article, we only had a chance to go over a few of the features offered by the plugin. Below I have listed three notable functions that can help you get the most out of this plugin.
If you are creating a catalog, book, magazine, or any flipbook with a large number of pages, chances are your reader won’t finish viewing your flipbook in one sitting. Enabling the bookmark feature in the Menu Buttons tab on the plugin dashboard will allow your viewers to bookmark the exact page they were on so they can come back at another point in time and continue reading.
When the WebGL display of the flipbook is enabled to show off the book's 3D capabilities, you will be able to edit the angle at which the flipbook is viewed. By changing the camera angle, you can create the illusion that the reader is actually reading a flipbook that is right in front of them. The options to adjust for this are the camera pan angle and the camera tilt angle under the WebGL tab. Adjust these settings to taste to create a realistic reading perspective for your flipbook.
By default, the search function on the flipbook is turned off. If your flipbook contains a lot of information, then having this search function turned on is a must so your reader can find exactly what they are looking for. Enable this function under the Menu Buttons tab.
When displaying any type of content to your website's audience, you need to able to attract and maintain their attention. The use of galleries and other gallery-like displays can present your images to your audience, but don't quite have the appeal of flipbooks.
By using the Real3D FlipBook plugin you can easily create a visually appealing flipbook that gives your audience a fresh new experience when visiting your website.
To give this plugin a try, head over to CodeCanyon and check out the Real3D FlipBook plugin. And while you're here, check out some of the other great WordPress plugins available from CodeCanyon.


Technology has completely transformed how we learn and how training is delivered. Physical presence in a physical location is no longer necessary. Technology has not done away with the instructor or the student though. Instead, it has made how and where we access and interact with learning material easy, dynamic, and flexible.
In fact, it has made instructor-to-student and student-to-student interaction more dynamic. Students learn from each other because there is greater collaboration between students.
Training is now commonly delivered and administered through learning management systems. Lessons are created and uploaded on these systems and can be accessed anytime, anyplace. Learning can happen by from desktops or mobile devices, from websites and apps.
In this article we will explore WordPress learning management systems (LMS) plugins.
Let’s get started.
The future of learning has been with us for a long time now. Learning accessible from anywhere anytime, at your own pace, using wide variety of devices from desktops to tablets to mobile phones. Learning delivered by systems that host large directories of courses. These large directories of e-courses utilize learning management systems.
As a result, there is an explosion in learning. Online learning platforms have responded to users educational needs and preferences for learning anywhere anytime by using responsive websites and apps. This makes sense since over 70% of users go online using mobile devices. And 90% of users spend their time in apps.
Many companies have also embraced online training for their staff. Some deliver their training to an externally-managed platforms that their staff can access. They don’t get involved in running the platform. Other companies have their own self-hosted learning management systems where they create, manage, and deliver training content.
The upside of this is saving on the logistical costs of planning location-based training or seminars for hundreds of employees.
Online learning platforms are very popular and profitable. If you want to get in the game so you too can host courses, or if you’re a company thinking of hosting your own training, or a developer tasked with implementing learning management infrastructures for your clients, then WordPress is your ally.
The fact that WordPress is a content management system makes it a perfect foundation on which to build learning management systems. It has a powerful and stable base, and its functionality can be extended a thousand fold through use of plugins.
But building learning management systems from scratch is extremely costly. This should not dash your hopes of managing your own self-hosted learning management system.
Here is where learning management systems (LMS) plugins for WordPress come in. There are developers who have specialized in catering specifically to this niche.
A learning management systems plugin is a cloud-based software that delivers online learning. It allow instructors to create, manage, track, and deliver learning content or e-courses.
WordPress, which is already a comprehensive CMS, is the perfect platform for creating and hosting your Learning Management System. To offer online courses you just need to download and install an LMS plugin. This will provide functionality to several classes of user:
An LMS is made up of many components enable different users to achieve their objectives.
Automated Administrative and Communication Tools
Communication is key to any successful venture. Automating communication takes a load off administrators’ shoulders. Communication to teachers and students can include notification about accounts and payments, email reminders, weekly course summaries, real-time onscreen progress indicators for each and so on.
Administrative tools include tools for registering teachers and calculating teachers commissions,
Diverse Course Options
An LMS should combine different learning methods. For example, learning content can delivered via audio, videos, powerpoint, multimedia, written text, games, social learning, and more.
Course Content Creation Tools
An LMS comes with built-in authoring tools that allow for easy creation of course content.
Engagement
Chats, forums, and other kinds of online community software tools integrated into the LMS offer opportunities for students to engage with their peers. They are not limited by location. They can collaborate on assignments and projects.
Assessment and Testing tools
Test to see how students are learning and retaining material in the courses through quizzes and exams.
Instant Feedback
Teachers can give learners feedback to show them where they need to improve.
Grading and Scoring
Allows yracking student progress and performance over the duration of the course.
Certification
An LMS should come with the ability create certificates for students that complete a course.
Reporting
Gives you access to data like number of students taking a particular course, individual reports for each student, and how much time students spend on each lesson and quiz.
Feedback
The only way to improve is through user feedback. An LMS system should offer tools for gathering feedback and suggestions from students and learning what they think about the quality of the courses and the system itself.
Reviews
An LMS system should offer students tools to review and rate their learning experience for courses. This will be helpful for others who want to take the course.
Ease of Use
A user-focused LMS system should be intuitive and simple to navigate and customize.
Compatibility With Mobile Devices
80% of users go online using their mobile devices and prefer to use them for everything including learning. LMS should have companion apps in iOS and Android.
Monetization
A good LMS should offer different payment models like:
Integration
A WordPress LMS system should integrate with software you already use like CRM software, accounting software, and more.
In addition it should be able to integrate with:
Multi-Language Support
If you want to offer online courses to a wider international audience your LMS plugin should offer translation support files.
Regular Updates
When bugs are left unattended they make the system vulnerable to attacks. Regular updates mean the system is reliable and secure.
Security
Users want to know that their personal and financial data is safe.
Reviews
Consider seriously what other users have to say. Users trust the word other users. They have used the system and seen how it works and what its strengths and weaknesses are.
CodeCanyon has some of the most feature-packed and lowest cost LMS plugins on the market. Here are a few of the very best.

Good LMS has many great features for creating and selling online and onsite courses.
It has an easy-to-use interface that makes creating courses a breeze. Teachers can offer quizzes, including timed quizes, and give students the option to take quizzes again.
Students can earn badges as they progress and they get a certificate at the end of each course. They will also have the ability to review and rate the course.
Payment
You can try this plugin for free today with the live preview.
It makes it easy to create and sell courses to millions of students. Teachers can register to teach courses and you can approve them. You can have multiple teachers for one course.
It has an easy-to-navigate interface where important information needing your urgent attention is arranged in tabs.
You can offer lesson previews, set lesson durations, and set up lessons drip content so you can release lessons at regular intervals. Students can take notes, receive badges, gain points, see their grades.
You can create quizzes, give hint to questions, set quiz duration and passing grade. Also questions can be multiple choice, essay, or fill in the blanks.
In addition to accepting multiple currencies, it supports many payment options including PayPal, Stripe, 2CheckOut. It can also be integrated with platforms like WooCommerce and Easy Digital Downloads.
Checkout the live preview and see why daedubu says this about Ultimate Learning Pro:
This is an amazing plugin! Easy and powerful :) The best plugin for e-learning on my site. Thanks for all, especially to your fantastic support team!

WPLMS Student app is a mobile app developed for the WPLMS Learning management system so students can learn anywhere and anytime.
To use this app you must have the WPLMS Learning Management System WP Education Theme. This is great because it allows for a consistent look between the website and the app you create. And most importantly, you can easily sync data between apps and websites.
Some best features of this app include:
And so much more.
Check out the free live preview of this LMS and see why this is the perfect app for you.

LearnDash is one of the top learning management systems on the market. Its list of users include Fortune 500 companies, universities, training organizations, entrepreneurs, WordPress developers and designers, and more.
It has with all kinds of tools you need to build a thriving business by selling courses.
Its powerful course builder where you can create multilayered courses and even reuse the lessons. It takes into accounts different learning styles so you can engage learners by using all kinds of media from video, audio, images, Google docs. You can also break up courses into sections, lessons, topics, quizzes.
Features on the Admin side include: front-end registration, detailed reporting on student progress, creating user groups and allowing others to manage them, email notifications to learners, ability to approve, comment, and award points for assignments.
You can sell courses by offering one time price, subscriptions, memberships, and course licensing.

Sensei LMS is made by the same company that brought you WordPress and WooCommerce. And the basic edition is free, so you can get started using it today! However, to sell your courses you'll need to purchase a paid extension from the WooCommerce site.
This LMS is very simple to use. No coding skills are required and it works with your preferred WordPress theme.
Some of this easy-to-use LMS plugin's interesting features include:
Sensei also has very extensive Documentation.

WP Courseware is a powerful plugin that allows you to create and sell online courses.
Features that come with this plugin include:
It comes with built-in shopping cart support. You can sell courses as a one time purchase or monthly membership subscription, or schedule installment payments.
It integrates smoothly with:
In addition, it has great documentation resources to get you started.
While these among the LMS plugins that caught my eye, there are many out there in the market today.
The following articles will help with ideas about how you can expand your online course platform.


