[ This is a content summary only. Visit our website https://ift.tt/1b4YgHQ for full links, other content, and more! ]


by Arooj Ahmed via Digital Information World
List of 400+ JavaScript interview questions and answers.


![]()
Did you know I’ve curated over 2,000 One Pagers on One Page Love featuring smooth scroll!
Smooth scroll is such a popular feature within the One Page website niche as it creates a more pleasurable reading experience. A visitor arrives, they click a link and it transports them, gracefully, to the information they are after within the same webpage.
In this new tutorial (plus video) I show you exactly how to achieve smooth scroll using the new Squarespace 7.1 platform. There are essentially two methods – both not requiring any coding experience – let’s begin!
Yay! Squarespace has been kind enough to give One Page Love readers the exclusive coupon OPL10 for 10% Off your first website or domain purchase. (There is a free 14-day trial with no credit card needed, so you can try risk free.)
For tutorial context we are adding smooth scroll to a Landing Page for a New Orleans dog walker, Sarah Young. Note how clicking the header navigation smooth scrolls to the page sections:

In both methods we are going to link to the footer contact area from the header navigation Contact button.
Squarespace 7.1 has a more streamlined setup process for styling your site and adding content. There is no need to start with a specific template. If you are wondering if your website is on Squarespace 7.0 or 7.1 – simply identify where the demo expansion arrow is. Left is Squarespace 7.0, right is Squarespace 7.1:
If you are using Squarespace 7.0 please refer to the older tutorial: How to Smooth Scroll to Index Blocks using Squarespace.
There are two methods to achieve smooth scroll using Squarespace 7.1, let’s continue:
Method A has 3 steps:
Think of anchors as positions within our long-scrolling webpage. Anchors are assigned a name like ‘contact’. We can navigation to these anchor positions by linking to the anchor name with a hashtag (#) prefix. Example #contact
So the link pointing to the contact anchor position would look like this:
#contact
and the actual anchor position code would look like this:
<a name="contact"></a>
To add an anchor link, we need that tiny bit of custom code above the relevant section, it’s real easy.
When editing the page, hover your tear drop cursor above the section to kick off the content block option panel. Select the Code block and proceed to paste in an anchor link like this:
<a name="contact"></a>
Then hit the Apply button.

Open up your header navigation links (or any link within your page) and link to the anchor we created using a # prefix, example:
#contact

Finally to enable that graceful smooth scroll motion when clicking links, head over to Design → Custom CSS in the main Squarespace menu and paste in the following code:
html {

scroll-behavior: smooth;

}
… and that’s it! Our long-scrolling Landing Page now features a header navigation that smooth scrolls to our Contact section. You would repeat the steps for other sections on your Landing Page like Rates and Testimonials.
To recap method A, we inserted an anchor link just above the section we wanted to scroll to. We inserted the anchor link via a code block. Then we linked to that anchor link via a main navigation link.
Method B has 4 steps:
Open up your Landing Page, right-click anywhere and select View Page Source out the menu options:

This will open up the scary looking source code of the webpage. Don’t panic, we are going to break it down.
For this example we want to smooth scroll to the Contact section so we need to find a section with contact detail content.
Open up the webpage search tool (Command + F) and paste in the following code snippet:
id="page-section
The result should suggest as many sections you have implemented in your Landing Page. In this example 5.
Switch between findings (ie. sections) using the arrows. As the Contact section is the last in the webpage, this should be the last reference with the search results. So I skip to the 5th result.
To ensure we are in the right section of the page, note how there is text related to contact in the demo below.
Copy the full code within the id=”XXX” like this:
page-section-5ec5004285641b15eddb5a81

Open up your header links (or any link within your page) and link to the section ID we copied from step 2 but using a # prefix, example:
#page-section-5ec5004285641b15eddb5a81

Finally to enable that graceful smooth scroll motion when clicking links, head over to Design → Custom CSS in the main Squarespace menu and paste in the following code:
html {

scroll-behavior: smooth;

}
… and that’s it! Our long-scrolling Landing Page now features a header navigation that smooth scrolls to our Contact section. You would repeat the steps for other sections on your Landing Page like Rates and Testimonials.
To recap method B, we dived into the page source and found the section we needed. We copied that sections unique ID. Then we linked to that section via a main navigation link using a hashtag prefix.
Squarespace is a leading online website builder. What sets them apart from the rest is their superior level of design and customer support. They have a huge support team and are available 24/7. Other main benefits are:
I hope you enjoyed this tutorial on how to Smooth Scroll using the new Squarespace 7.1 platform. Props to Squarespace for creating a platform where we can create beautiful Ecommerce websites, easily. In case you missed it last month, I wrote a tutorial how to build a long-scrolling Landing Page from scratch using Squarespace.


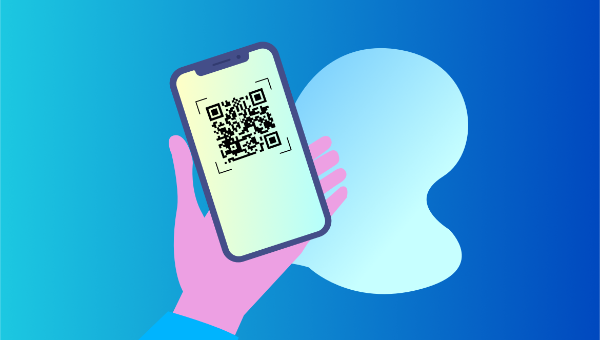
The barcode and QR code have modernized our shopping and searching experience. Customers carrying smartphones can now pick up a product anywhere in the world, scan its barcode or its QR code using one of the many free phone apps and find out its lowest price as well as where it can be bought.

Companies like Walmart and Amazon have embraced this technique to draw customers to their online and offline stores using their phone app. Other companies like Fedex and UPS allow customers to scan the codes on packages using a phone app, instead of needing to manually type in long lists of characters.
If the users of your mobile website have a need to type in long codes like activation codes, or they like to look up specific products on your website based on a model number printed in a magazine or advertisement, then you too can take advantage of QR codes to eliminate the frustration of tiny keyboards and spare them the need to double check for errors.
You don’t need a native phone app to scan QR codes. It’s quite simple to create your own QR code reader. Your website running on a smartphone equipped with a camera and running a little JavaScript can do the same trick.
Here’s a demo of a QR code scanner that works not only on Mobile but also in most modern devices. All you need is a camera and a QR code to scan.
If you don’t have a QR code handy, here’s one that shows the first eight digits of Pi.

Our QR code reader will need some HTML and JavaScript but most importantly, a JavaScript library capable of interpreting the QR code.
We’re not going to build that ourselves, because there are some great libraries out there doing this for us, so we don’t need to reinvent the wheel for our current purposes.
Let’s begin by creating an index.html file.
We’ll need some very simple HTML for this project. Add the following to your body tag:
<div id="container">
    <h1>QR Code Scanner</h1>

    <a id="btn-scan-qr">
        <img src="https://dab1nmslvvntp.cloudfront.net/wp-content/uploads/2017/07/1499401426qr_icon.svg">
    <a/>

    <canvas hidden="" id="qr-canvas"></canvas>

    <div id="qr-result" hidden="">
        <b>Data:</b> <span id="outputData"></span>
    </div>
</div>

<script src="./src/qrCodeScanner.js"></script>
As you can see, we have a wrapper container with a title, the QR icon image wrapped in an a tag, a canvas and a div where we’ll show the result of the scan.
Outside the container div we’re including the qrCodeScanner.js file. We’ll create it later, but first we’ll improve the look of our app.
Add the stylesheet to the head of our HTML:
<link rel="stylesheet" href="src/styles.css" />
Now we want to create the style.css file within the src folder. We just want some basic styles for this sample app. Add the following to your css file:
html {
  height: 100%;
}

body {
  font-family: sans-serif;
  padding: 0 10px;
  height: 100%;
  background: black;
  margin: 0;
}

h1 {
  color: white;
  margin: 0;
  padding: 15px;
}

#container {
  text-align: center;
  margin: 0;
}

#qr-canvas {
  margin: auto;
  width: calc(100% - 20px);
  max-width: 400px;
}

#btn-scan-qr {
  cursor: pointer;
}

#btn-scan-qr img {
  height: 10em;
  padding: 15px;
  margin: 15px;
  background: white;
}

#qr-result {
  font-size: 1.2em;
  margin: 20px auto;
  padding: 20px;
  max-width: 700px;
  background-color: white;
}
Nothing fancy at all. We’ll leave everything centered with a big QR button in the middle and the result underneath. We’re using black and white like the QR codes.
The secret to reading QR codes is math, and the substitute for math is open-source libraries. To read QR codes, we’ll be using the JavaScript port of the Java-based image processing library written by ZXing. The JavaScript version was ported by Lazar Laszlo.
Because the JavaScript library consists of 17 files, we’ve taken the liberty of merging them into one file, wrapping the code in an anonymous function to prevent pollution of the global namespace and putting the file through Google Closure’s minifier to make the file size smaller.
In order to make the library more adaptable, we’ve added a few minor changes to the library’s output function to differentiate between a success response and an error response.
Two important changes made were in qrcode.js, to these two lines:
qrcode.result = "error decoding QR Code";
//...
qrcode.callback("Failed to load the image");
These strings have been replaced by Error objects:
qrcode.result = Error("error decoding QR Code");
//...
qrcode.callback(Error("Failed to load the image"));
Now I can detect in my callback function whether an error occurred, just by checking if the callback payload is an instance of Error or not.
Those changes can be found in this fork of the library.
To use the library in our QR code reader, we first need to include it in our HTML using a regular script tag:
<script src="https://rawgit.com/sitepoint-editors/jsqrcode/master/src/qr_packed.js">
</script>
Something we’ll need to do is tell mobile browsers that we don’t want to scale this site in portrait mode. This can be achieved by adding the following meta tag within the head element:
<meta name="viewport" content="width=device-width; initial-scale=1.0; maximum-scale=1.0; user-scalable=0;"/>
Continue reading How to Create a QR Code Reader for Your Mobile Website on SitePoint.
