"Mr Branding" is a blog based on RSS for everything related to website branding and website design, it collects its posts from many sites in order to facilitate the updating to the latest technology.
To suggest any source, please contact me: Taha.baba@consultant.com
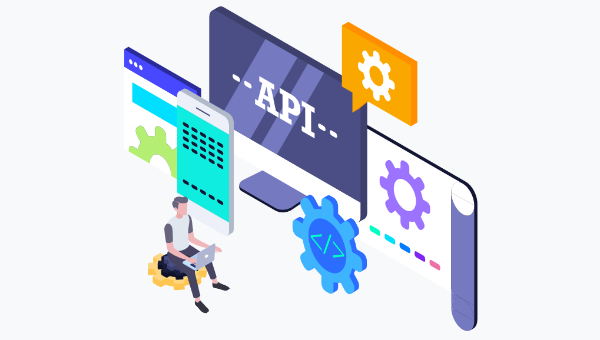
Facebook, GitHub, Google, and many other giants need a way to serve and consume data. A RESTful API is still one of the best choices in today’s dev landscape to serve and consume data.
But have you ever considered learning about industry standards? What are the best practices for designing a RESTful API? In theory, anyone can quickly spin up a data API in less than five minutes — whether it be Node.js, Golang, or Python.
We’ll explore 13 best practices you should consider when building a RESTful API. But first, let’s clarify a RESTful API quickly.
What is a RESTful API?
A RESTful API needs to meet the following constraints for it to be called a RESTful API.
Client-server: A RESTful API follows the client-server model where the server serves data and clients connect to the server to consume data. The interaction between client and server occurs through HTTP(S) requests that transfer the requested data.
Stateless: More importantly, a RESTful API should be stateless. Each request is treated as a standalone request. The server should not keep track of any internal state that might influence the result of future requests.
Uniform interface: Lastly, uniformity defines how the client and server interact. RESTful APIs define best practices for naming resources but define fixed HTTP operations that allow you to modify/interact with resources. The following HTTP operations can be accessed in RESTful APIs:
GET request: retrieve a resource
POST request: create a resource or send information to the API
PUT request: create or replace a resource
PATCH request: update an existing resource
DELETE request: delete a resource
With this deeper understanding of the characteristics of a RESTful API, it’s time to learn more about RESTful API best practices.
Best Practices For Designing Your First RESTful API
This article presents you with an actionable list of 13 best practices. Let’s explore!
1. Use HTTP methods correctly
We’ve already discussed the possible HTTP methods you can use to modify resources: GET, POST, PUT, PATCH, and DELETE.
Still, many developers tend to abuse GET and POST, or PUT and PATCH. Often, we see developers use a POST request to retrieve data. Furthermore, we see developers use a PUT request which replaces the resource while they only wanted to update a single field for that resource.
Make sure to use the correct HTTP method as this will add a lot of confusion for developers using your RESTful API. It’s better to stick to the intended guidelines.
2. Naming conventions
Understanding the RESTful API naming conventions will help you a lot with designing your API in an organized manner. Design a RESTful API according to the resources you serve.
For example, your API manages authors and books (yes, a classic example). Now, we want to add a new author or access an author with ID 3. You could design the following routes to serve this purpose:
api.com/addNewAuthor
api.com/getAuthorByID/3
Imagine an API that hosts many resources that each have many properties. The list of possible endpoints will become endless and not very user-friendly. So we need a more organized and standardized way of designing API endpoints.
RESTful API best practices describe that an endpoint should start with the resource name, while the HTTP operation describes the action. Now we get:
POST api.com/authors
GET api.com/authors/3
What if we want to access all books author with ID 3 has ever written? Also for this case, RESTful APIs have a solution:
GET api.com/authors/3/books
Lastly, what if you want to delete a book with ID 5 for an author with ID 3. Again, let’s follow the same structured approach to form the following endpoint:
DELETE api.com/authors/3/books/5
In short, make use of HTTP operations and the structured way of resource mapping to form a readable and understandable endpoint path. The big advantage of this approach is that every developer understands how RESTful APIs are designed and they can immediately use the API without having to read your documentation on each endpoint.
3. Use plural resources
Resources should always use their plural form. Why? Imagine you want to retrieve all authors. Therefore, you would call the following endpoint: GET api.com/authors.
When you read the request, you can’t tell if the API response will contain only one or all authors. For that reason, API endpoints should use plural resources.
4. Correct use of status codes
Status codes aren’t here just for fun. They have a clear purpose. A status code notifies the client about the success of its request.
One of the first bits of advice that people got when the internet started becoming more commonplace had to do with the fact that you should never open emails unless they are from someone that you know. A big part of the reason why that is the case has to do with the fact that malicious actors tend...
[ This is a content summary only. Visit our website https://ift.tt/1b4YgHQ for full links, other content, and more! ]
In this article, we’ll discuss the basics of autoloading in PHP and how to autoload PHP classes with Composer. I'll explain why autoloading is so important and show you how to use Composer for autoloading step by step. I'll also explain the difference between the different kinds of autoloading in Composer.
Why Do We Need Autoloading?
When you build PHP applications, you may need to use third-party libraries. And as you know, if you want to use these libraries in your application, you need to include them in your source files by using require or include statements.
These require or include statements are fine as long as you’re developing small applications. But as your application grows, the list of require or include statements gets longer and longer, which is a bit annoying and difficult to maintain. The other problem with this approach is that you're loading the entire libraries in your application, including the parts you're not even using. This leads to a heavier memory footprint for your application.
To overcome this problem, it would be ideal to load classes only when they are actually needed. That's where autoloading comes in. Basically, when you use a class in your application, the autoloader checks if it’s already loaded, and if not, the autoloader loads the necessary class into memory. So the class is loaded on the fly where it’s needed—this is called autoloading. When you’re using autoloading, you don’t need to include all the library files manually; you just need to include the autoloader file which contains the logic of autoloading, and the necessary classes will be included dynamically.
Later in this article, we'll look at autoloading with Composer. But first, I'll explain how you can implement autoloading in PHP without Composer.
How Autoloading Works Without Composer
You might not realize it, but it is possible to implement autoloading in PHP without Composer. The spl_autoload_register() function is what makes this possible. The spl_autoload_register() function allows you to register functions that will be put into a queue to be triggered sequentially when PHP tries to load classes that are not loaded yet.
Let’s quickly go through the following example to understand how it works.
<?php
function custom_autoloader($class) {
  include 'lib/' . $class . '.php';
}

spl_autoload_register('custom_autoloader');

$objFooBar = new FooBar();
?>
In the above example, we’ve registered the custom_autoloader() function as our custom autoloader by using the spl_autoload_register() function. Next, when you try to instantiate the FooBar class and it’s not yet available, PHP will execute all the registered autoloader functions sequentially. And thus the custom_autoloader function is called—it includes the necessary class file, and finally the object is instantiated. For this example, we're assuming the FooBar class is defined in the lib/FooBar.php file.
Without autoloading, you would need to use the require or include statement to include the FooBar class file. The autoloader implementation is pretty simple in the above example, but you could build on this by registering multiple autoloaders for different kinds of classes.
In practice, you won't often be writing your own autoloader, though. That's what Composer is for! In the next section, we’ll discuss how to use Composer for autoloading in PHP.
How Autoloading Works With Composer
Firstly, make sure to install Composer on your system if you want to follow along with the examples. When it comes to autoloading with Composer, there are different methods you could choose from.
Specifically, Composer provides four different methods for autoloading files:
file autoloading
classmap autoloading
PSR-0 autoloading
PSR-4 autoloading
As per the official Composer documentation, PSR-4 is the recommended way of autoloading, and we’ll go through that in detail in the next section. In this section, we’ll briefly discuss the other three options.
Before we go ahead, let’s quickly go through the steps that you need to perform when you want to use Composer autoloading.
Define the composer.json file in the root of your project or library. It should contain directives based on the type of autoloading.
Run the composer dump-autoload command to generate the necessary files that Composer will use for autoloading.
Include the require 'vendor/autoload.php' statement at the top of the file where you want to use autoloading.
Autoloading: The files Directive
File autoloading works similarly to include or require statements that allow you to load entire source files. All the source files that are referenced with the files directive will be loaded every time your application runs. This is useful for loading source files that do not use classes.
To use file autoloading, provide a list of files in the files directive of the composer.json file, as shown in the following snippet.
As you can see, we can provide a list of files in the files directive that we want to autoload with Composer. After you create the composer.json file in your project root with the above contents, you just need to run the composer dump-autoload command to create the necessary autoloader files. These will be created under the vendor directory. Finally, you need to include the require 'vendor/autoload.php' statement at the top of the file where you want to autoload files with Composer, as shown in the following snippet.
<?php
require 'vendor/autoload.php';

// code which uses things declared in the "lib/Foo.php" or "lib/Bar.php" file
?>
The require 'vendor/autoload.php' statement makes sure that the necessary files are loaded dynamically.
Autoloading: The classmap Directive
Classmap autoloading is an improved version of file autoloading. You just need to provide a list of directories, and Composer will scan all the files in those directories. For each file, Composer will make a list of classes that are contained in that file, and whenever one of those classes is needed, Composer will autoload the corresponding file.
Let’s quickly revise the composer.json file to demonstrate the classmap autoloader.
{
    "autoload": {
        "classmap": ["lib"]
    }
}
Run the composer dump-autoload command, and Composer will read the files in the lib directory to create a map of classes that can be autoloaded.
Autoloading: PSR-0
PSR-0 is a standard recommended by the PHP-FIG group for autoloading. In the PSR-0 standard, you must use namespaces to define your libraries. The fully qualified class name must reflect the \<Vendor Name>\(<Namespace>\)*<Class Name> structure. Also, your classes must be saved in files that follow the same directory structure as that of the namespaces.
Let’s have a look at the following composer.json file.
In PSR-0 autoloading, you need to map namespaces to directories. In the above example, we’re telling Composer that anything which starts with the Tutsplus\Library namespace should be available in the src\Tutsplus\Library directory.
For example, if you want to define the Foo class in the src\Tutsplus\Library directory, you need to create the src\Tutsplus\Library\Foo.php file as shown in the following snippet:
<?php
namespace Tutsplus\Library;

class Foo
{
    //...
}
?>
As you can see, this class is defined in the Tutsplus\Library namespace. Also, the file name corresponds to the class name. Let’s quickly see how you could autoload the Foo class.
<?php
require 'vendor/autoload.php';

$objFoo = new Tutsplus\Library\Foo();
?>
Composer will autoload the Foo class from the src\Tutsplus\Library directory.
So that was a brief explanation of file, classmap, and PSR-0 autoloading in Composer. In the next section, we’ll see how PSR-4 autoloading works.
How PSR-4 Autoloading Works With Composer
In the previous section, we discussed how PSR-0 autoloading works. PSR-4 is similar to PSR-0 autoloading in that you need to use namespaces, but you don’t need to mimic the directory structure with namespaces.
In PSR-0 autoloading, you must map namespaces to the directory structure. As we discussed in the previous section, if you want to autoload the Tutsplus\Library\Foo class, it must be located at src\Tutsplus\Library\Foo.php. In PSR-4 autoloading, you can shorten the directory structure, which results in a much simpler directory structure compared to PSR-0 autoloading.
We’ll revise the example above—see if you can spot the differences.
Here's what the composer.json file looks with PSR-4 autoloading.
It’s important to note that we’ve added trailing backslashes at the end of namespaces. The above mapping tells Composer that anything which starts with the Tutsplus\Library namespace should be available in the src directory. So you don’t need to create the Tutsplus and Library directories. For example, if you request the Tutsplus\Library\Foo class, Composer will try to load the src\Foo.php file.
It’s important to understand that the Foo class is still defined under the Tutsplus\Library namespace; it’s just that you don’t need to create directories that mimic the namespaces. The src\Foo.php file contents will be identical to those of the src\Tutsplus\Library\Foo.php file in theprevious section.
As you can see, PSR-4 results in a much simpler directory structure, since you can omit creating nested directories while still using full namespaces.
PSR-4 is the recommended way of autoloading, and it’s widely accepted in the PHP community. You should start using it in your applications if you haven’t done so already!
Conclusion
Today, we discussed autoloading in PHP. Starting with the introduction of different kinds of Composer autoloading techniques, we discussed PSR-0 and PSR-4 autoloading standards in detail in the latter half of the article.
In this course, you'll learn the fundamentals of PHP programming. You'll start with the basics, learning how PHP works and writing simple PHP loops and functions. Then you'll build up to coding classes for simple object-oriented programming (OOP).
Along the way, you'll learn all the most important skills for writing apps for the web: you'll get a chance to practice responding to GET and POST requests, parsing JSON, authenticating users, and using a MySQL database.
Microsoft’s web browser woes have always been well known. The tech giant has managed to become the industry standard when it comes to consumer facing desktop operating systems, and while it has failed to capture the smartphone OS market it has still managed to maintain its previous successes as...
[ This is a content summary only. Visit our website https://ift.tt/1b4YgHQ for full links, other content, and more! ]
Chromium team recently reported that Google is working on a new Web Vital metric in Chrome 85 beta version. This metric will tell the user if a page is fast-loading or if it will take time to load. This will be done by a ‘Fast Page’ label given to the site the user wants to visit. The labeling is...
[ This is a content summary only. Visit our website https://ift.tt/1b4YgHQ for full links, other content, and more! ]