[ This is a content summary only. Visit our website https://ift.tt/1b4YgHQ for full links, other content, and more! ]


by Zia Muhammad via Digital Information World


Long-scrolling Landing Page for Companion, an internal learning platform to help businesses train employees.


Have you ever considered improving the learnability of your product or website? Perhaps it’s your first time reading about the concept of learnability. It’s not an easy task to build a learnable website, as it requires some experimentation and A/B testing.
Learnability’s goal is to design a clear interface that users can quickly pick up and understand. Ideally, there’s no need for documentation to educate your users on how to use your product.
Luckily, many techniques exist to create a learnable interface. This article shows you five best practices you can use to provide a more learnable interface to your users.
But first, let’s make the point clear why learnability matters.

Now, why does learnability matter? There are various reasons why you should consider providing a more learnable user interface.
First of all, users can adopt a new interface much quicker. Therefore, they can accomplish their goal using your tool much quicker. In other words, they can receive more value from your tool. Moreover, there’s little need for documentation or an extensive support center. Your goal is to reduce the number of support requests by providing a clear interface.
That’s not all! Think about customer experience. A user who can quickly learn your tool will have a better experience. In the end, the user wants to receive value within the least amount of time possible. They don’t want to spend a lot of time learning a new tool.
Lastly, learnability matters for your retention rate. A complex interface will scare users. Often, they’ll look for easier alternatives that provide them with the same value.
Now that we understand the importance of learnability, let’s explore five best practices to enhance learnability.
First, let’s discuss the importance of consistency. Google has nailed consistency through its Material Design to give all of its products a similar look. Therefore, when users switch between Google’s products, it’s much easier to understand how the new product works.
Why? Users have seen this design before and know how to interact with it. Let’s compare the interface of both Google Drive and Gmail. Note the similarities in the positioning of elements such as the search bar, menu, and action button.

For example, Google Drive has a big call to action button with the text “New” to create a new file or folder. If we compare this with Gmail, we find the same call to action button “Compose” to create a new email. This allows a user who’s new to Gmail but frequently uses Google Drive to quickly understand the purpose of this large button.

In short, consistent interfaces are predictable interfaces. This predictability leads to learnable patterns. This applies to everything, ranging from sidebar menus to icon usage, or even link color.
Feedback is one of those keywords you find in every UI design book. One of the most rudimental forms of feedback is hyperlink feedback.
A hyperlink can have three different states. First of all, a hyperlink sits in its normal state. When the user hovers the hyperlink with its cursor, the link color changes or the user sees a small transition animation. This small feedback moment tells the user that the element is clickable. Once the hyperlink has been clicked, you’ll see its active state. Again, this is a form of feedback to tell the user that the click request has been received and is being processed.

Feedback can be very subtle. We refer to this as micro-interactions. Micro-interactions can take the shape of:
These micro-interactions are crucial, as a user needs evidence that what they’ve done affected the page. Imagine you click a button to submit a form and the button doesn’t provide any sort of feedback. In other words, the page remains static. I bet you’ll hit the submit button a second time because you didn’t receive any evidence of your actions.
Therefore, be kind, and provide feedback to your users. It will make their experience so much nicer and less confusing.
Continue reading Learnability in Web Design: 5 Best Practices on SitePoint.

Webpack has established itself as an indispensable part of the JavaScript toolchain. It has over 55,000 stars on GitHub and is used by many of the big players in the JavaScript world, such as React and Angular.
However, you don’t need to be using a front-end framework, or be working on a large-scale project to take advantage of it. Webpack is primarily a bundler, and as such you can also use it to bundle just about any resource or asset you care to think of.
In this article, I’m going to show you how to install and configure webpack, then use it to create minified bundles for a simple static site with a handful of assets.
Good question. Glad you asked!
One of the reasons for doing this is to minimize the number of HTTP requests you make to the server. As the average web page grows, you’ll likely include jQuery (yes, it’s still popular in 2020), a couple of fonts, a few plugins, as well as various style sheets and some JavaScript of your own. If you’re making a network request for each of these assets, things soon add up and your page can become sluggish. Bundling your code can go some way to mitigating this problem.
Webpack also makes it easy to minify your code, further reducing its size, and it lets you write your assets in whatever flavor you desire. For example, in this article I’ll demonstrate how to have webpack transpile modern JavaScript to ES5. This means you can write JavaScript using the latest, most up-to-date syntax (although this might not be fully supported yet), then serve the browsers ES5 that will run almost everywhere.
And finally, it’s a fun learning exercise. Whether or not you employ any of these techniques in your own projects is down to you, but by following along you’ll get a firm understanding of what webpack does, how it does it and whether it’s a good fit for you.
The first thing you’ll need is to have Node and npm installed on your computer. If you haven’t got Node yet, you can either download it from the Node website, or you can download and install it with the aid of a version manager. Personally, I much prefer this second method, as it allows you to switch between multiple versions of Node and it negates a bunch of permissions errors, which might otherwise see you installing Node packages with admin rights.
We’ll also need a skeleton project to work with. Here’s one I made earlier. To get it running on your machine, you should clone the project from GitHub and install the dependencies:
git clone https://github.com/sitepoint-editors/webpack-static-site-example
cd webpack-static-site-example
npm install
This will install jQuery, plus Slick Slider and Lightbox2 — two plugins we’ll be using on the site — to a node_modules folder in the root of the project.
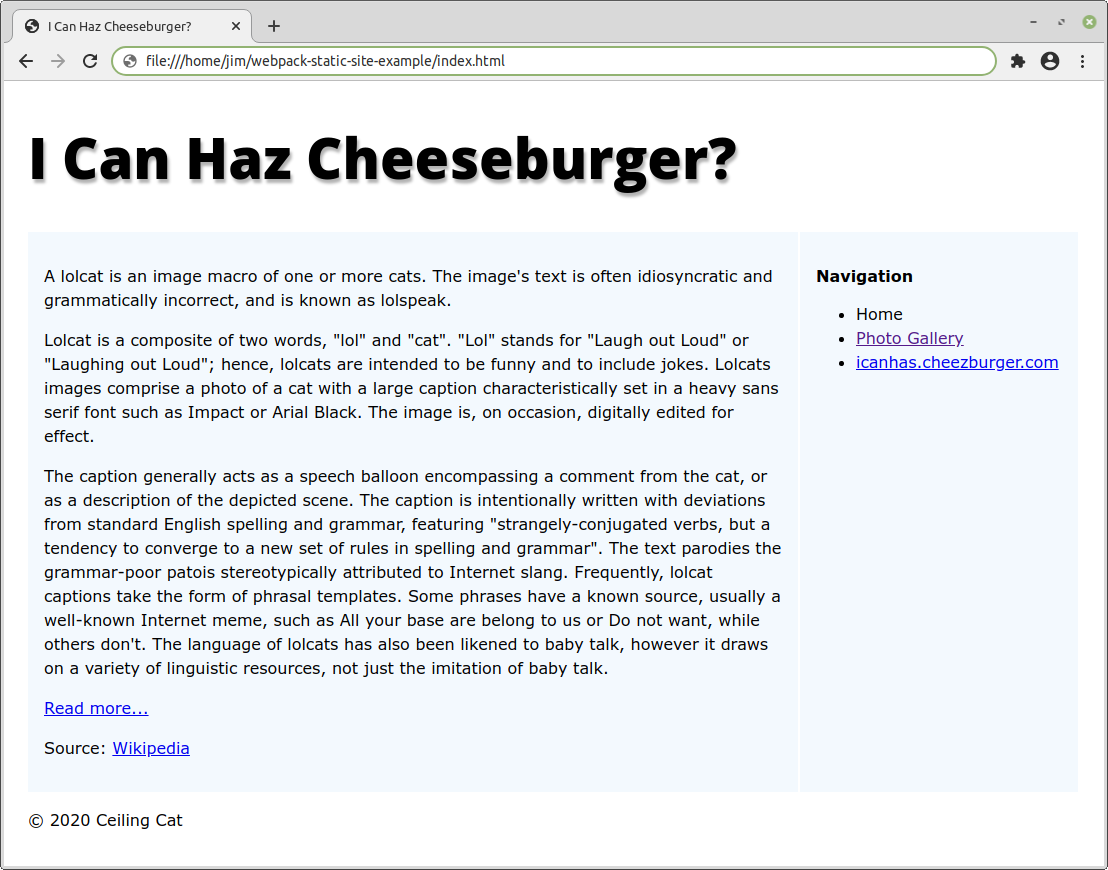
After that, you can open index.html in your browser and navigate the site. You should see something like this:
If you need help with any of the steps above, why not head over to our forums and post a question.
The next thing we’ll need to do is to install webpack. We can do this with the following command:
npm install webpack webpack-cli --save-dev
This will install webpack and the webpack CLI and add them to the devDependency section of your package.json file:
"devDependencies": {
  "webpack": "^5.1.3",
  "webpack-cli": "^4.0.0"
}
Next, we’ll make a dist folder which will contain our bundled JavaScript:
mkdir dist
Now we can try and run webpack from the command line to see if it is set up correctly:
./node_modules/webpack/bin/webpack.js ./src/js/main.js --output-filename=bundle.js --mode=development
What we’re doing here is telling webpack to bundle the contents of src/js/main.js into dist/bundle.js. If everything is installed correctly, you should see something like this output to the command line:
asset bundle.js 1.04 KiB [emitted] (name: main)
./src/js/main.js 192 bytes [built] [code generated]
webpack 5.1.3 compiled successfully in 45 ms
And webpack will create a bundle.js file in the dist folder. If you have a look at that file in your text editor of choice, you’ll see a bunch of boilerplate and the contents of main.js at the bottom.
If we had to type all of the above into the terminal every time we wanted to run webpack, that’d be quite annoying. So let’s create an npm script we can run instead.
In package.json, alter the scripts property to look like this:
"scripts": {
  "test": "echo \"Error: no test specified\" && exit 1",
  "build": "webpack ./src/js/main.js --output-filename=bundle.js --mode=development"
},
Notice how we can leave out the full path to the webpack module, as when run from a script, npm will automatically look for the module in the node_modules folder. Now when you run npm run build, the same thing should happen as before. Cool, eh?
Notice how we’re passing the path of the file to bundle and the path of the output file as arguments to webpack? Well, we should probably change that and specify these in a configuration file instead. This will make our life easier when we come to use loaders later on.
Create a webpack.config.js file in the project root:
touch webpack.config.js
And add the following code:
module.exports = {
  entry: './src/js/main.js',
  mode: 'development',
  output: {
        path: `${__dirname}/dist`,
        filename: 'bundle.js',
  },
};
And change the npm script to the following:
"scripts": {
  ...
  "build": "webpack"
},
In webpack.config.js we’re exporting a configuration object, which specifies the entry point, the mode webpack should run in (more on that later), and the output location of the bundle. Run everything again and it should all still work as before.
Now that we have webpack generating a bundle for us, the next thing we need to do is to include it somewhere. But first, let’s create a different entry point, so that we can list the assets we want webpack to bundle for us. This will be a file named app.js in the src/js directory:
touch src/js/app.js
Add the following to app.js:
require('./main.js');
And change the webpack config thus:
entry: './src/js/app.js',
Run npm run build again to recreate the bundle. Everything should work as before.
Now, if you have a look at index.html you’ll notice that there’s not much going on JavaScript-wise. At the bottom of the file we are including jQuery and a file called main.js, which is responsible for showing more information when you click the Read more… link.
Let’s edit index.html to include the bundle instead of main.js. Look at the bottom of the file. You should see:
    <script src="./node_modules/jquery/dist/jquery.min.js"></script>
        <script src="./src/js/main.js"></script>
  </body>
</html>
Change this to:
    <script src="./node_modules/jquery/dist/jquery.min.js"></script>
        <script src="./dist/bundle.js"></script>
  </body>
</html>
Refresh the page in the browser and satisfy yourself that the Read more… link still works.
Next, let’s add jQuery to the bundle. That will reduce the number of HTTP requests the page is making. To do this, we have to alter the app.js file like so:
window.$ = require('jquery');
require('./main.js');
Here we’re requiring jQuery, but as we installed this using npm, we don’t have to include the full path. We’re also adding its usual $ alias to the global window object, so that it’s accessible by other scripts. We’re requiring main.js after jQuery, as the former depends on the latter, and order is important.
Alter index.html to remove the jQuery script tag:
    <script src="./dist/bundle.js"></script>
  </body>
</html>
Run npm run build and once again, refresh the page in the browser to satisfy yourself that the Read more… link still works. It does? Good!
Continue reading How to Bundle a Simple Static Site Using Webpack on SitePoint.

