Friday, January 26, 2018

Choosing the Right UX Research Method

As more and more organisations become focused on creating great experiences, more teams are being tasked with conducting research to inform and validate user experience objectives.

UX research can be extremely helpful in crafting a product strategy and ensuring that the solutions built fit users’ needs, but it can be hard to know how to get started.  This article will show you how to set your research objectives and choose the method so that you can uncover the information you need.

When to do research

The first thing to know is that there is never a bad time to do research. While there are many models and complicated diagrams to describe how products get built, essentially, you’re always in one of three core phases: conceptualising something brand new, in the middle of designing and/or building something, or assessing something that’s already been built.

There’s plenty to learn in each of those phases. If you’re just starting out, you need to focus on understanding your potential users and their context and needs so that you can understand your best opportunities to serve them. In other words, you’re trying to figure out what problems to solve and for whom.  This is often called generative or formative research.

Once you’re actively building something, you’ll shift your focus to analysing the solutions that you’re coming up with, and making sure that they address the needs of your users. You’ll want to assess both conceptual fit and specific interactions quality.  We usually call this evaluative research.

When you have a live product or service, you’ll want to continue to assess how well you’re serving people’s needs, but you’ll also want to use research to discover how people change and how you can continue to provide value. At this point, you’ll be doing a mix of the generative type of work that is generally in the conceptual phase and evaluative work.

There is no cut-and-dried guide of exactly what methods to employ when, but there should never be a time that you can’t find an open question to investigate.

Determine your specific research objectives

At any given time, your team might have dozens of open questions that you could explore. I recommend keeping a master list of outstanding open questions to keep track of possible research activities, but focusing on answering just one open question at a time. The core goal of a study will determine which method you ultimately use.

If you need help coming up with research goals, consider things like:

  • the stage of the project you’re in
  • what information you already know about your users, their context, and needs
  • what your business goals are
  • what solutions already exist or have been proposed
  • or where you think there are existing issues.

The questions might be large and very open, like “who are our users?” or more targeted things like “who uses feature x most?” or “what colour should this button be?” Those are all valid things to explore, but require totally different research methods, so it’s good to be explicit.

Once you’ve identified open questions, you and the team can prioritise which things would be riskiest to get wrong, and therefore, what you should investigate first. This might be impacted by what project phase you’re in or what is currently going on in the team. For instance, if you’re in the conceptual phase of a new app and don’t have a clear understanding of your potential user’s daily workflows yet, you’d want to prioritize that before assessing any particular solutions.

From your general list of open questions, specify individual objectives to investigate. For instance, rather than saying that you want to assess the usability of an entire onboarding workflow, you might break down the open questions into individual items, like, “Can visitors find the pricing page?” and “Do potential customers understand the pricing tiers?”

You can usually combine multiple goals into a single round of research, but only if the methods align. For instance, you could explore many different hypotheses about a proposed solution in a single usability test session. Know that you’ll need to do several rounds of different types of research to get everything answered and that is totally OK.

Looking at data types

After determining your research goal, it’s time to start looking at the kind of information you need to answer your questions.

There are two main types of data: quantitative and qualitative.

Quantitative data

Quantitative data measures specific counts collected, like how many times a link was clicked or what percentage of people completed a step. Quantitative data is unambiguous in that you can’t argue what is measured. However, you need to understand the context to interpret the results.

For instance, you could measure how frequently an item is purchased. The number of sales is unchangeable and unambiguous, but whether 100 sales is good or bad depends on a lot of things. Quantitative research helps us understand what’s happening and questions like: how much, how many, how often. It tends to need a large sample size so that you can feel confident about your results.

Common UX research methods that can provide quantitative data are surveys, a/b or multivariate tests, click tests, eye tracking studies, and card sorts.

Qualitative data

Qualitative data is basically every other sort of information that you can collect but not necessarily measure. These pieces of information tend to provide descriptions and contexts, and are often used to describe why things are happening.

Qualitative data needs to be interpreted by the researcher and the team and doesn’t have a precise, indisputable outcome. For instance, you might hear people talk about valuing certain traits and note that as a key takeaway, but you can’t numerically measure or compare different participant’s values. You don’t need to include nearly as many sessions or participants in a qualitative study.

Common UX research methods that can provide qualitative data are usability tests, interviews, diary studies, focus groups, and participatory design sessions.

Some methods can produce multiple types of data. For instance, in a usability study, you might measure things like how long it took someone to complete a task, which is quantitative data, but also make observations about what frustrated them, which is qualitative data. In general, quantitative data will help you understand what is going on, and qualitative data will give you more context about why things are happening and how to move forward or serve better.

Behavioural vs attitudinal data

There is also a distinction between the types of research where you observe people directly to see what they do, and the type where you ask for people’s opinions.

Any direct-observation method is known as behavioural research. Ethnographic studies, usability tests, a/b tests, and eye tracking are all examples of methods that measure actions. Behavioral research is often thought of as the holy grail in UX research, because we know that people are exceptionally bad at predicting and accurately representing their own behaviour. Direct observation can give you the most authentic sense of what people really do and where they get stuck.

By contrast, attitudinal research like surveys, interviews, and focus groups asks for self-reported information from participants. These methods can be helpful to understand stated beliefs, expectations, and perceptions. For instance, you might interview users and find that they all wish they could integrate your tool with another tool they use, which isn’t necessarily an insight you’d glean from observing them to perform tasks in your tool.

It’s also common to both observe behaviour and ask for self-reported feedback within a single session, meaning that you can get both sorts of data, which is likely to be useful regardless of your open question.

Other considerations

Even after you’ve chosen a specific research method, there are a few more things you may need to consider when planning your research methods.

Where to conduct

It’s often ideal to be able to perform research in the context of how a person normally would use your product, so you can see how your product fits into their life and observe things that might affect their usage, like interruptions or specific conditions.

For instance, if you’re working on a traffic prediction application, it might be really important to have people test the app while on their commute at rush hour rather than sitting in a lab in the middle of the day. I recently did some work for employees of a cruise line, and there would have been no way to know how the app really behaved until we were out at sea with satellite internet and rolling waves!

You might have the opportunity to bring someone to a lab setting, meet them in a neutral location, or even intercept them in a public setting, like a coffee shop.

You may also decide to conduct sessions remotely, meaning that you and the participant are not in the same location. This can be especially useful if you need to reach a broad set of users and don’t have travel budget or have an especially quick turnaround time.

There is no absolute right or wrong answer about where the sessions should occur, but it’s important to think through how the location might affect the quality of your research and adjust as much as you can.

Moderation

Regardless of where the session takes place, many methods are traditionally moderated, meaning that a researcher is present during the session to lead the conversation, set tasks, and dig deeper into interesting conversation points. You can tend to get the richest, deepest data with moderated studies. But these can be time-consuming and require a good deal of practice to do effectively.

You can also collect data when you aren’t present, which is known as unmoderated research. There are traditional unmoderated methods like surveys, and variations of traditional methods, like usability tests, where you set tasks for users to perform on their own and ask them to record their screen and voice.

Unmoderated research takes a bit more careful planning because you need to be especially clear and conscious of asking neutral questions, but you can often conduct them faster, cheaper, and with a broader audience traditionally moderated methods. Whenever you do unmoderated research, I strongly suggest doing a pilot round and getting feedback from teammates to ensure that instructions are clear.

Research methods

Once you’ve thought through what stage of the product you’re in, what your key research goals are, what kind of data you need to collect to answer your questions, and other considerations, you can pinpoint a method that will serve your needs. I’ll go through a list of common research methods and their most common usages.

Usability tests: consist of asking a participant to conduct common tasks within a system or prototype and share their thoughts as they do so. A researcher often observes and asks follow up questions.

Common usages: Evaluating how well a solution works and identifying areas to improve.

UX interview: a conversation between a researcher and a participant, where the researcher usually looking to dig deep into a particular topic. The participant can be a potential end user, a business stakeholder or teammate.

Common usages: Learning basics of people’s needs, wants, areas of concern, pain points, motivations, and initial reactions.

Focus groups: similar to interviews, but occur with multiple participants and one researcher. Moderators need to be aware of potential group dynamics dominating the conversation, and these sessions tend to include more divergent and convergent activities to draw out each individual’s viewpoints.

Common usages: Similar to interviews in learning basics of people’s needs, wants, areas of concern, pain points, motivations, and initial reactions. May also be used to understand social dynamics of a group.

Surveys: lists of questions that can be used to gather any type of attitudinal behaviour.

Common usages: Attempting to define or verify scale of outlook among larger group

Diary study: a longitudinal method that asks participants to document their activities, interactions or attitudes over a set period of time. For instance, you might ask someone to answer three questions about the apps they use while they commute every day.

Common usages: Understanding the details of how people use something in the context of their real life.

Card sortsa way to help you see how people group and categorise information. You can either provide existing categories and have users sort the elements into those groupings or participants can create their own.

Common usages: Help inform information architecture and navigation structures.

Tree tests: the opposite of card sorts, wherein you provide participants with a proposed structure and ask them to find individual elements within the structure.

Common usages: Help assess a proposed navigation and information architecture structure.

A/B testing: Providing different solutions to audiences and measuring their actions to see which better hits your goals.

Common usages: Assess which of two solutions performs better.

Christian Rohrer and Susan Farrell also have great cheat sheets of best times to employ different UX research methods.

Wrapping up

To get the most out of UX research, you need to consider your project stage, objectives, the type of data that will answer your questions, and where you want to conduct your research.

As with most things in UX, there is no one right answer for every situation, but after reading this article you’re well on your way to successfully conducting UX research.

The post Choosing the Right UX Research Method appeared first on UX Mastery.


by Amanda Stockwell via UX Mastery

Thursday, January 25, 2018

Your Passion is Your Greatest Asset, Learn How to Harness It - #Infographic

Finding your passions as a leader and learning ways how to cultivate them in your organisation is critical to running a high-performing business. Any business, more specifically a start-up venture, is a gamble but if your business idea is one that can potentially be profitable, then having an...

[ This is a content summary only. Visit our website http://ift.tt/1b4YgHQ for full links, other content, and more! ]

by Web Desk via Digital Information World

10 Incredible & Mind boggling WiFi Facts - #infographic

WiFi has become the single most popular wireless network protocol of the twenty- first century. InspireWiFi have compiled a list of 10 incredible and mind boggling WiFi facts in this infographic lets go through them without further ado.

[ This is a content summary only. Visit our website http://ift.tt/1b4YgHQ for full links, other content, and more! ]

by Web Desk via Digital Information World

How to Use SSL/TLS with Node.js

It’s time! No more procrastination and poor excuses: Let’s Encrypt works beautifully, and having an SSL-secured site is easier than ever.

In this article, I’ll work through a practical example of how to add a Let’s Encrypt-generated certificate to your Express.js server.

But protecting our sites and apps with HTTPS isn’t enough. We should also demand encrypted connections from the servers we’re talking to. We’ll see that possibilities exist to activate the SSL/TLS layer even if it wouldn’t be enabled by default.

Let’s start with a short review of HTTPS’s current state.

HTTPS Everywhere

The HTTP/2 specification was published as RFC 7540 in May 2015, which means at this point it’s a part of the standard. This was a major milestone. Now we can all upgrade our servers to use HTTP/2. One of the most important aspects is the backwards compatibility with HTTP 1.1 and the negotiation mechanism to choose a different protocol. Although the standard doesn’t specify mandatory encryption, currently no browser supports HTTP/2 unencrypted. This gives HTTPS another boost. Finally we’ll get HTTPS everywhere!

What does our stack actually look like? From the perspective of a website running in the browser (application level) we have roughly the following layers to reach the IP level:

  1. Client browser
  2. HTTP
  3. SSL/TLS
  4. TCP
  5. IP

HTTPS is nothing more than the HTTP protocol on top of SSL/TLS. Hence all the rules of HTTP still have to apply. What does this additional layer actually give us? There are multiple advantages: we get authentication by having keys and certificates; a certain kind of privacy and confidentiality is guaranteed, as the connection is encrypted in an asymmetric manner; and data integrity is also preserved: that transmitted data can’t be changed during transit.

One of the most common myths is that using SSL/TLS requires too many resources and slows down the server. This is certainly not true anymore. We also don’t need any specialized hardware with cryptography units. Even for Google, the SSL/TLS layer accounts for less than 1% of the CPU load. Furthermore, the network overhead of HTTPS as compared to HTTP is below 2%. All in all, it wouldn’t make sense to forgo HTTPS for having a little bit of overhead.

Is TLS Fast Yet?

The most recent version is TLS 1.3. TLS is the successor of SSL, which is available in its latest release SSL 3.0. The changes from SSL to TLS preclude interoperability. The basic procedure is, however, unchanged. We have three different encrypted channels. The first is a public key infrastructure for certificate chains. The second provides public key cryptography for key exchanges. Finally, the third one is symmetric. Here we have cryptography for data transfers.

TLS 1.3 uses hashing for some important operations. Theoretically, it’s possible to use any hashing algorithm, but it’s highly recommended to use SHA2 or a stronger algorithm. SHA1 has been a standard for a long time but has recently become obsolete.

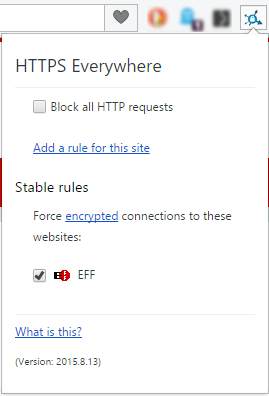
HTTPS is also gaining more attention for clients. Privacy and security concerns have always been around, but with the growing amount of online accessible data and services, people are getting more and more concerned. A useful browser plugin is “HTTPS Everywhere”, which encrypts our communications with most websites.

HTTPS-everywhere

The creators realized that many websites offer HTTPS only partially. The plugin allows us to rewrite requests for those sites, which offer only partial HTTPS support. Alternatively, we can also block HTTP altogether (see the screenshot above).

Basic Communication

The certificate’s validation process involves validating the certificate signature and expiration. We also need to verify that it chains to a trusted root. Finally, we need to check to see if it was revoked. There are dedicated trusted authorities in the world that grant certificates. In case one of these were to become compromised, all other certificates from the said authority would get revoked.

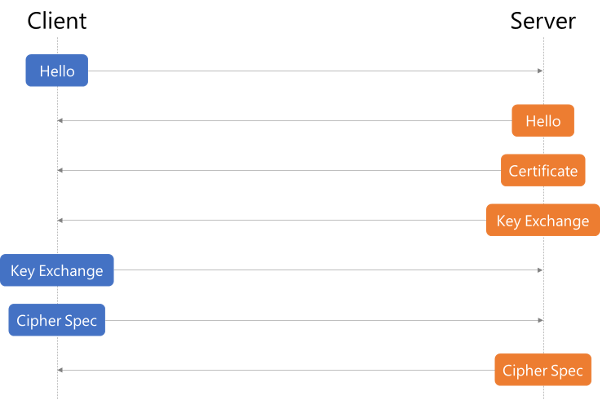
The sequence diagram for a HTTPS handshake looks as follows. We start with the init from the client, which is followed by a message with the certificate and key exchange. After the server sends its completed package, the client can start the key exchange and cipher specification transmission. At this point, the client is finished. Finally the server confirms the cipher specification selection and closes the handshake.

HTTPS-sequence

The whole sequence is triggered independently of HTTP. If we decide to use HTTPS, only the socket handling is changed. The client is still issuing HTTP requests, but the socket will perform the previously described handshake and encrypt the content (header and body).

So what do we need to make SSL/TLS work with an Express.js server?

HTTPS

By default, Node.js serves content over HTTP. But there’s also an HTTPS module which we have to use in order to communicate over a secure channel with the client. This is a built-in module, and the usage is very similar to how we use the HTTP module:

const https = require("https"),
  fs = require("fs");

const options = {
  key: fs.readFileSync("/srv/www/keys/my-site-key.pem"),
  cert: fs.readFileSync("/srv/www/keys/chain.pem")
};

const app = express();

app.use((req, res) => {
  res.writeHead(200);
  res.end("hello world\n");
});

app.listen(8000);

https.createServer(options, app).listen(8080);

Ignore the /srv/www/keys/my-site-key.pem and and /srv/www/keys/chain.pem files for now. Those are the SSL certificates we need to generate, which we’ll do a bit later. This is the part that changed with Let’s Encrypt. Previously, we had to generate a private/public key pair, send it to a trusted authority, pay them and probably wait a bit in order to get an SSL certificate. Nowadays, Let’s Encrypt generates and validates your certificates for free and instantly!

Generating Certificates

Certbot

A certificate, which is signed by a trusted certificate authority (CA), is demanded by the TLS specification. The CA ensures that the certificate holder is really who he claims to be. So basically when you see the green lock icon (or any other greenish sign to the left side of the URL in your browser) it means that the server you’re communicating with is really who it claims to be. If you’re on facebook.com and you see a green lock, it’s almost certain you really are communicating with Facebook and no one else can see your communication — or rather, no one else can read it.

It’s worth noting that this certificate doesn’t necessarily have to be verified by an authority such as Let’s Encrypt. There are other paid services as well. You can technically sign it yourself, but then the users visiting your site won’t get an approval from the CA when visiting and all modern browsers will show a big warning flag to the user and ask to be redirected “to safety”.

In the following example, we’ll use the Certbot, which is used to generate and manage certificates with Let’s Encrypt.

On the Certbot site you can find instructions on how to install Certbot on your OS. Here we’ll follow the macOS instructions. In order to install Certbot, run

brew install certbot

Webroot

Webroot is a Certbot plugin that, in addition to the Certbot default functionallity which automatically generates your public/private key pair and generates an SSL certificate for those, also copies the certificates to your webroot folder and also verifies your server by placing some verification codes into a hidden temporary directory named .well-known. In order to skip doing some of these steps manually, we’ll use this plugin. The plugin is installed by default with Certbot. In order to generate and verify our certificates, we’ll run the following:

certbot certonly --webroot -w /var/www/example/ -d www.example.com -d example.com

You may have to run this command as sudo, as it will try to write to /var/log/letsencrypt.

You’ll also be asked for your email address. It’s a good idea to put in a real address you use often, as you’ll get a notification if your certificate expires is about to expire. The trade off for Let’s Encrypt being a free certificate is that it expires every three months. Luckily, renewal is as easy as running one simple command, which we can assign to a cron and then not have to worry about expiration. Additionally, it’s a good security practice to renew SSL certificates, as it gives attackers less time to break the encryption. Sometimes developers even set up this cron to run daily, which is completely fine and even recommended.

Keep in mind that you have to run this command on a server to which the domain specified under the -d (for domain) flag resolves — that is, your production server. Even if you have the DNS resolution in your local hosts file, this won’t work, as the domain will be verified from outside. So if you’re doing this locally, it will most likely not work at all, unless you opened up a port from your local machine to the outside and have it running behind a domain name which resolves to your machine, which is a highly unlikely scenario.

Last but not least, after running this command, the output will contain paths to your private key and certificate files. Copy these values into the previous code snippet, into the cert property for certificate and key property for the key.

// ...

const options = {
  key: fs.readFileSync("/var/www/example/sslcert/privkey.pem"),
  cert: fs.readFileSync("/var/www/example/sslcert/fullchain.pem") // these paths might differ for you, make sure to copy from the certbot output
};

// ...

Continue reading %How to Use SSL/TLS with Node.js%


by Florian Rappl via SitePoint

These Top WordPress Themes Can Make 2018 Your Best Year Ever

This article was sponsored by BAWMedia. Thank you for supporting the partners who make SitePoint possible.

Web design trends change over the years. Some trends come and go. Others become permanent fixtures.

Such is the case with responsive websites. The number of Internet shoppers that primarily rely on mobile devices has grown. The need for retina-ready, responsive websites has grown as well — almost in lockstep.

Some time ago, a responsive website could give any business a competitive advantage. Today, a responsive website is imperative if a business wishes to have an online presence.

Fortunately, most premium WordPress themes make creating a responsive website a breeze. This includes the ThemeForest products highlighted here.

You don't have to worry about what's needed. Any of these themes will ensure your website pages will display correctly on all devices. You can focus entirely on creating an engaging UX.

These top themes make it easy to do that.

1. Be Theme

Be Theme

Every website project has its challenges. If your work involves creating websites for a diverse clientele, purchasing a multipurpose WordPress theme such as Be Theme usually makes the most sense.

Be Theme is a premium theme in terms of its features, performance, and support — and its selection of more than 300 pre-built websites has you covered. They address more than 30 different business niche categories, and the most common website types as well – portfolios, blogs, eCommerce sites, and one-page websites.

Finding the right theme for a given business or niche typically takes but a few minutes. Since they are customizable, it's easy to convert a close fit into a perfect match. It takes a single-click to install a theme, saving you even more time.

Thanks to Muffin Builder, the Options Panel, shortcodes, and a host of other core features, you'll find building a responsive website is an easy task, with no need to write code.

2. Kalium – Creative Theme for Professionals

Kalium

Kalium is another multipurpose theme you should check out. It’s a creative theme designed by professionals. While it was also designed for professionals, you don't have to be an experienced web designer to use it. Kalium is easy to use, responsive, requires no coding, and includes a host of demo sites, layouts, shortcodes, premium plugins, and other special features you'll need to build award-winning websites. Especially noteworthy is the large collection of shop layouts.

A recipient of several best-in-industry awards, and a web-building tool that currently enjoys ThemeForest's top rating, you can be confident of providing your clients with products that will meet or exceed their expectations. Kalium is an especially good choice if your clientele consists largely of creative agencies, bloggers, or online store owners.

3. Pro

Pro

Some WordPress themes force you into a trial-and-error approach to website building — one that can lead to substandard results and lower productivity.

Pro offers a better way. This responsive WP theme was designed for those who prefer following a logical, building-block web design approach. Pro's approach is centered around 3 primary building blocks, a Header Builder, a Content Builder, and a Footer Builder. These, in turn, are supported by secondary building blocks (presets) and a host of design elements and options.

The principle behind the Header Builder is "if you can think of it, you can create it". The Content Builder's drag-and-drop feature is easy to use, and its workflow optimization features are designed to give your productivity efforts a helping hand. Footers are seldom works of art, or significant contributors to a site's UX — but with the Footer Builder, you can change that!

One more thing: You can work with Pro from your browser.

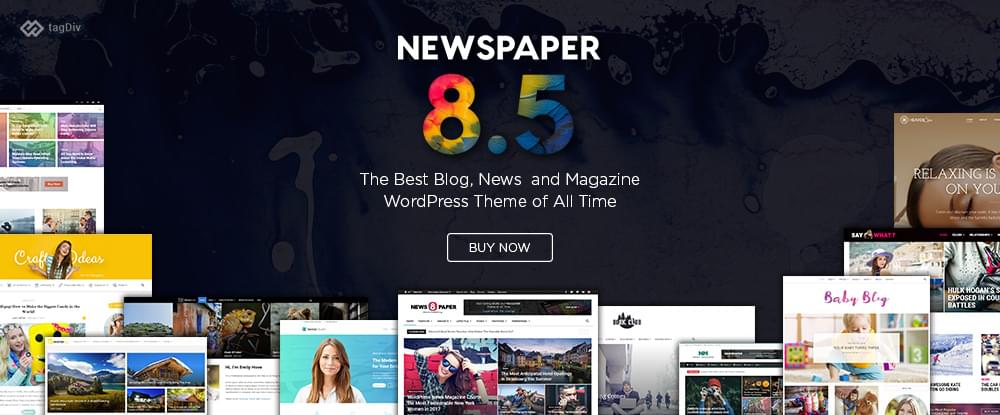
4. Newspaper

Newspaper

What is the best approach when building a responsive news or magazine website? You can struggle with a multipurpose theme, or you can choose a dedicated WordPress theme, with features designed for the publishing industry. Newspaper is the best-selling template for the publishing industry, providing a powerful frontend page builder, drag-and-drop functionality, elements for landing pages, premium widgets, intelligent ads, and beautiful layouts.

With 48+ ready-made demos that focus on subjects like technology, arts, sports, health, food or architecture, any website can be built without coding skills.

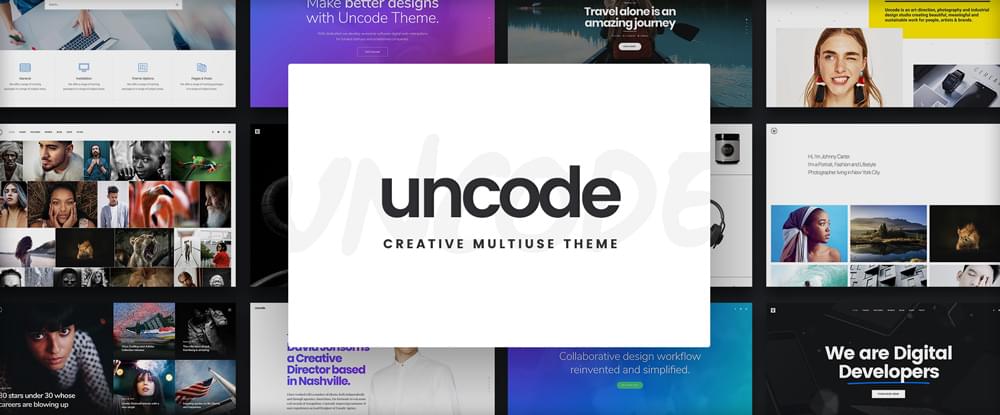
5. Uncode – Creative Multiuse WordPress Theme

Uncode

Uncode has everything needed to build responsive award-winning websites. Other premium WordPress themes can say the same, so what makes Uncode different? One reason is that this pixel-perfect theme provides an ideal solution to a web designer tasked with creating high quality portfolios or blogs for extremely picky clients.

One of its most useful capabilities is the centered mobile menu feature — a feature greatly favored by the mobile crowd.

6. TheGem – Creative Multi-Purpose High-Performance WordPress Theme

TheGem

TheGem is aptly named. This multipurpose theme is an ideal choice for building creative websites, business websites, one page or multipage websites, portfolios, or blogs. TheGem offers more than 70 unique multi-purpose concepts, an array of stunning demo pages, plus flexible page layouts.

No coding is required, and all the elements, layouts, and styles you pick can be freely combined. The package even comes with a ready-to-launch fashion store!

7. Houzez

Houzez

With this specialty theme, its super-easy to create a website that even the most demanding real estate agent or agency would fall in love with, and do so in record time.

Houzez' features range from radius and advanced search capabilities and geolocations, to listings options, payment options, and memberships.

8. The Core

The Core

The Core is a great choice if your clientele largely consists of business and corporate types. Still, this multipurpose, responsive WordPress theme is flexible and versatile enough to be able to claim that if you can envision it, you can build it.

Continue reading %These Top WordPress Themes Can Make 2018 Your Best Year Ever%


by SitePoint Team via SitePoint

Collective WP

‘Collective’ is a multi-page WordPress theme with a smart One Page portfolio layout. Demo’d here is an architecture website which could of course be adapted to a freelancer or agency portfolio. Features include a sticky header navigation that smooth scrolls to the sections, a portfolio with project pop-ups – each accommodating gorgeous big image with a slider, team section, services, Google Maps and ends fittingly with an enquiry form. Overall Collective is a solid offering by StonedThemes that boasts over 700 sales. It’s worth noting the them has a very high 4.94/5 star rating, so you know you’re in good hands!

Full Review | Direct Link


by Rob Hope @robhope via One Page Love

Straple

Slick feature carousal in this clean One Pager by Gravita promoting their new premium Design System/Framework called Straple.

Full Review | Direct Link


by Rob Hope @robhope via One Page Love