[ This is a content summary only. Visit our website https://ift.tt/1b4YgHQ for full links, other content, and more! ]
by Mehwish Mehmood via Digital Information World
"Mr Branding" is a blog based on RSS for everything related to website branding and website design, it collects its posts from many sites in order to facilitate the updating to the latest technology.
To suggest any source, please contact me: Taha.baba@consultant.com

This article was updated in July, 2018 to reflect improved browser support for CSS Grid Layout.
As web applications become more and more complex, we need a more natural way to do advanced layouts easily without hacky solutions that use floats and other less burdensome techniques. An exciting new solution for creating layouts comes with the CSS Grid Layout Module.
In this introductory tutorial, I’ll introduce you to this relatively new CSS feature, I’ll discuss the current browser support, and I’ll show you using some examples how the CSS Grid Layout Module works.
The core idea behind the Grid Layout is to divide a web page into columns and rows, along with the ability to position and size the building block elements based on the rows and columns we have created in terms of size, position, and layer.
The grid also gives us a flexible way to change the position of elements with only CSS without any change to the HTML. This can be used with media queries to alter the layout at different breakpoints.
Before we can dive more into Grid Layout, it’s important to take a look at the status of browser support.

As you can see from the image above, the great news is that CSS Grid is supported by the latest version of most browsers.
If you click the Show all option on Can I use, you'll see how far back this support goes. Because Grid is such a new feature, backwards compatibility doesn't extend far, so you need to bear this in mind if there's a chance your audience is using an older version of a major browser.
However, hovering over each version number on Can I use shows the rate of global usage for that version. At the time of writing, the latest version for each browser not to support Grid has a usage of far less than one percent.
The first proposal of Grid Layout was developed by Microsoft, and IE10 shipped with an -ms prefixed implementation. If you take a look at support on Can I use, you’ll see that both IE10 and IE11 support CSS Grid … with the caveat that they only support the older version of the specification. Bummer. That's not going to change. But what will change is the usage for those browsers. In July 2018, IE11 usage is down to around 2% globally, and IE10 usage is about a tenth of a percent.
Can I use also indicates that a few other browsers don't support grid layout. These include Opera Mini and Blackberry Browser. Opera Mini is the only one with significant usage, but because it's a mobile browser, you'll most likely want to target it with a mobile-friendly, non-Grid layout anyway.
Given that the vast majority of browsers in use today support CSS Grid, it's a shame not to use it on the basis that some browsers may not support it. There are various options for using Grid and providing perfectly adequate fallbacks for non-supporting browsers.
Perhaps the simplest option is to provide a simple "mobile first" layout. This will be perfectly adequate for mobile devices that don't support Grid and also desktop browsers like IE.
Another option is to use more sophisticated fallbacks and overrides to produce similar results to Grid, as outlined by Rachel Andrew.
And a polyfill is also available to provide a working implementation of the Grid Module for browsers that don't support it natively. Note that this might be a bit out of date now.
The post An Introduction to the CSS Grid Layout Module appeared first on SitePoint.
This article was originally published on the Okta Developer Blog. Thank you for supporting the partners who make SitePoint possible.
With Okta and OpenID Connect (OIDC), you can easily integrate authentication into a React Native application and never have to build it yourself again. OIDC allows you to authenticate directly against the Okta API, and this article shows you how to do just that in a React Native application. Today you’ll see how to log a user into your React Native application using an OIDC redirect via the AppAuth library.
React Native is a pretty slick framework. Unlike Ionic and other hybrid mobile frameworks, it allows you to use web technologies (React and JavaScript) to build native mobile apps. There is no browser or WebView involved, so developing a mobile app with React Native is similar to using the native SDK in that you’ll do all your testing on an emulator or device. There is no way to test it in your browser like there is with Ionic. This can be a benefit in that you don’t have to write code that works in-browser and on-device separately.
If you look at Google Trends, you can see that React Native is even more popular than Android and iOS for native development!
Today I’m going to show you how to develop a React Native app with the latest and greatest releases. At the time of this writing, that’s React 16.2.0 and React Native 0.54.0. You’ll create a new app, add AppAuth for authentication, authenticate with Okta, and see it running on both iOS and Android.
AppAuth is a client SDK for native apps to authenticate and authorize end-users using OAuth 2.0 and OpenID Connect. Available for iOS, macOS, Android and Native JS environments, it implements modern security and usability best practices for native app authentication and authorization.
React has a create-react-app command-line tool (CLI) that you can use to create new React apps. React Native has a similar tool called Create React Native App. Before you install it, make sure you have Node v6 or later installed.
Install create-react-native-app and create a new project called okta-rn:
npm install -g create-react-native-app
create-react-native-app okta-rn
cd okta-rn
npm start
Running these commands will result in your terminal prompting you with some options:
To view your app with live reloading, point the Expo app to this QR code.
You'll find the QR scanner on the Projects tab of the app.

[QR Code]

Or enter this address in the Expo app's search bar:

  exp://172.31.98.12:19000

Your phone will need to be on the same local network as this computer.
For links to install the Expo app, please visit https://expo.io.

Logs from serving your app will appear here. Press Ctrl+C at any time to stop.

 › Press a to open Android device or emulator, or i to open iOS emulator.
 › Press q to display QR code.
 › Press r to restart packager, or R to restart packager and clear cache.
 › Press d to toggle development mode. (current mode: development)
If you’re on a Mac, press i to open iOS emulator. You will be prompted to install/open with Expo, then presented with the rendered App.js.
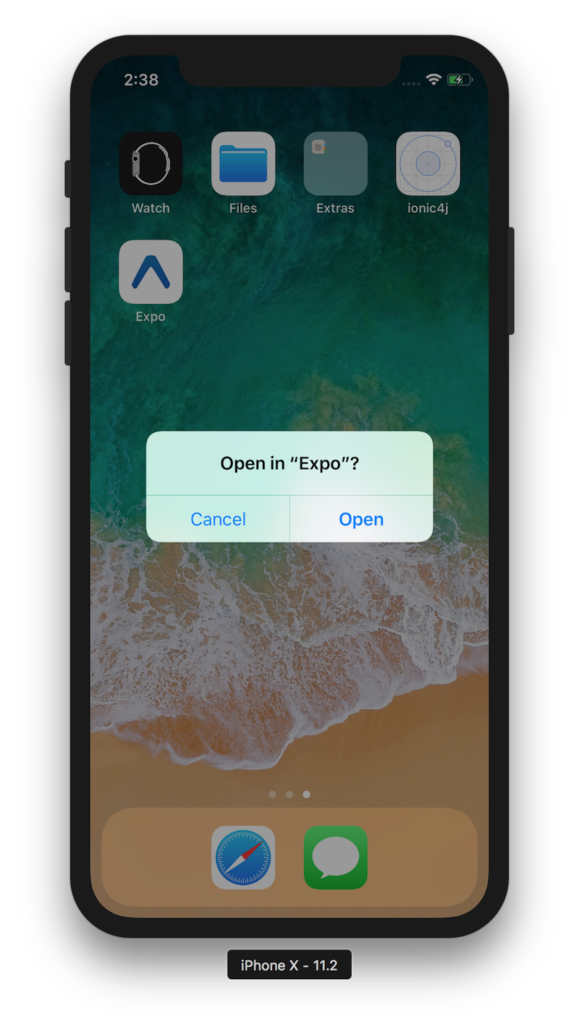
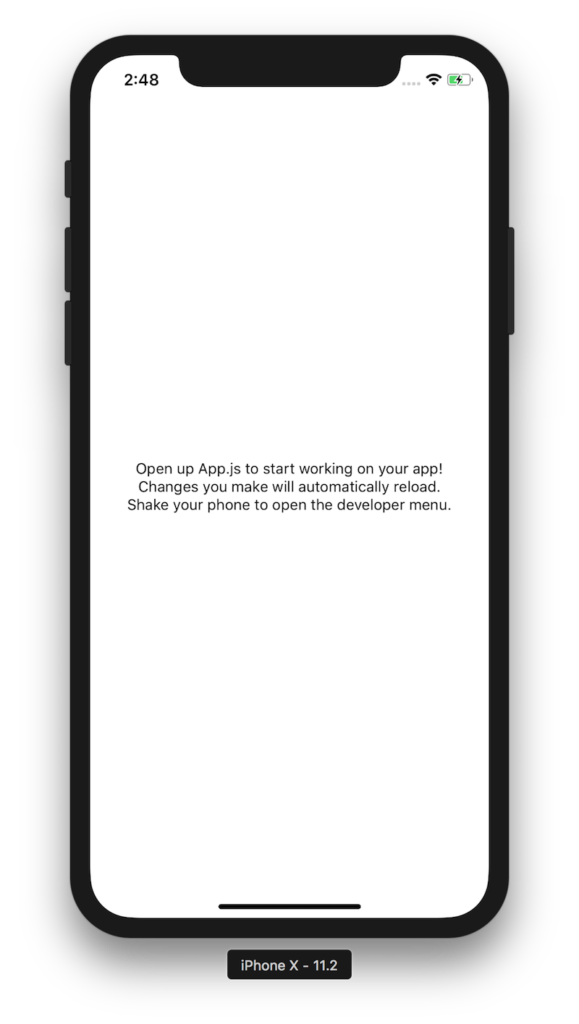
If you’re on Windows or Linux, I’d suggest trying the Android emulator or your Android device (if you have one). If it doesn’t work, don’t worry, I’ll show you how to make that work later on.
TIP: You can use TypeScript instead of JavaScript in your React Native app using Microsoft’s TypeScript React Native Starter. If you decide to go this route, I’d recommend following the steps to convert your app after you’ve completed this tutorial.
In this example, I’ll use React Native App Auth, a library created by Formidable. The reason I’m using this library is three-fold: 1) they provide an excellent example that I was able to make work in just a few minutes, 2) it uses AppAuth (a mature OAuth client implementation), and 3) I was unable to get anything else working.
Before you add AppAuth to your React Native application, you’ll need an app to authorize against. If you don’t have a free-forever Okta Developer account, get one today!
Log in to your Okta Developer account and navigate to Applications > Add Application. Click Native and click Next. Give the app a name you’ll remember (e.g., React Native), select Refresh Token as a grant type, in addition to the default Authorization Code. Copy the Login redirect URI (e.g., com.oktapreview.dev-158606:/callback) and save it somewhere. You’ll need this value when configuring your app.
Click Done and you should see a client ID on the next screen. Copy and save this value as well.
You’ll need to “eject” the native configuration for your app, which is normally hidden by create-react-native-app.
npm run eject
When prompted to answer questions, use the following answers:
| Question | Answer |
|---|---|
| How would you like to eject from create-react-native-app? | React Native |
| What should your app appear as on a user’s home screen? | Okta RN |
| What should your Android Studio and Xcode projects be called? | OktaRN |
To install App Auth for React Native, run the following commands:
npm i react-native-app-auth@2.2.0
npm i
react-native link
After running these commands, you have to configure the native iOS projects. I’ve copied the steps below for your convenience.
React Native App Auth depends on AppAuth-ios, so you have to configure it as a dependency. The easiest way to do that is to use CocoaPods. To install CocoaPods, run the following command:
sudo gem install cocoapods
Create a Podfile in the ios directory of your project that specifies AppAuth-ios as a dependency. Make sure that OktaRN matches the app name you specified when running npm run eject.
platform :ios, '11.0'

target 'OktaRN' do
  pod 'AppAuth', '>= 0.91'
end
Then run pod install from the ios directory. This can take a while the first time, even on a fast connection. Now is a good time to grab a coffee or a scotch! 🥃
Open your project in Xcode by running open OktaRN.xcworkspace from the ios directory.
If you intend to support iOS 10 and older, you need to define the supported redirect URL schemes in ios/OktaRN/Info.plist as follows:
<key>CFBundleURLTypes</key>
<array>
  <dict>
    <key>CFBundleURLName</key>
    <string>$(PRODUCT_BUNDLE_IDENTIFIER)</string>
    <key>CFBundleURLSchemes</key>
    <array>
      <string>{yourReversedOktaDomain}</string>
    </array>
  </dict>
</array>
Below is what mine looks like after I changed my app identifier and added this key.
<key>CFBundleIdentifier</key>
<string>com.okta.developer.reactnative.$(PRODUCT_NAME:rfc1034identifier)</string>
<key>CFBundleURLTypes</key>
<array>
  <dict>
    <key>CFBundleURLName</key>
    <string>$(PRODUCT_BUNDLE_IDENTIFIER)</string>
    <key>CFBundleURLSchemes</key>
    <array>
      <string>com.oktapreview.dev-158606</string>
    </array>
  </dict>
</array>
Open AppDelegate.h in your Xcode project (OktaRN > OktaRN > AppDelegate.h) and add the lines with the + next to them below.
+ @protocol OIDAuthorizationFlowSession;

  @interface AppDelegate : UIResponder <UIApplicationDelegate>
+ @property(nonatomic, strong, nullable) id<OIDAuthorizationFlowSession> currentAuthorizationFlow;
  @property (nonatomic, strong) UIWindow *window;
  @end
This property holds the authorization flow information that started before you redirect to Okta. After Okta authorizes you, it redirects to the redirect_uri that’s passed in.
The authorization flow starts from an openURL() app delegate method. To add it, open AppDelegate.m and import AppAuth.h.
#import "AppAuth.h"
Then at the bottom of the class (before @end), add the openURL() method.
- (BOOL)application:(UIApplication *)app
            openURL:(NSURL *)url
            options:(NSDictionary<NSString *, id> *)options {
  if ([_currentAuthorizationFlow resumeAuthorizationFlowWithURL:url]) {
    _currentAuthorizationFlow = nil;
    return YES;
  }
  return NO;
}
Replace the code in App.js with the following JavaScript. This code allows you to authorize, refresh your access token, and revoke it.
import React, { Component } from 'react';
import { UIManager, LayoutAnimation } from 'react-native';
import { authorize, refresh, revoke } from 'react-native-app-auth';
import { Page, Button, ButtonContainer, Form, Heading } from './components';

UIManager.setLayoutAnimationEnabledExperimental &&
  UIManager.setLayoutAnimationEnabledExperimental(true);

const scopes = ['openid', 'profile', 'email', 'offline_access'];

type State = {
  hasLoggedInOnce: boolean,
  accessToken: ?string,
  accessTokenExpirationDate: ?string,
  refreshToken: ?string
};

const config = {
  issuer: 'https://{yourOktaDomain}/oauth2/default',
  clientId: '{clientId}',
  redirectUrl: 'com.{yourReversedOktaDomain}:/callback',
  additionalParameters: {},
  scopes: ['openid', 'profile', 'email', 'offline_access']
};

export default class App extends Component<{}, State> {
  state = {
    hasLoggedInOnce: false,
    accessToken: '',
    accessTokenExpirationDate: '',
    refreshToken: ''
  };

  animateState(nextState: $Shape<State>, delay: number = 0) {
    setTimeout(() => {
      this.setState(() => {
        LayoutAnimation.easeInEaseOut();
        return nextState;
      });
    }, delay);
  }

  authorize = async () => {
    try {
      const authState = await authorize(config);
      this.animateState(
        {
          hasLoggedInOnce: true,
          accessToken: authState.accessToken,
          accessTokenExpirationDate: authState.accessTokenExpirationDate,
          refreshToken: authState.refreshToken
        },
        500
      );
    } catch (error) {
      Alert.alert('Failed to log in', error.message);
    }
  };

  refresh = async () => {
    try {
      const authState = await refresh(config, {
        refreshToken: this.state.refreshToken
      });

      this.animateState({
        accessToken: authState.accessToken || this.state.accessToken,
        accessTokenExpirationDate:
          authState.accessTokenExpirationDate || this.state.accessTokenExpirationDate,
        refreshToken: authState.refreshToken || this.state.refreshToken
      });
    } catch (error) {
      Alert.alert('Failed to refresh token', error.message);
    }
  };

  revoke = async () => {
    try {
      await revoke(config, {
        tokenToRevoke: this.state.accessToken,
        sendClientId: true
      });
      this.animateState({
        accessToken: '',
        accessTokenExpirationDate: '',
        refreshToken: ''
      });
    } catch (error) {
      Alert.alert('Failed to revoke token', error.message);
    }
  };

  render() {
    const {state} = this;
    return (
      <Page>
        {!!state.accessToken ? (
          <Form>
            <Form.Label>accessToken</Form.Label>
            <Form.Value>{state.accessToken}</Form.Value>
            <Form.Label>accessTokenExpirationDate</Form.Label>
            <Form.Value>{state.accessTokenExpirationDate}</Form.Value>
            <Form.Label>refreshToken</Form.Label>
            <Form.Value>{state.refreshToken}</Form.Value>
          </Form>
        ) : (
          <Heading>{state.hasLoggedInOnce ? 'Goodbye.' : 'Hello, stranger.'}</Heading>
        )}

        <ButtonContainer>
          {!state.accessToken && (
            <Button onPress={this.authorize} text="Authorize" color="#017CC0"/>
          )}
          {!!state.refreshToken && <Button onPress={this.refresh} text="Refresh" color="#24C2CB"/>}
          {!!state.accessToken && <Button onPress={this.revoke} text="Revoke" color="#EF525B"/>}
        </ButtonContainer>
      </Page>
    );
  }
}
Make sure to adjust config with your settings.
const config = {
  issuer: 'https://{yourOktaDomain}/oauth2/default',
  clientId: '{clientId}',
  redirectUrl: 'com.{yourReversedOktaDomain}:/callback',
  ...
};
Change index.js to use OktaRN as the name of your app.
AppRegistry.registerComponent('OktaRN', () => App);
This code uses styled-components, so you’ll need to install that as a dependency.
NOTE: Make sure to navigate into the root directory of your project before running the commands below.
npm i styled-components
Then copy the components directory into your project’s root directory from Formidable’s example.
svn export https://github.com/FormidableLabs/react-native-app-auth/trunk/Example/components
Grab the background image that’s referenced in the Page.js component too.
svn export https://github.com/FormidableLabs/react-native-app-auth/trunk/Example/assets
Run your app with npm run ios.
You should see a screen that says “Hello, stranger.” Click on Authorize, and you’ll be prompted to continue or cancel.
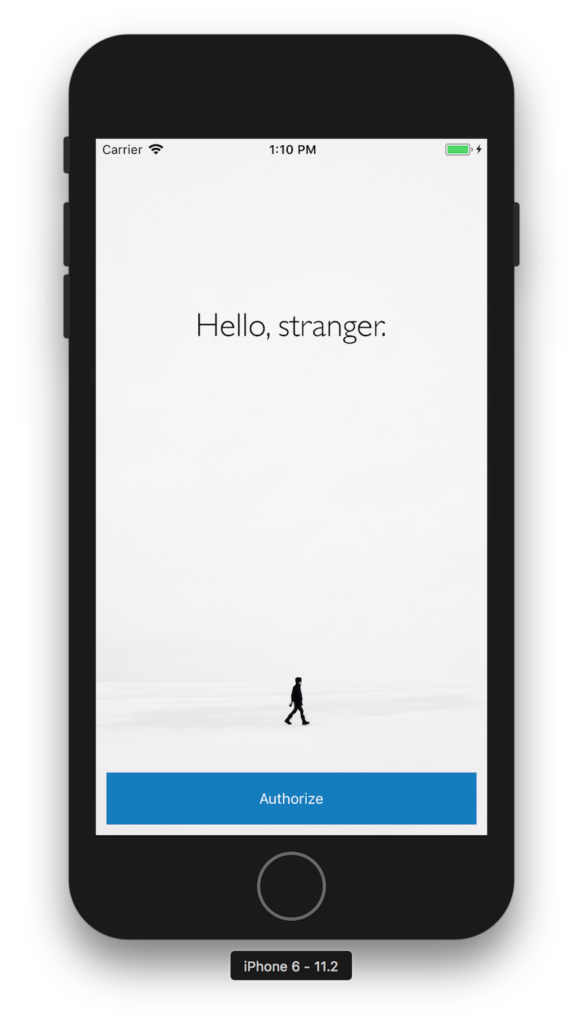
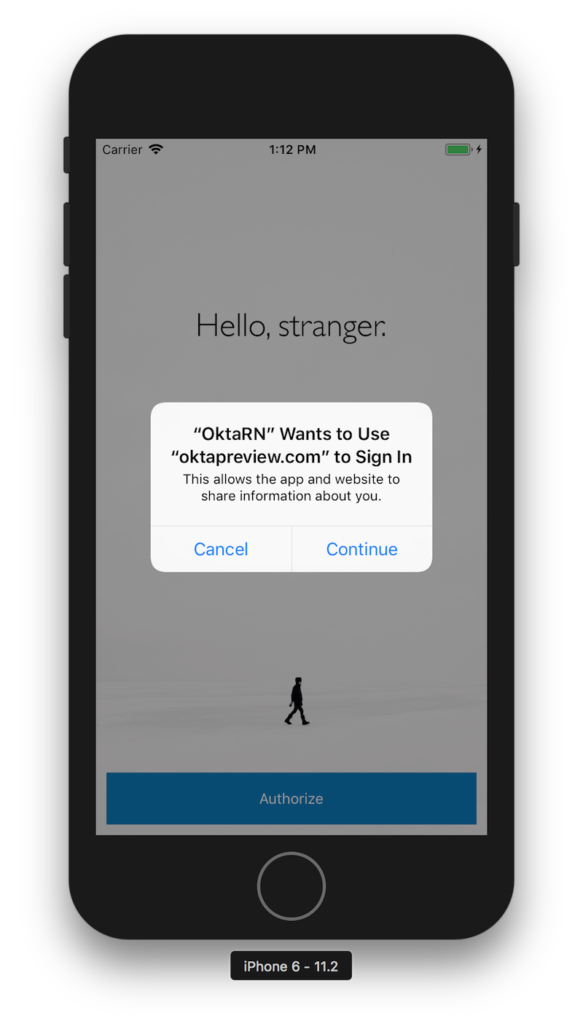
Click Continue and you should see an Okta sign-in form. Enter your credentials, and you’ll be redirected back to the application.
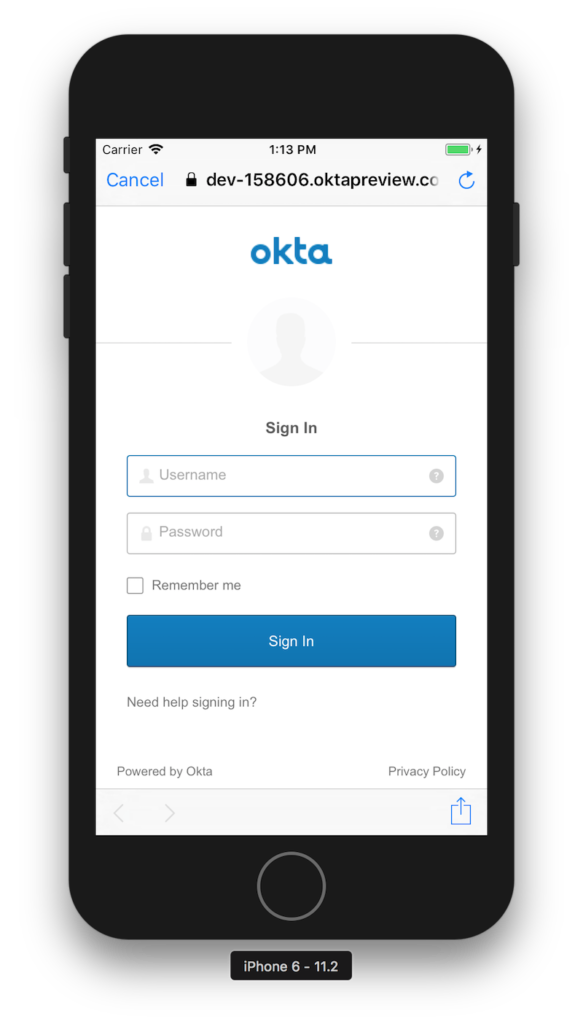
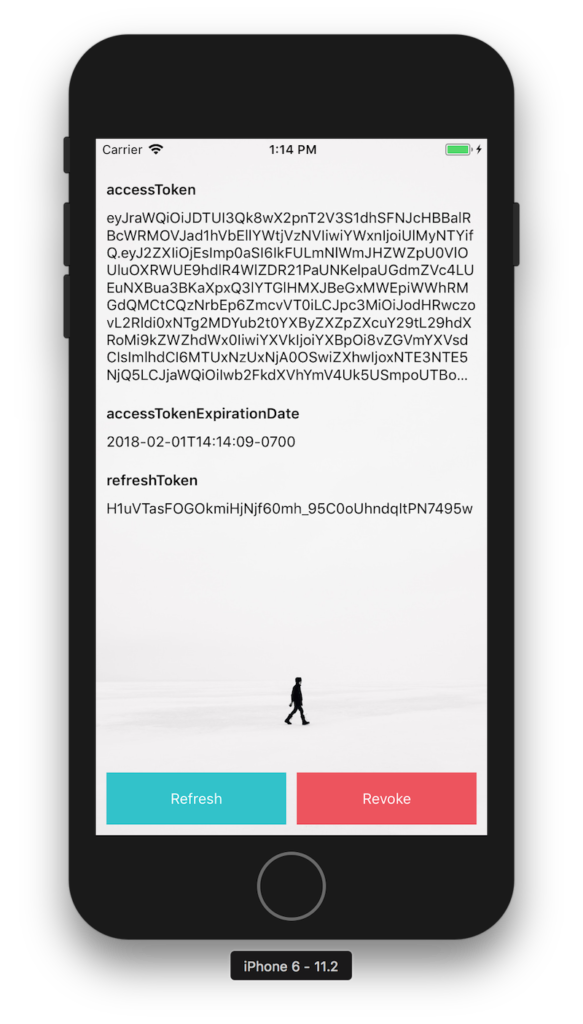
You can click Refresh to watch the values for the access token and expire date change.
TIP: If animations happen slowly in iOS Simulator, toggle Debug > Slow Animations.
To configure the native Android project, start by upgrading the version of Gradle it uses.
cd android
./gradlew wrapper --gradle-version 4.6
React Native App Auth for Android depends on AppAuth-android, but you need to add the correct Android Support library version to your project.
Add the Google Maven repository to your android/build.gradle and upgrade the Android Tools dependency:
The post Build a React Native Application & Authenticate with OAuth 2.0 appeared first on SitePoint.