SitePoint Premium gives you an entire collection of books covering developer essentials like Pug, Gulp, Git and more. Join now.
As web designers or developers, we likely all have to write our fair share of HTML. And while this is not the most difficult task, it can often feel a little boring or repetitive. HTML is also static, which means that if you want to display dynamic data (fetched from an API, for example), you invariably end up with a mishmash of HTML stings inside JavaScript. This can be a nightmare to debug and to maintain.
This is where Pug comes in. Pug is a template engine for Node and for the browser. It compiles to HTML and has a simplified syntax, which can make you more productive and your code more readable. Pug makes it easy both to write reusable HTML, as well as to render data pulled from a database or API.
In this guide, I’ll demonstrate how to get up and running with Pug. We’ll start by installing it from npm, go over its basic syntax and then look at several examples of using JavaScript in Pug. Finally, we’ll explore a couple of Pug’s more advanced features by building a simple Node/Express project which uses Pug as its template engine.
What’s a Template Engine and Why Do I Need One?
Before we start looking at Pug, let’s take a second to understand the concepts involved.
A template engine is a program which is responsible for compiling a template (that can be written using any one of a number of languages) into HTML. The template engine will normally receive data from an external source, which it will inject into the template it’s compiling. This is illustrated by the following diagram.
 Credit: Dreftymac, TempEngWeb016, CC BY-SA 3.0
This approach allows you to reuse static web page elements, while defining dynamic elements based on your data. It also facilitates a separation of concerns, keeping your application logic isolated from your display logic.
You’re more likely to benefit from a template engine if your site or web application is data driven — such as a staff directory for administering employees, a web store that lists various products for users to buy, or a site with dynamic search functionality.
You won’t need a template engine if you’re fetching a small amount of data from an API (in which case you can just use JavaScript’s native template strings), or if you’re making a small static site.
A Little History
It’s also worth noting that Pug used to be called Jade until it was forced to change its name due to a trademark claim in 2015. The name change took effect with version 2.0.
There’s still a lot of Jade-related material available online. And while some of it’s probably still quite valid, the fact that the name change coincided with a major version bump means that Pug’s syntax has several differences, deprecations, and removals compared to its predecessor. These are documented here.
If you’re interested in finding out more, you can read the original name change announcement in this GitHub issue. Otherwise, just be sure to add the word “template” to your Pug-related Google searches to avoid the results being full of pooches.
Installing Pug
Before we can get to writing some Pug, we’ll need to install Node, npm (which comes bundled with Node) and the pug-cli package.
There’s a couple options for installing Node/npm. Either head on over to the project’s home page and download the correct binaries for your system, or use a version manager such as nvm. I would recommend using a version manager where possible, as this will allow you to install different Node versions and switch between them at will. It will also negate a bunch of potential permissions errors.
You can check out our tutorial “Installing Multiple Versions of Node.js Using nvm” for a more in-depth guide.
Once Node and npm are installed on your system, you can install the pug-cli package like so:
npm i -g pug-cli
You can check that the install process ran correctly by typing pug --version into a terminal. This will output the version of Pug and the version of the CLI that you have installed.
At the time of writing, this was as follows:
$ pug --version
pug version: 2.0.3
pug-cli version: 1.0.0-alpha6
Syntax Highlighting in Your Editor
If your editor doesn’t offer syntax highlighting for Pug, it’d be a good idea to look for an extension to add this functionality.
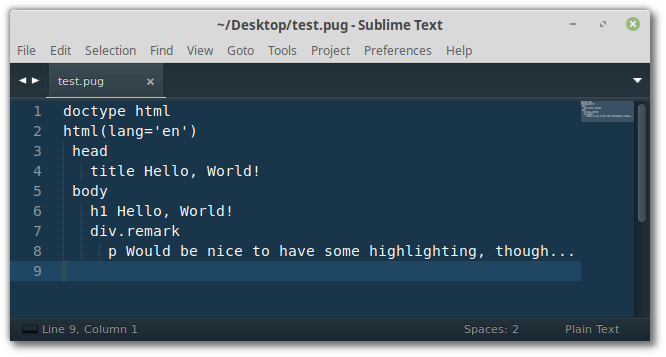
I’m currently using Sublime Text 3 and, out of the box, this is what a .pug file looks like:

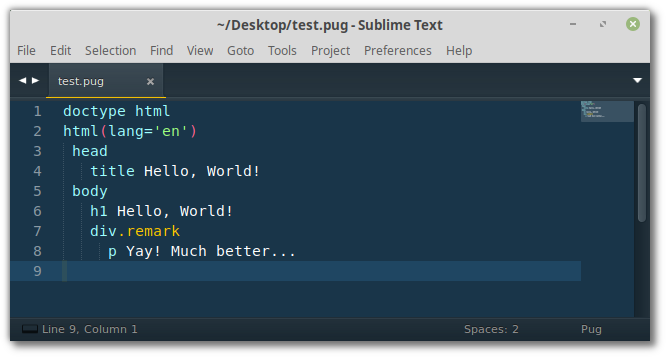
To remedy this, one can install the Sublime Pug package:

Syntax highlighting will make it much easier to work with Pug files, especially those of any length.
Try Pug without Installing
If you’d like to follow along with the simpler examples in this tutorial, you can also run them in various online code playgrounds.
CodePen, for example, has Pug support baked right in. Simply create a new pen, then select Settings > HTML and choose Pug as your preprocessor. This will allow you to enter Pug code into the HTML pane and see the result appear in real time.
As an added bonus, you can click on the down arrow in the HTML pane and select View Compiled HTML to see the markup that Pug has generated.
Pug’s Basic Syntax
Now that we’ve got Pug installed, let’s try it out. Create a new directory named pug-examples and change into it. Then create a further directory called html and a file called index.pug:
mkdir -p pug-examples/html
cd pug-examples
touch index.pug
Note: the touch command is Linux/macOS specific. Windows users would do echo.> index.pug to achieve the same thing.
The way this is going to work is that we’ll write our Pug code in index.pug and have the pug-cli watch this file for changes. When it detects any, it will take the contents of index.pug and render it as HTML in the html directory.
To kick this off, open a terminal in the pug-examples directory and enter this:
pug -w . -o ./html -P
You should see something like the following:
watching index.pug
rendered /home/jim/Desktop/pug-examples/html/index.html
Note: in the above command, the -w option stands for watch, the dot tells Pug to watch everything in the current directory, -o ./html tells Pug to output its HTML in the html directory and the -P option prettifies the output.
Now let’s create the page from the screenshot above (the one complaining about the lack of syntax highlighting). Enter the following into index.pug:
doctype html
html(lang='en')
 head
   title Hello, World!
 body
   h1 Hello, World!
   div.remark
     p Pug rocks!
Save pug.index and then inspect the contents of ./html/index.html. You should see the following:
<!DOCTYPE html>
<html lang="en">
  <head>
    <title>Hello, World!</title>
  </head>
  <body>
    <h1>Hello, World!</h1>
    <div class="remark">
      <p>Pug rocks!!</p>
    </div>
  </body>
</html>
Not bad, eh? The Pug CLI has taken our Pug file and rendered it as regular HTML.
This example serves to highlight a couple of important points about Pug. Firstly, it is whitespace sensitive, which means that Pug uses indentation to work out which tags are nested inside each other. For example:
div.remark
  p Pug rocks!!
The code above produces this:
<div class="remark">
  <p>Pug rocks!!</p>
</div>
Now take this code:
div.remark
p Pug rocks!!
This produces the following:
<div class="remark"></div>
<p>Pug rocks!!</p>
It doesn’t really matter what level of indentation you use (you can even use tabs if you have to), but it’s highly recommended that you keep the level of indentation consistent. In this article I’ll be using two spaces.
Secondly, Pug doesn’t have any closing tags. This will obviously save you a fair few keystrokes and affords Pug a clean and easy-to-read syntax.
Now that we’ve got a handle on some basic Pug, let’s quickly go over its syntax. If any of this seems confusing, or you’d like to go more in-depth, be sure to consult the project’s excellent documentation.
The post A Beginner’s Guide to Pug appeared first on SitePoint.
by James Hibbard via SitePoint
No comments:
Post a Comment