Out of the box, Alexa supports a number of built-in skills, such as adding items to your shopping list or requesting a song. However, developers can build new custom skills by using the Alexa Skill Kit (ASK).
The ASK, a collection of APIs and tools, handles the hard work related to voice interfaces, including speech recognition, text-to-speech encoding, and natural language processing. ASK helps developers build skills quickly and easily.
In short, the sole reason that Alexa can understand a user’s voice commands is that it has skills defined. Every Alexa skill is a piece of software designed to understand voice commands. Also, each Alexa skill has its own logic defined that creates an appropriate response for the voice command. To give you an idea of some existing Alexa skills, they include:
- ordering pizza at Domino's Pizza
- calling for an Uber
- telling you your horoscope
So as said, we can develop our own custom skills fitted to our need with the Alexa Skill Kit, a collection of APIs and tools designed for this purpose. The ASK includes tools like speech recognition, text-to-speech encoding, and natural language processing. The kit should get any developer started quickly with developing their own custom skill.
In this article, you’ll learn how to create a basic "get a fact" Alexa skill. In short, we can ask Alexa to present us with a random cat fact. The complete code for completing our task can be found on GitHub. Before we get started, let's make sure we understand the Alexa skill terminology.
Mastering Alexa Skill Terminology
First, let's learn how a user can interact with a custom skill. This will be important for understanding the different concepts related to skills.
In order to activate a particular skill, the user has to call Alexa and ask to open a skill. For example: "Alexa, open cat fact". By doing this, we're calling the invocation name of the skill. Basically, the invocation name can be seem as the name of the application.
Now that we've started the right skill, we have access to the voice intents/commands the skill understands. As we want to keep things simple, we define a "Get Cat Fact" intent. However, we need to provide sample sentences to trigger the intent. An intent can be triggered by many example sentences, also called utterances. For example, a user might say "Give a fact". Therefore, we define the following example sentences:
- "Tell a fact"
- "Give a cat fact"
- "Give a fact"
It's even possible to combine the invocation name with an intent like this: "Alexa, ask Cat Fact to give a fact".
Now that we know the difference between an invocation name and intent, let's move on to creating your first Alexa skill.
Creating an Amazon Developer Account
To get started, we need an Amazon Developer Account. If you have one, you can skip this section.
Signing up for an Amazon Developer account is a three-step process. Amazon requires some personal information, accepting the terms of service, and providing a payment method. The advantage of signing up for an Amazon Developer account is that you get access to a plethora of other Amazon services. Once the signup has been successfully completed, you'll see the Amazon Developer dashboard.
Log yourself in to the dashboard and click on the Developer Console button in the top-right corner.

Next up, we want to open the Alexa Skills Kit.

If you were unable to open the Alexa Skills Kit, use this link.
In the following section, we'll create our actual skill.
Creating Our First Custom Alexa Skill
Okay, we're set to create our first custom Alexa skill. Click the blue button Create Skill to open up the menu for creating a new skill.

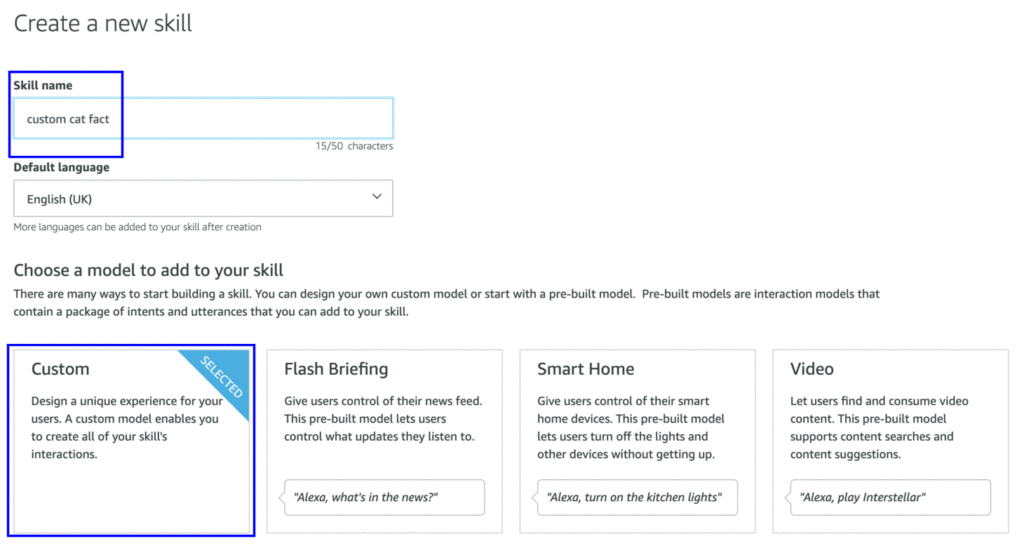
Firstly, it will prompt us for the name of our skill. As you already know, we want random cat facts and therefore call the skill custom cat fact (we can't use cat fact as that's a built-in skill for Alexa devices). Next, it prompts us to pick a model for your skill. We can choose between some predefined models or go for a custom model that gives us full flexibility. As we don't want to be dealing with code we don't need, we go for the Custom option.
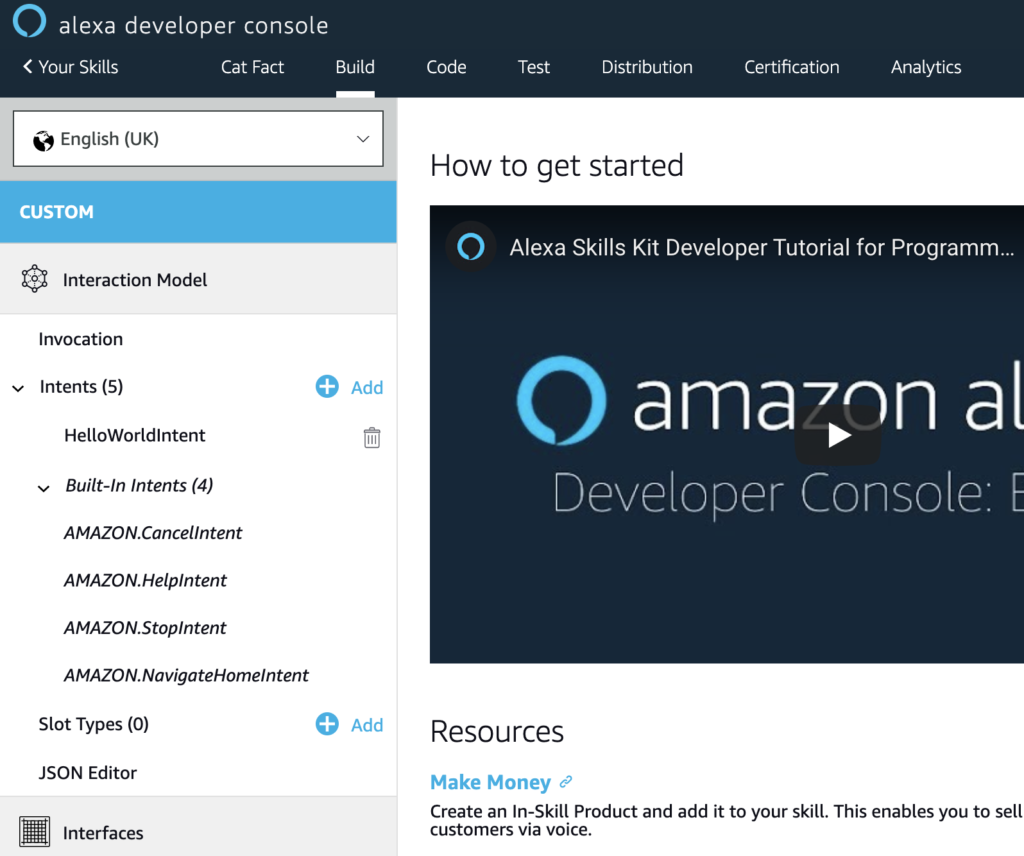
Note: If you choose a predefined skill, you get a list of interaction models and example sentences (utterances). However, even the custom skill is equipped with the most basic intents like Cancel, Help, NavigateHome, and Stop.

Next, we need to pick a way to host our skill. Again, we don't want to overcomplicate things and pick the Alexa-Hosted (Node.js) option. This means we don't have to run a back end ourselves that requires some effort to make it "Alexa compliant". It means you have to format the response according to the Amazon Alexa standards for a device to understand this. The Alexa-hosted option will:
host skills in your account up to the AWS Free Tier limits and get you started with a Node.js template. You will gain access to an AWS Lambda endpoint, 5 GB of media storage with 15 GB of monthly data transfer, and a table for session persistence.

Okay, now that all settings are in place, you can click the Create Skill button in the top-right corner of the screen. This button will generate the actual skill in our Amazon Developer account.
Modifying Your First Alexa Skill
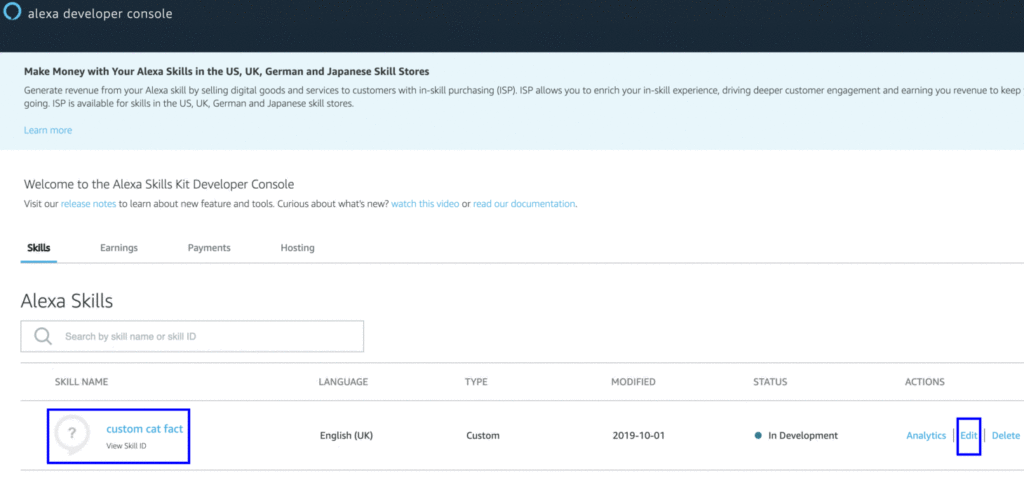
Now if you navigate to the Alexa Developer Console, you'll find your skill listed there. Click the edit button to start modifying the skill.

Next, Amazon will display the build tab for the Cat Fact skill. On the left-hand side, you'll find a list of intents that are defined for the skill. As said before, by default the Alexa Skills Kit generates a Cancel, Stop, Help, and NavigateHome intent. The first three are helpful for a user that wants to quit the skill or doesn't know how to use it. The last one, NavigateHome, is only used for complex skills that involve multiple steps.

Step 1: Verify Invocation Name
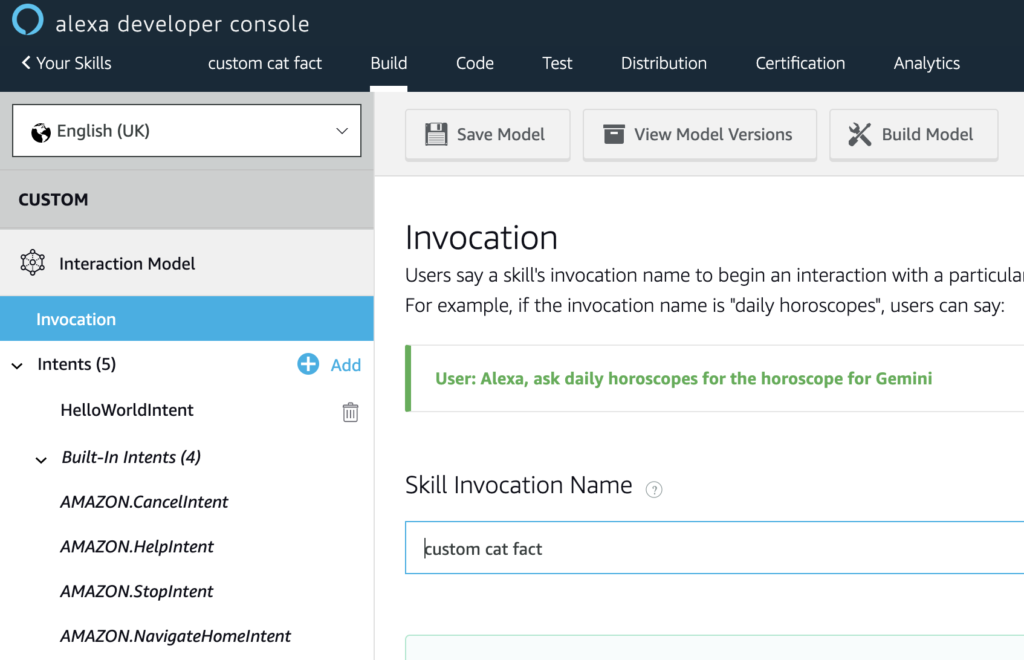
First of all, let's verify if the invocation name for the skill is correct. The name should say "custom cat fact".
In case you change the name, make sure to hit the Save Model button on top of the page.

The post How to Build Your First Amazon Alexa Skill appeared first on SitePoint.
by Michiel Mulders via SitePoint
No comments:
Post a Comment