As recently as seven short years ago, building video applications on the web was a massive pain. Remember the days of using Flash and proprietary codecs (which often required licensing)? Yuck. In the last few years, video chat technology has dramatically improved and Flash is no longer required.
Today, the video chat landscape is much simpler thanks to WebRTC: an open source project built and maintained by Google, Mozilla, Opera, and others. WebRTC allows you to easily build real-time communication software in your browser and is being standardized at the W3C and IETF levels. Using WebRTC, you can build real-time video chat applications in the browser that actually work well! It’s pretty amazing.
Today, I thought it’d be fun to walk you through the process of using WebRTC and Okta to build a simple video chat service that allows users to create a chatroom and share the link around to anyone they want who can then join the room and chat with them in real-time.
The application you’ll be building today will use Okta (a free authentication service) to handle user login and access control and WebRTC for powering all the video functionality. You’ll also use pure JavaScript to create the web application.
By the time you’ve gone through this guide, you’ll have a much better understanding of how both web authentication and real-time video chat works in a pure JavaScript environment.
Let’s get started.
NOTE: Want to play around with the chat app in real-time? You can do so here: https://ift.tt/2Iohft6 You can also view the source code for the app we’ll be building on GitHub.
Create the Web Page
The first thing you’ll do is create a simple HTML web page for the app.
When building web applications, I like to start by first creating my markup and CSS, then going back for a second pass and adding in application logic.
Create a new folder somewhere on your computer called chatapp, then create an index.html file with the following contents:
<!DOCTYPE html>
<html>
  <head>
    <title>vchat - a simple video chat app</title>
    <link rel="stylesheet" href="https://maxcdn.bootstrapcdn.com/bootstrap/4.0.0/css/bootstrap.min.css" integrity="sha384-Gn5384xqQ1aoWXA+058RXPxPg6fy4IWvTNh0E263XmFcJlSAwiGgFAW/dAiS6JXm" crossorigin="anonymous">
    <link href="https://fonts.googleapis.com/css?family=Raleway" rel="stylesheet">
  </head>
  <body>
    <div class="container">
      <header>
        <h1><a href="/">vchat</a></h1>
        <h2><a href="/">a simple video chat app</a></h2>
      </header>

      <div id="okta-login-container"></div>

      <div class="row">
        <div class="col"></div>
        <div class="col-md-auto align-self-center">
          <p id="login"><b>NOTE</b>: You are not currently logged in. If you'd like to start your own
            chat room please <button type="button" class="btn btn-light">log in</button></p>
          <div id="url" class="alert alert-dark" role="alert">
            <span id="roomIntro">ROOM URL</span>: <span id="roomUrl"></span>
          </div>
        </div>
        <div class="col"></div>
      </div>

      <div id="remotes" class="row">
        <div class="col-md-6">
          <div class="videoContainer">
            <video id="selfVideo"></video>
            <meter id="localVolume" class="volume"></meter>
          </div>
        </div>
      </div>
    </div>

    <footer>
      <p>Hacked together by <a href="https://twitter.com/rdegges">@rdegges</a>
        and <a href="https://twitter.com/oktadev">@oktadev</a>.</p>
    </footer>
  </body>
</html>
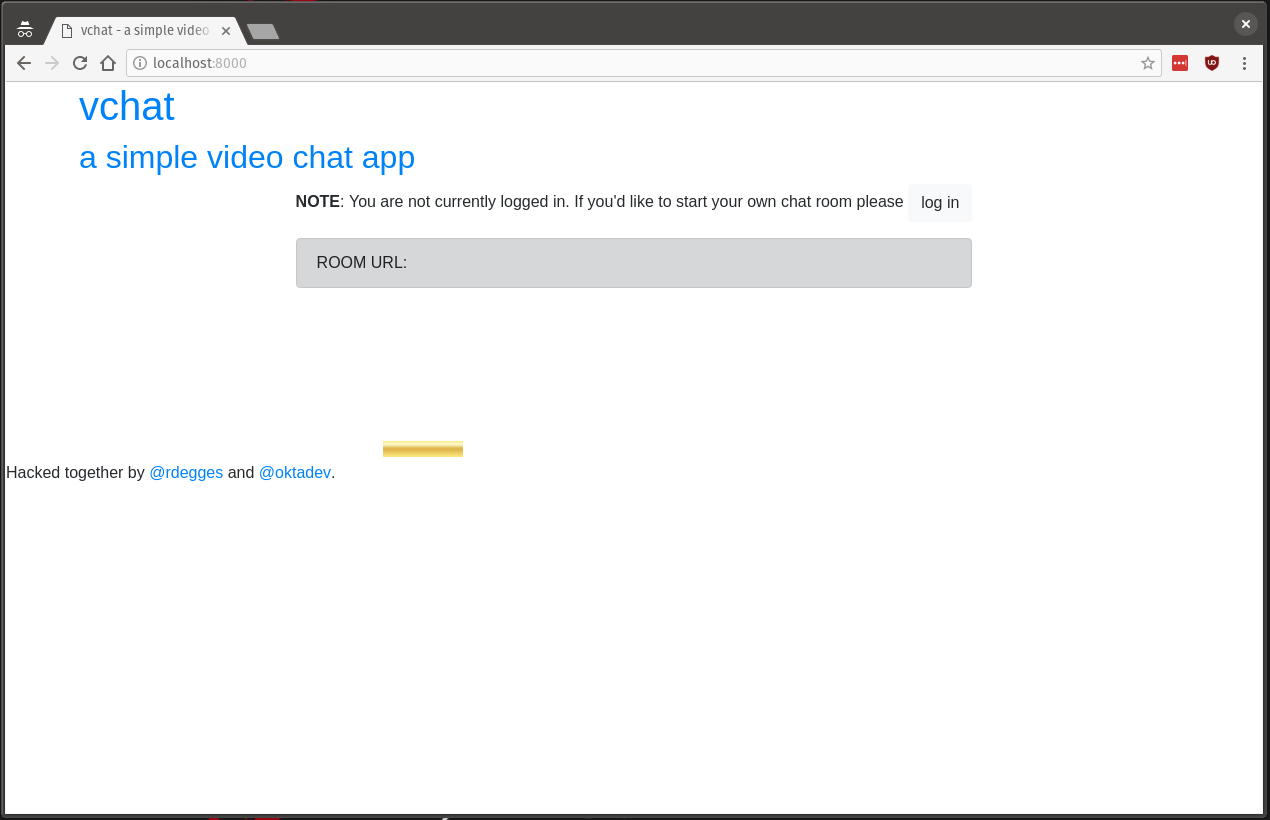
This simple page is using the latest version of Bootstrap as well as the Raleway font (my personal favorite) — but not much else.
The key elements present in this minimalistic HTML page are:
- An
okta-login-containerdiv, which will eventually hold our login form - A login notice and Room URL placeholder that will notify a user whether they need to log in, and what chat room they are currently in
- A div that will eventually contain all of the video feeds from various participants
If you open this page up in your browser, you’ll notice that it looks pretty bad. But don’t worry, you’ll make it look pretty soon enough! ;)
Next, you’ll want to create a folder called static, which contains another folder named css. Then, you’ll need to copy the following CSS into a new style.css file inside that folder:
body {
  font-family: 'Raleway', sans-serif;
}

footer {
  text-align: center;
  margin-top: 2em;
}

h2 {
  font-style: italic;
}

header {
  text-align: center;
  margin: 4em;
}

header h1, header h2 {
  display: inline;
}

header h1 a, header h2 a, header h1 a:hover, header h2 a:hover {
  color: inherit;
  text-decoration: none;
}

header h2 {
  font-size: 24px;
  padding-left: .5em;
}

#remotes {
  visibility: hidden;
}

#url {
  text-align: center;
  display: none;
}

#login {
  display: none;
}

#roomIntro {
  font-weight: bold;
}

.videoContainer {
  object-fit: cover;
  margin: 0 auto;
  padding: 0;
}

.videoContainer video {
  width: 100%;
  height: 100%;
  border-radius: 10px;
  border: 5px double #f2f2f2;
}

.volume {
  position: absolute;
  left: 15%;
  width: 70%;
  bottom: 20px;
  height: 10px;
  display: none;
}

.connectionstate {
  position: absolute;
  top: 10px;
  width: 100%;
  text-align: center;
  color: #fff
}

.col-md-6 {
  margin-bottom: 1em;
}
I won’t go into detail explaining each CSS rule (as I won’t want to bore you to death), but if you add your newly created stylesheet into your index.html page, you’ll notice that the web app now looks a lot nicer:
<head>
  <title>vchat - a simple video chat app</title>
  <link rel="stylesheet" href="https://maxcdn.bootstrapcdn.com/bootstrap/4.0.0/css/bootstrap.min.css" integrity="sha384-Gn5384xqQ1aoWXA+058RXPxPg6fy4IWvTNh0E263XmFcJlSAwiGgFAW/dAiS6JXm" crossorigin="anonymous">
  <link href="https://fonts.googleapis.com/css?family=Raleway" rel="stylesheet">
  <link rel="stylesheet" href="/static/css/style.css">
</head>

Set Up Okta
Now that you’ve got a simple web page with some styling on it, let’s set up the user login component using Okta. If you don’t already have an Okta developer account, go create one now then come back (it should only take a second).
Once you’ve got your Okta account and you’re logged into the Okta dashboard, you’ll need to create a new Okta application (this is how Okta knows what type of app you’re building and what type of authentication to allow).
To do this, navigate to the Applications tab from your dashboard and click the Add Application button. Once there, click the Single-Page App icon (because you are building a SPA) then click Next.
Once you’ve reached the Create New Application page fill out the Application Settings form with the following information:
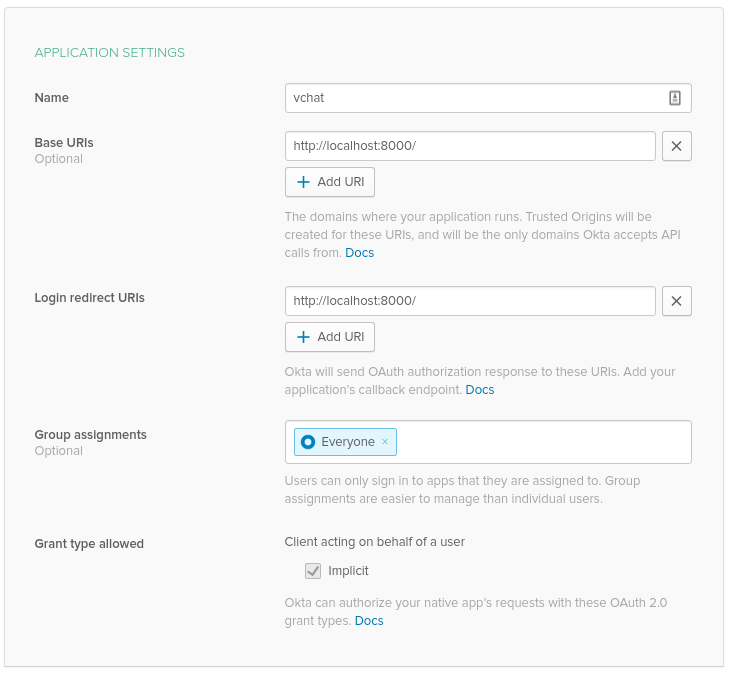
When done, click Done. Your Okta Application is now almost ready to go.
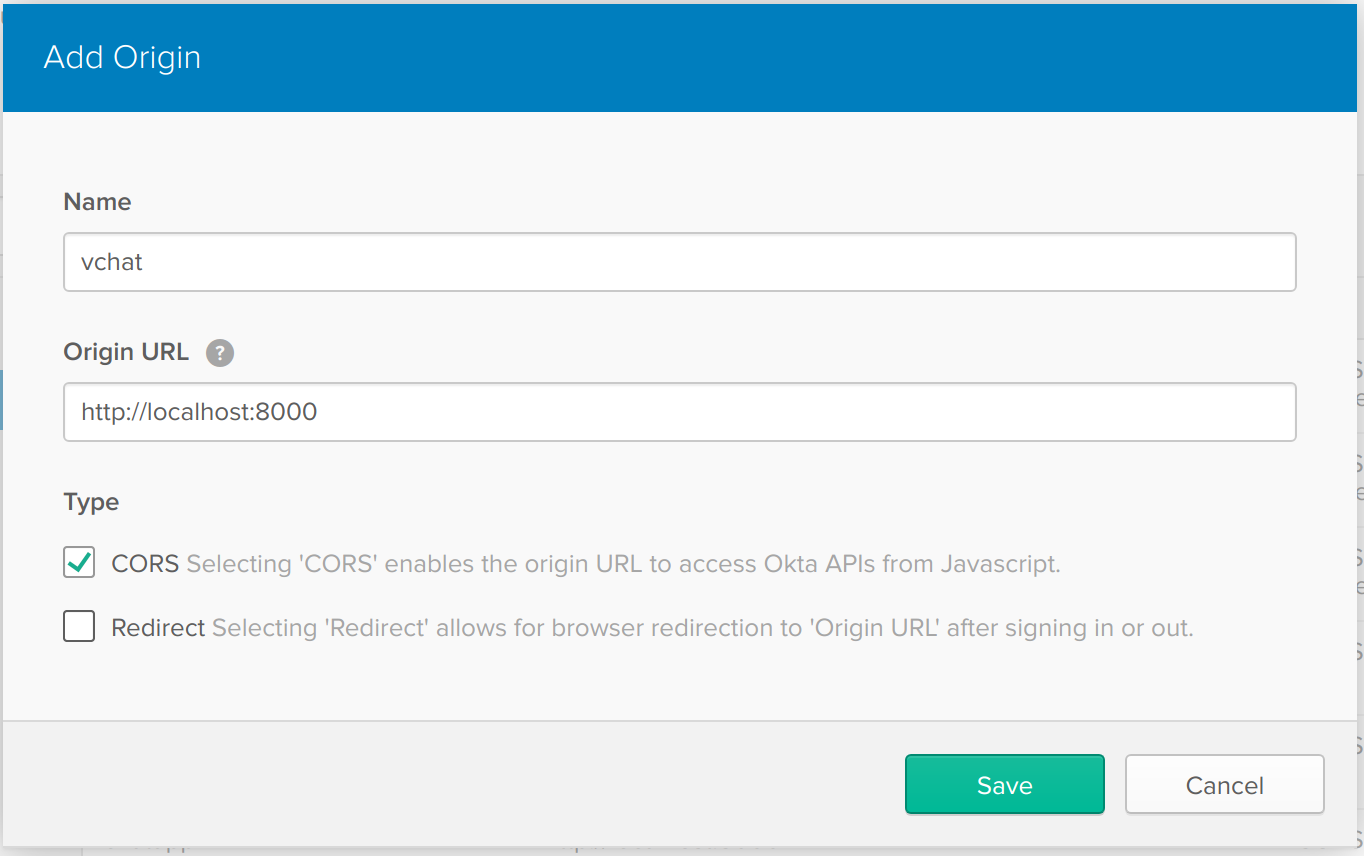
The next thing you’ll need to do is add your local computer as a Trusted Origin — trusted origins are URLs allowed to interact with Okta from a pure JavaScript environment; you’ll need to explicitly create one.
To do this, click the API tab followed by the Trusted Origins tab from your Okta dashboard. To create your new origin, now click the Add Origin button:
Once you’ve reached the Add Origin screen, enter the following information which tells Okta to allow you to use the Okta authentication service from your local test environment:
Finally, now that you’ve configured your Okta Application and all necessary security rules, you should go create some user accounts in Okta that you can log in with later. You can do this by clicking on the Users tab followed by the Add Person button:
Use Okta to Handle User Authentication
Now that you’ve got Okta configured, you need to plug Okta into your web app so users can log into your video chat app.
While there are many different ways to integrate with Okta, for a single-page app like the one you’re building today you’ll want to use the Okta Sign-In Widget.
The Okta Sign-In Widget is a pure JS library you can drop into any web page that handles user authentication for you.
Before adding the widget’s JS code (below), you’ll want to visit your Okta dashboard and grab the Org URL value from the top-right portion of the page.
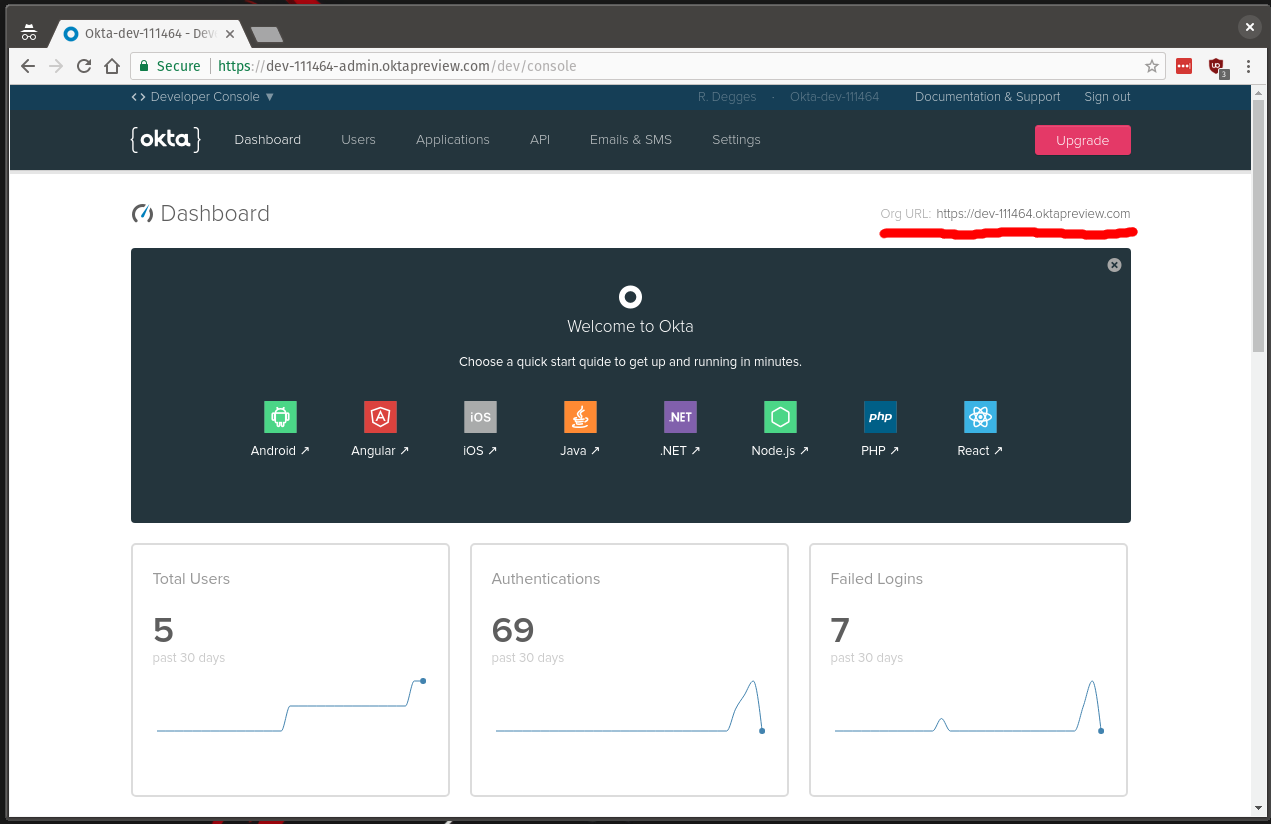
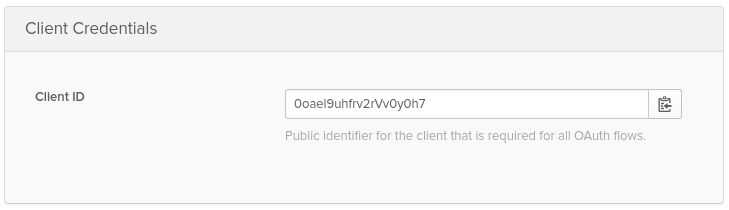
You’ll also need to view the Application you created earlier to grab the Client ID value. These two values (the client ID and org URL) will be used below.
Now that you have the necessary credentials, let’s get started plugging the widget into your web app. Open the index.html file you were working on previously and import the Okta Sign-In widget dependencies as well as initialize the widget at the bottom of the page in a script tag. Be sure to substitute and with the appropriate values for your app.
<!-- snip -->

<head>
  <title>vchat - a simple video chat app</title>
  <link rel="stylesheet" href="https://maxcdn.bootstrapcdn.com/bootstrap/4.0.0/css/bootstrap.min.css" integrity="sha384-Gn53
84xqQ1aoWXA+058RXPxPg6fy4IWvTNh0E263XmFcJlSAwiGgFAW/dAiS6JXm" crossorigin="anonymous">
  <link href="https://fonts.googleapis.com/css?family=Raleway" rel="stylesheet">
  <script src="https://ok1static.oktacdn.com/assets/js/sdk/okta-signin-widget/2.6.0/js/okta-sign-in.min.js" type="text/javas
cript"></script>
  <link href="https://ok1static.oktacdn.com/assets/js/sdk/okta-signin-widget/2.6.0/css/okta-sign-in.min.css" type="text/css"
 rel="stylesheet"/>
  <link href="https://ok1static.oktacdn.com/assets/js/sdk/okta-signin-widget/2.6.0/css/okta-theme.css" type="text/css" rel="
stylesheet"/>
  <link rel="stylesheet" href="/static/css/style.css">
</head>

<!-- snip -->

<footer>
  <p>Hacked together by <a href="https://twitter.com/rdegges">@rdegges</a>
    and <a href="https://twitter.com/oktadev">@oktadev</a>.</p>
</footer>

<script>
  var okta = new OktaSignIn({
    baseUrl: "",
    clientId: "",
    authParams: {
      issuer: "/oauth2/default",
      responseType: ["token", "id_token"],
      display: "page"
    }
  });

  // Render the login form.
  function showLogin() {
    okta.renderEl({ el: "#okta-login-container" }, function(res) {}, function(err) {
      alert("Couldn't render the login form, something horrible must have happened. Please refresh the page.");
    });
  }

  // Handle the user's login and what happens next.
  function handleLogin() {
    // If the user is logging in for the first time...
    if (okta.token.hasTokensInUrl()) {
      okta.token.parseTokensFromUrl(
        function success(res) {
          // Save the tokens for later use, e.g. if the page gets refreshed:
          okta.tokenManager.add("accessToken", res[0]);
          okta.tokenManager.add("idToken", res[1]);

          console.log("user just logged in");
        }, function error(err) {
          alert("We weren't able to log you in, something horrible must have happened. Please refresh the page.");
        }
      );
    } else {
      okta.session.get(function(res) {

        // If the user is logged in...
        if (res.status === "ACTIVE") {

          console.log("user is already logged in")
          return;
        }

        // If we get here, the user is not logged in.
        console.log("user not logged in");
        showLogin();
      });
    }
  }

  handleLogin();
</script>
The code above initializes the Okta widget, handles user authentication, and logs some messages to the developer console to help you understand what’s going on.
The okta object you create above controls the widget’s functionality: by creating a new instance of the OktaSignIn class and giving it your app-specific details, you’re essentially telling Okta where your OpenID Connect server is and how to use it (Okta uses the OpenID Connect protocol behind the scenes to power this login widget).
The handleLogin function you see above is what controls the session management in your app. If a user has just logged in (as part of the OIDC flow) then the user’s access and ID tokens will be stored in HTML local storage so your app can remember who the user is. If the user was already logged in but is viewing the page, a message will be echoed to the console. And if the user is not logged in at all, then the login form will be rendered (via the showLogin function).
Now that you’ve got the widget hooked up to your app, if you view your app in a browser you’ll be able to see the Okta Sign-In Widget in action: it will render a nice looking login form. If you fill in your Okta user login details you’ll notice that the appropriate console.log message will fire: either you aren’t logged in, you just logged in, or you were already logged in.
Configure State Management
The next thing you will need to do is configure state management for the app. But before we dive into that, let’s talk about how the app is going to work.
The video chat app you’re building will give each registered user their own dedicated chat room that they can use at any time and that can be shared with any external person. When another person joins one of these dedicated chat rooms they’ll be instantly put into the video chat session without needing an account on the site.
To make this functionality work in a simple manner, you’ll structure the app such that each registered user will have a dedicated chat room whose URL is ?room=. This way, if my email address is r@rdegges.com then I’ll have a dedicated chat room my friends can join that is ?room=r@rdegges.com — easy to remember and easy to share.
If a user is on a page with the room querystring, you’ll know that they are trying to join a specific video chat room and will use that querystring value to put them into the right room. If the user is visiting the homepage of the site (without any querystring), you’ll know that they’re likely trying to log into the app and that you should therefore show them the login form.
This is the basic logic you’ll implement below. We’ll build on this as this guide progresses, adding more and more functionality in until the video chat service is fully built.
To get started, create a hasQueryString function that will be helpful in determining whether or not the user is on the homepage of the app or in a specific chat room:
// Determine whether or not we have a querystring.
function hasQueryString() {
  return location.href.indexOf("?") !== -1;
}
Next, define two helper functions: getRoom and getRoomURL which will determine the chat room name (from the querystring) as well as the fully qualified room URL as well. These will be helpful later on when writing the video chat code:
// Determine the room name and public URL for this chat session.
function getRoom() {
  var query = location.search && location.search.split("?")[1];

  if (query) {
    return (location.search && decodeURIComponent(query.split("=")[1]));
  }

  return okta.tokenManager.get("idToken").claims.email;
}

// Retrieve the absolute room URL.
function getRoomURL() {
  return location.protocol + "//" + location.host + (location.path || "") + "?room=" + getRoom();
}
Now that you’ve got some useful helper functions, you’ll want to modify the handleLogin function from before to:
- Redirect logged in users to their dedicated chat room (
?room= - Notify users who aren’t logged in (but are in a video chat room) that they can log in if they want to
// Handle the user's login and what happens next.
function handleLogin() {
  // If the user is logging in for the first time...
  if (okta.token.hasTokensInUrl()) {
    okta.token.parseTokensFromUrl(
      function success(res) {
        // Save the tokens for later use, e.g. if the page gets refreshed:
        okta.tokenManager.add("accessToken", res[0]);
        okta.tokenManager.add("idToken", res[1]);

        // Redirect to this user's dedicated room URL.
        window.location = getRoomURL();
      }, function error(err) {
        alert("We weren't able to log you in, something horrible must have happened. Please refresh the page.");
      }
    );
  } else {
    okta.session.get(function(res) {

      // If the user is logged in...
      if (res.status === "ACTIVE") {

        // If the user is logged in on the home page, redirect to their room page.
        if (!hasQueryString()) {
          window.location = getRoomURL();
        }

        return;
      }

      // If we get here, the user is not logged in.

      // If there's a querystring in the URL, it means this person is in a
      // "room" so we should display our passive login notice. Otherwise,
      // we'll prompt them for login immediately.
      if (hasQueryString()) {
        document.getElementById("login").style.display = "block";
      } else {
        showLogin();
      }
    });
  }
}
By using the simple helper functions to handle redirects, you’re almost able to accomplish everything you need in terms of state management.
But, there’s one tiny thing left to do: you need to make sure that the login button redirects any users to the homepage of the app so they can view the login form. To do this, simply define an onclick handler on the button element in the page:
<p id="login">
  <b>NOTE</b>: You are not currently logged in. If you'd like to start your own chat room please <button type="button" class="btn btn-light" onclick="document.location='/'">log in</button>
</p>
And with that final change, the app’s state management is now complete!
Time to move onto the fun stuff: real-time video with WebRTC.
Use WebRTC to Enable Real-Time Video Chat
To get real-time video chat working in this app we’ll be using the fantastic SimpleWebRTC library. This library provides some excellent APIs that wrap the underlying WebRTC APIs making them much simpler to work with.
To get started with SimpleWebRTC, you first need to include the required adapter library in the head section of the web app:
<head>
  <title>vchat - a simple video chat app</title>
  <link rel="stylesheet" href="https://maxcdn.bootstrapcdn.com/bootstrap/4.0.0/css/bootstrap.min.css" integrity="sha384-Gn5384xqQ1aoWXA+058RXPxPg6fy4IWvTNh0E263XmFcJlSAwiGgFAW/dAiS6JXm" crossorigin="anonymous">
  <link href="https://fonts.googleapis.com/css?family=Raleway" rel="stylesheet">
  <script src="https://ok1static.oktacdn.com/assets/js/sdk/okta-signin-widget/2.6.0/js/okta-sign-in.min.js" type="text/javascript"></script>
  <link href="https://ok1static.oktacdn.com/assets/js/sdk/okta-signin-widget/2.6.0/css/okta-sign-in.min.css" type="text/css" rel="stylesheet"/>
  <link href="https://ok1static.oktacdn.com/assets/js/sdk/okta-signin-widget/2.6.0/css/okta-theme.css" type="text/css" rel="stylesheet"/>
  <script src="https://webrtc.github.io/adapter/adapter-4.2.2.js"></script>
  <link rel="stylesheet" href="/static/css/style.css">
</head>
Next, you’ll need to modify the videoContainer div you created previously which will hold your video in order to do two things:
The post Build a Video Chat Service with JavaScript, WebRTC, and Okta appeared first on SitePoint.
by Randall Degges via SitePoint
Mr Branding: Build A Video Chat Service With Javascript, Webrtc, And Okta >>>>> Download Now
ReplyDelete>>>>> Download Full
Mr Branding: Build A Video Chat Service With Javascript, Webrtc, And Okta >>>>> Download LINK
>>>>> Download Now
Mr Branding: Build A Video Chat Service With Javascript, Webrtc, And Okta >>>>> Download Full
>>>>> Download LINK