[ This is a content summary only. Visit our website https://ift.tt/1b4YgHQ for full links, other content, and more! ]
by Neha Zaidi via Digital Information World
"Mr Branding" is a blog based on RSS for everything related to website branding and website design, it collects its posts from many sites in order to facilitate the updating to the latest technology.
To suggest any source, please contact me: Taha.baba@consultant.com
When styling websites or PWAs with CSS, you should analyze how CSS resources will affect performance. In this tutorial, we’ll use various tools and related techniques to help build a better PWA by focusing on CSS performance. Specifically, we’ll remove the unused CSS, inline the critical path CSS, and minify the resulting code.
The techniques can also be used to improve the performance of general websites and apps. We’ll be focusing on CSS performance for PWAs since they should be fast and feel native on user devices.
Progressive web apps (PWAs) are web experiences that bring the best of both worlds: native mobile apps (installable from a store) and web apps (reachable from public URLs). Users can start using the application right away from their web browser without waiting for a download, installing, or needing extra space in the device.
Service workers and caching allow the app to work offline and when network connectivity is poor. Over time, the app could become faster as more assets are cached locally. PWAs can also be installed as an icon on the home screen and launched full-screen with an initial splash screen.
Before learning how to audit a PWA for any CSS issues, you can get the code of a simple website with PWA features from this GitHub repository. The PWA uses an unminified version of Bootstrap v4 for CSS styling and displays a set of posts fetched from a statically generated JSON API. You can also use the hosted version of this demo, since learning how to build a PWA is beyond the scope of this tutorial.
PWAs are simply web apps with additional features, including these elements:
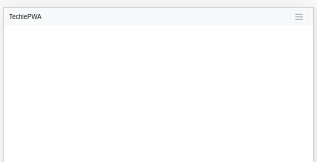
Here’s a screen shot of the application shell:
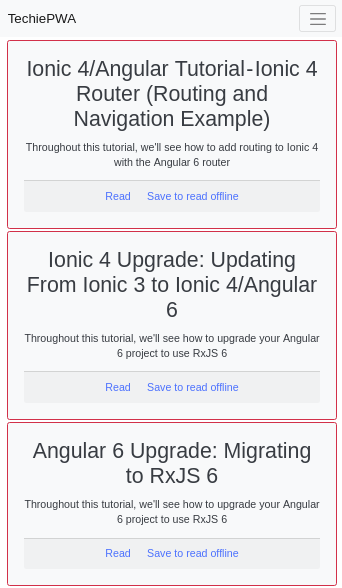
A screen shot of the application with data:
Lighthouse is an open-source auditing tool developed by Google. It can be used to improve the performance, accessibility and SEO of websites and progressive web apps.
Lighthouse can be accessed from the Audit tab in Chrome DevTools, programatically as a Node.js module and also as a CLI tool. It takes a URL and runs a series of audits to generate a report with optimization suggestions.
You can apply different techniques either manually or using tools. This article describes how such tools can be used to remove redundant styles, extract the above-the-fold critical CSS, load the remaining CSS with JavaScript, and minify the resulting code.
Launch Chrome, visit the PWA address https://www.techiediaries.com/unoptimizedpwa/ and open Developer Tools (CTRL-Shift-I). From the Developer Tools, click the Audits panel:
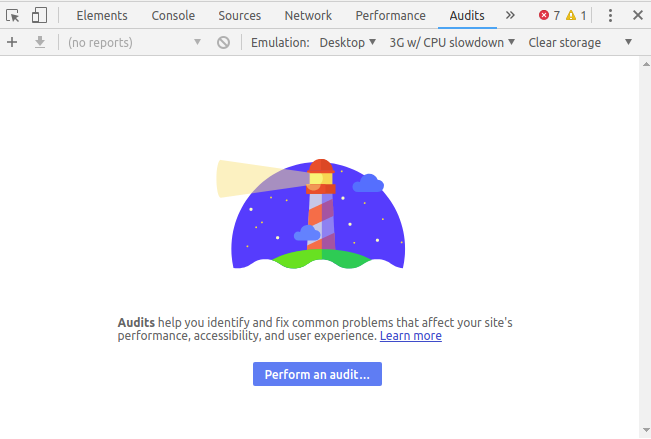
Next, click on Perform an audit…. A dialog will prompt you for the types of audit you want to perform. Keep all types selected and click the Run audit button.
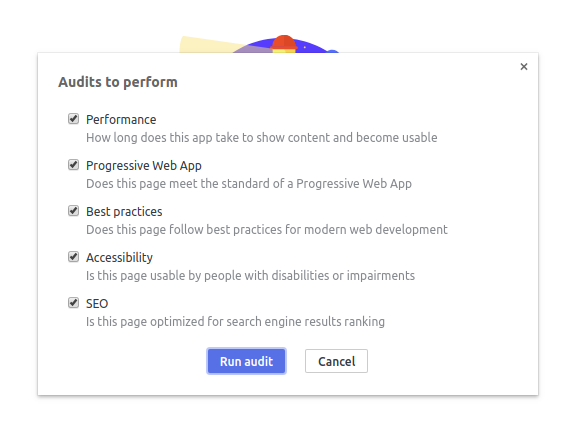
Wait for Lighthouse to complete the auditing process and generate a report:
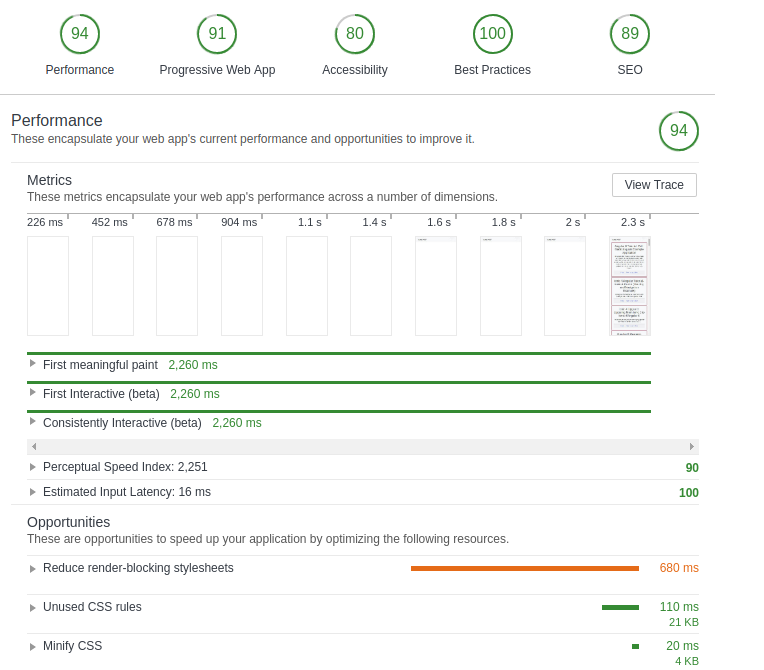
The scores are calculated in a simulated environment. You’re unlikely to get the same results on your machine because they depend on hardware and network capabilities.
From the report, you can see a timeline which visually shows how the page is loaded. First meaningful paint, First Interactive and Consistently Interactive are key time points that describe how fast the page loaded. Our goal is to optimize these metrics according to the Critical Rendering Path.
The post CSS Optimization Tools for Boosting PWA Performance appeared first on SitePoint.
In the previous tutorial, we learned what the REST architecture is, the six guiding constraints of REST, how to understand HTTP request methods and their response codes, and the anatomy of a RESTful API endpoint.
In this tutorial, we'll set up a server for our API to live on. You can build an API with any programming language and server software, but we will use Node.js, which is the back-end implementation of JavaScript, and Express, a popular, minimal framework for Node.
Our first prerequisite is making sure Node.js and npm are installed globally on the computer. We can test both using the -v flag, which will display the version. Open up your command prompt and type the following.
node -v && npm -v
v10.8.0
6.2.0
Your versions may be slightly different than mine, but as long as both are there, we can get started.
Let's create a project directory called express-api and move to it.
mkdir express-api && cd express-api
Now that we're in our new directory, we can initialize our project with the init command.
npm init
This command will prompt you to answer some questions about the project, which you can choose to fill out or not. Once the setup is complete, you'll have a package.json file that looks like this:
{
  "name": "express-api",
  "version": "1.0.0",
  "description": "Node.js and Express REST API",
  "main": "index.js",
  "scripts": {
    "test": "echo \"Error: no test specified\" && exit 1"
  },
  "author": "Tania Rascia",
  "license": "MIT"
}
Now that we have our package.json, we can install the dependencies required for our project. Fortunately we don't require too many dependencies, just these four listed below.
We'll use the install command followed by each dependency to finish setting up our project.
npm install body-parser express mysql request
This will create a package-lock.json file and a node_modules directory, and our package.json will be updated to look something like this:
{
  "name": "express-api",
  "version": "1.0.0",
  "description": "Node.js and Express REST API",
  "main": "index.js",
  "scripts": {
    "test": "echo \"Error: no test specified\" && exit 1"
  },
  "author": "Tania Rascia",
  "license": "MIT",
  "dependencies": {
  "dependencies": {
    "body-parser": "^1.18.3",
    "express": "^4.16.3",
    "mysql": "^2.16.0",
    "request": "^2.88.0"
  }
}
Before we get started on setting up an Express server, we will quickly set up an HTTP server with Node's built-in http module, to get an idea of how a simple server works.
Create a file called hello-server.js. Load in the http module, set a port number (I chose 3001), and create the server with the createServer() method.
// Build a server with Node's HTTP module
const http = require('http');
const port = 3001;
const server = http.createServer();
In the introductory REST article, we discussed what requests and responses are with regards to an HTTP server. We're going to set our server to handle a request and display the URL requested on the server side, and display a Hello, server! message to the client on the response side.
server**on('request'** (request, response) => {
    console.log(`URL: ${request.url}`);
    response.end('Hello, server!')
})
Finally, we will tell the server which port to listen on, and display an error if there is one.
// Start the server
server.listen(port, (error) => {
    if (error) return console.log(`Error: ${error}`);

    console.log(`Server is listening on port ${port}`)
})
Now, we can start our server with node followed by the filename.
node hello-server.js
You will see this response in the terminal:
Server is listening on port 3001
To check that the server is actually running, go to http://localhost:3001/ in your browser's address bar. If all is working properly, you should see Hello, server! on the page. In your terminal, you'll also see the URLs that were requested.
URL: /
URL: /favicon.ico
If you were to navigate to http://localhost:3001/hello, you would see URL: /hello.
We can also use cURL on our local server, which will show us the exact headers and body that are being returned.
curl -i http://localhost:3001
HTTP/1.1 200 OK
Date: Wed, 15 Aug 2018 22:14:23 GMT
Connection: keep-alive
Content-Length: 14

Hello, server!
If you close the terminal window at any time, the server will go away.
Now that we have an idea of how the server, request, and response all work together, we can rewrite this in Express, which has an even simpler interface and extended features.
We're going to create a new file, app.js, which will be the entry point to our actual project. Just like with the original http server, we'll require a module and set a port to start.
Create an app.js file and put the following code in it.
// Require packages and set the port
const express = require('express');
const port = 3002;
const app = express();
Now, instead of looking for all requests, we will explicitly state that we are looking for a GET request on the root of the server (/). When / receives a request, we will display the URL requested and the "Hello, Server!" message.
app.get('/', (request, response) => {
    console.log(`URL: ${request.url}`);
    response.send('Hello, Server!');
});
Finally, we'll start the server on port 3002 with the listen() method.
// Start the server
const server = app.listen(port, (error) => {
    if (error) return console.log(`Error: ${error}`);

    console.log(`Server listening on port ${server.address().port}`);
});
We can start the server with node app.js as we did before, but we can also modify the scripts property in our package.json file to automatically run this specific command.
"scripts": {
  "start": "node app.js"
},
Now we can use npm start to start the server, and we'll see our server message in the terminal.
Server listening on port 3002
If we run a curl -i on the URL, we will see that it is powered by Express now, and there are some additional headers such as Content-Type.
curl -i http://localhost:3002
HTTP/1.1 200 OK
X-Powered-By: Express
Content-Type: text/html; charset=utf-8
Content-Length: 14
ETag: W/"e-gaHDsc0MZK+LfDiTM4ruVL4pUqI"
Date: Wed, 15 Aug 2018 22:38:45 GMT
Connection: keep-alive

Hello, Server!
In order to easily deal with POST and PUT requests to our API, we will add body parsing middleware. This is where our body-parser module comes in. body-parser will extract the entire body of an incoming request and parse it into a JSON object that we can work with.
We'll simply require the module at the top of our file. Add the following require statement to the top of your app.js file.
const bodyParser = require('body-parser');
...
Then we'll tell our Express app to use body-parser, and look for JSON.
// Use Node.js body parsing middleware
app.use(bodyParser.json());
app.use(bodyParser.urlencoded({
    extended: true,
}));
Also, let's change our message to send a JSON object as a response instead of plain text.
response.send({message: 'Node.js and Express REST API'});
Following is our full app.json file as it stands now.
// Require packages and set the port
const express = require('express');
const port = 3002;
const bodyParser = require('body-parser');
const app = express();

// Use Node.js body parsing middleware
app.use(bodyParser.json());
app.use(bodyParser.urlencoded({
    extended: true,
}));

app.get('/', (request, response) => {
    response.send({
        message: 'Node.js and Express REST API'}
    );
});

// Start the server
const server = app.listen(port, (error) => {
    if (error) return console.log(`Error: ${error}`);

    console.log(`Server listening on port ${server.address().port}`);
});
If you send a curl -i to the server, you'll see that the header now returns Content-Type: application/json; charset=utf-8.
So far, we only have a GET route to the root (/), but our API should be able to handle all four major HTTP request methods on multiple URLs. We're going to set up a router and make some fake data to display.
Let's create a new directory called routes, and a file within called routes.js. We'll link to it at the top of app.js.
const routes = require('./routes/routes');
Note that the .js extension is not necessary in the require. Now we'll move our app's GET listener to routes.js. Enter the following code in routes.js.
const router = app => {
    app.get('/', (request, response) => {
        response.send({
            message: 'Node.js and Express REST API'
        });
    });
}
Finally, export the router so we can use it in our app.js file.
// Export the router
module.exports = router;
In app.js, replace the app.get() code you had before with a call to routes():
routes(app);
You should now be able to go to http://localhost:3002 and see the same thing as before. (Don't forget to restart the server!)
Once that is all set up and working properly, we'll serve some JSON data with another route. We'll just use fake data for now, since our database is not yet set up.
Let's create a users variable in routes.js, with some fake user data in JSON format.
const users = [{
        id: 1,
        name: "Richard Hendricks",
        email: "richard@piedpiper.com",
    },
    {
        id: 2,
        name: "Bertram Gilfoyle",
        email: "gilfoyle@piedpiper.com",
    },
];
We'll add another GET route to our router, /users, and send the user data through.
app.get('/users', (request, response) => {
    response.send(users);
});
After restarting the server, you can now navigate to http://localhost:3002/users and see all our data displayed.
Note: If you do not have a JSON viewer extension on your browser, I highly recommend you download one, such as JSONView for Chrome. This will make the data much easier to read!
Visit our GitHub Repo to see the completed code for this post and compare it to your own.
In this tutorial, we learned how to set up a built-in HTTP server and an Express server in node, route requests and URLs, and consume JSON data with get requests.
In the final installment of the RESTful API series, we will hook up our Express server to MySQL to create, view, update, and delete users in a database, finalizing our API's functionality.
whs.js is a framework for 3D web apps built with Three.js technology.It implements a core with component system and plugin support for fast development of 3D scene with physics.
Features:
Worker (Multithreading)The post Whs.js : Super-fast 3D framework for Web Applications & Games appeared first on Best jQuery.
This plugin generates an autocomplet from an input field, so that you can retrieve an address and its associated geodata from Google and fill it into input fields.
The post Google Geocomplete jQuery Plugin appeared first on Best jQuery.