In a previous article, we looked at how to get data into and out of components using the @Input and @Output annotations. In this article, we’ll look at another fundamental aspect of Angular 2 components — their ability to use “providers.”
You may have seen “providers” in a list of properties you can use to configure components, and you might have realized that they allow you to define a set of injectable objects that will be available to the component. That’s nice, but it of course begs the question, “what is a provider?”
Answering that question gets us into an involved discussion of Angular 2’s Dependency Injection (DI) system. We may specifically cover DI in a future blog post, but it’s well covered in a series of articles by Pascal Precht, beginning with: http://blog.thoughtram.io/angular/2015/05/18/dependency-injection-in-angular-2.html. We’ll assume you are familiar with DI and Angular 2’s DI system in general, as covered in Pascal’s article, but in brief the DI system is responsible for:
- Registering a class, function or value. These items, in the context of dependency injection, are called “providers” because they result in something. For example, a class is used to provide or result in an instance. (See below for more details on provider types.)
- Resolving dependencies between providers — for example, if one provider requires another provider.
- Making the provider’s result available in code when we ask for it. This process of making the provider result available to a block of code is called “injecting it.” The code that injects the provider results is, logically enough, called an “injector.”
- Maintaining a hierarchy of injectors so that if a component asks for a provider result from a provider not available in its injector, DI searches up the hierarchy of injectors.
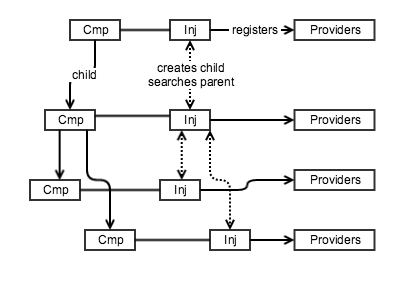
In the previous article, we included a diagram showing that components form a hierarchy beginning with a root component. Let’s add to that diagram to include the injectors and the resources (providers) they register:

Figure 1: Each component has its own injector that registers providers. Injectors create child injectors and a request for a provider starts with the local injector and searches up the injector hierarchy.
We can see from the above that while components form a downwards directed graph, their associated injectors have a two-way relationship: parent injectors create children (downwards) and when a provider is requested, Angular 2 searches the parent injector (upwards) if it can’t find the requested provider in the component’s own injector. This means that a provider with the same identifier at a lower level will shadow (hide) the same-named provider at a higher level.
What are Providers?
So, what are these “providers” that the injectors are registering at each level? Actually, it’s simple: a provider is a resource or JavaScript “thing” that Angular uses to provide (result in, generate) something we want to use:
- A class provider generates/provides an instance of the class.
- A factory provider generates/provides whatever returns when you run a specified function.
- A value provider doesn’t need to take an action to provide the result like the previous two, it just returns its value.
Unfortunately, the term “provider” is sometimes used to mean both the class, function or value and the thing that results from the provider — a class instance, the function’s return value or the returned value.
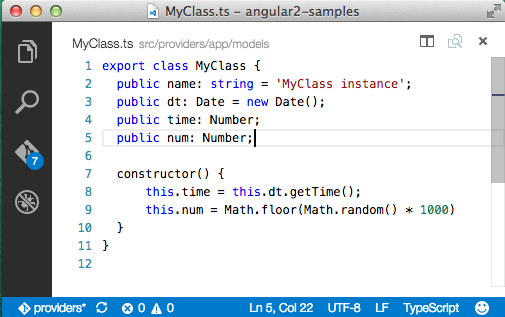
Let’s see how we can add a provider to a component by creating a class provider using MyClass, a simple class that will generate the instance we want to use in our application.

Figure 2: A simple class with four properties. (Code screenshots are from Visual Studio Code)
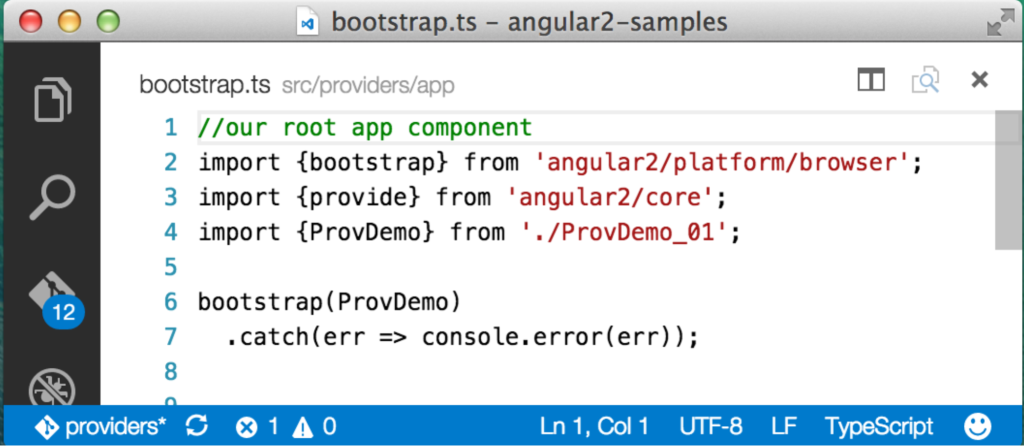
Okay, that’s the class. Now let’s instruct Angular to use it to register a class provider so we can ask the dependency injection system to give us an instance to use in our code. We’ll create a component, ProvDemo_01.ts, that will serve as the root component for our application. We load this component and kick-off our application in the bootstrap.ts:

Figure 3: Our application’s bootstrap.ts file that instantiates the root component.
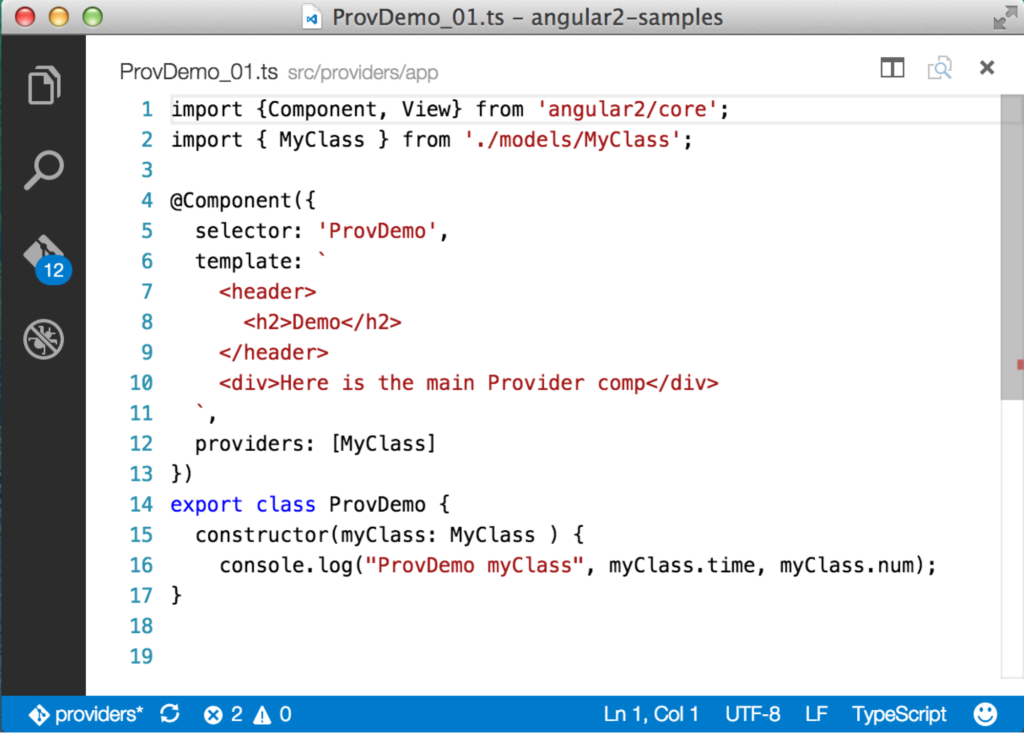
If the above doesn’t make sense, then take a look at our earlier post that walks through building a simple Angular 2 application. Our root component is called ProvDemo, and the repository contains several numbers versions of it. You can change the version that’s displayed by updating the line that imports ProvDemo above. Our first version of the root component looks like this:

Figure 4: CompDemo with MyClass imported, added to the providers array and used as a Type in the constructor arguments.
Adding the MyClass provider to this component is straightforward:
- Import MyClass
- Add it to the @Component providers property
- Add an argument of type “MyClass” to the constructor.
Under the covers, when Angular instantiates the component, the DI system creates an injector for the component which registers the MyClass provider. Angular then sees the MyClass type specified in the constructor’s argument list and looks up the newly registered MyClass provider and uses it to generate an instance which it assigns to “myClass” (initial small “m”).
The process of looking up the MyClass provider and generating an instance to assign to “myClass” is all Angular. It takes advantage of the TypeScript syntax to know what type to search for but Angular’s injector does the work of looking up and returning the MyClass instance.
Given the above, you might conclude that Angular takes the list of classes in the “providers” array and creates a simple registry used to retrieve the class. But there’s a slight twist to make things more flexible. A key reason why a “twist” is needed is to help us write unit tests for our components that have providers we don’t want to use in the testing environment. In the case of MyClass, there isn’t much reason not to use the real thing, but if MyClass made a call to a server to retrieve data, we might not want to or be able to do that in the test environment. To get around this, we need to be able to substitute within ProvDemo a mock MyClass that doesn’t make the server call.
How do we make the substitution? Do we go through all our code and change every MyClass reference to MyClassMock? That’s not efficient and is a poor pattern for writing tests.
We need to swap out the provider implementation without changing our ProvDemo component code. To make this possible, when Angular registers a provider it sets up a map to associate a key (called a “token”) with the actual provider. In our example above, the token and the provider are the same thing: MyClass. Adding MyClass to the providers property in the @Component decorator is shorthand for:
providers: [ provide(MyClass, {useClass: MyClass} ]
This says “register a provider using ‘MyClass’ as the token (key) to find the provider and set the provider to MyClass so when we request the provider, the dependency injection system returns a MyClass instance.” Most of us are used to thinking of keys as being either numbers or strings. But in this case the token (key) is the class itself. We could have also registered the provider using a string for the token as follows:
providers: [ provide(“aStringNameForMyClass”, {useClass: MyClass} ]
So, how does this help us with testing? It means in the test environment we can override the provider registration, effectively doing:
provide(MyClass, {useClass: MyClassMock})
This associates the token (key) MyClass with the class provider MyClassMock. When our code asked the DI system to inject MyClass in testing, we get an instance of MyClassMock which can fake the data call. The net effect is that all our code remains the same and we don’t have to worry about whether the unit test will make a call to a server that might not exist in the test environment.
Continue reading %Angular 2 Components and Providers: Classes, Factories & Values%
by David Aden via SitePoint
No comments:
Post a Comment