In part 2 of this tutorial series on building DApps with Ethereum, we wrote the TNS token’s code. But we haven’t yet compiled it, deployed it, tested it or verified it. Let’s do all that in this part so that we’re ready for what comes next.
Compiling
At this point we have a file containing some Solidity code. But to make the Ethereum Virtual Machine understand it, we need to turn it into machine code. Additionally, in order to communicate with it from a web application, we need an ABI (application binary interface), which is a universally readable description of the functions that exist in a certain smart contract — be it a token or something more complex. We can create machine code for the EVM and the ABI all at once by using Truffle’s compiler.
In the project folder, run:
truffle compile
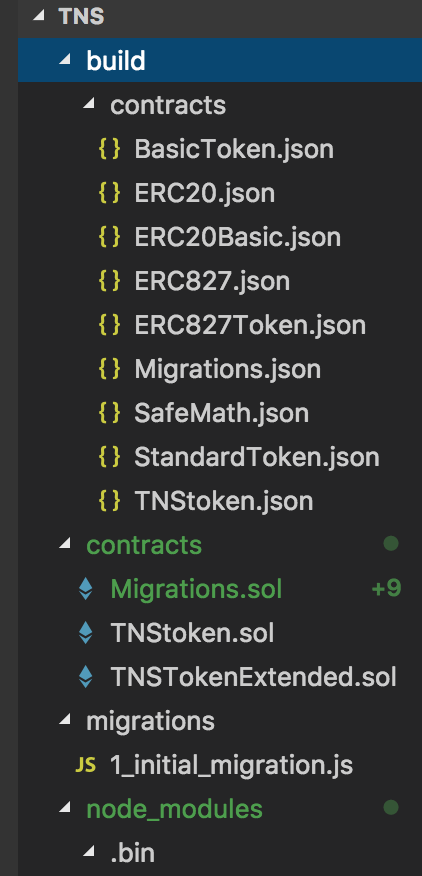
This command will look inside the contracts subfolder, compile them all and place their compiled version into the build subfolder. Note that if you used the alternative development flow from the last part, all the parent contracts from which our TNSToken contract is inheriting functionality will also be compiled one by one each in its own file.

Feel free to inspect the contents of the generated JSON files. Our TNSToken should have over 10000 lines of JSON code.
Deploying to Ganache
Now let’s see if we can deploy this to our simulated Ganache blockchain. If Ganache isn’t running already in a tab of your terminal or among your operating system’s applications, run it with:
ganache-cli
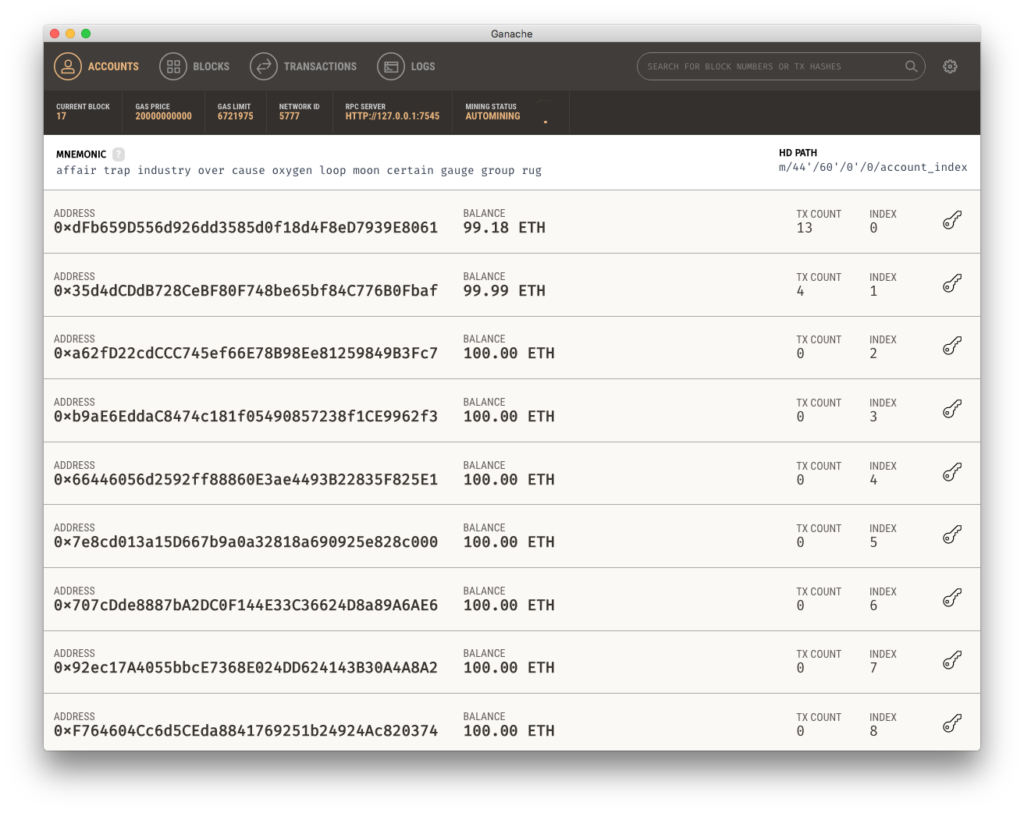
Or run the app to get a screen like this one:

Then, back in the folder where we just compiled the contracts, we have to add a migration. Create the file migrations/2_deploy_tnstoken.js. If you’re not familiar with migrations in the Truffle ecosystem, see this guide.
Let’s put the following into that file:
var Migrations = artifacts.require("./Migrations.sol");
var TNSToken = artifacts.require("./TNSToken.sol");

module.exports = function(deployer, network, accounts) {
  deployer.deploy(TNSToken, {from: accounts[0]});
};
First the ability to do migrations at all is imported by requesting Migrations.sol. This is required in every migration. Next, deploying a token means we need to import its Solidity code, and we do this by pulling in TNSToken.sol, the code we wrote in the previous part. Finally, this is cookie cutter migrating with only the part between function(deployer, network, accounts) { and the last } changing.
In this case, we tell the deployer to deploy the TNSToken and pass in the from argument in order to set the initial token holder. The address used here is a random one generated by Ganache, but by using the accounts array automatically passed to the deployer, we make sure we have access to the list of accounts present in the running node (be it a live Geth node or Ganache). In my particular example, the account[0] address was 0xdFb659D556d926dd3585d0f18d4F8eD7939E8061, also evident in the screenshot above.
Let’s also not forget to configure a development environment in truffle.js:
module.exports = {
  networks: {
    development: {
      host: "127.0.0.1",
      port: 7545,
      network_id: "*"
    }
  }
};
Note: take care of the port and IP; yours might be different!
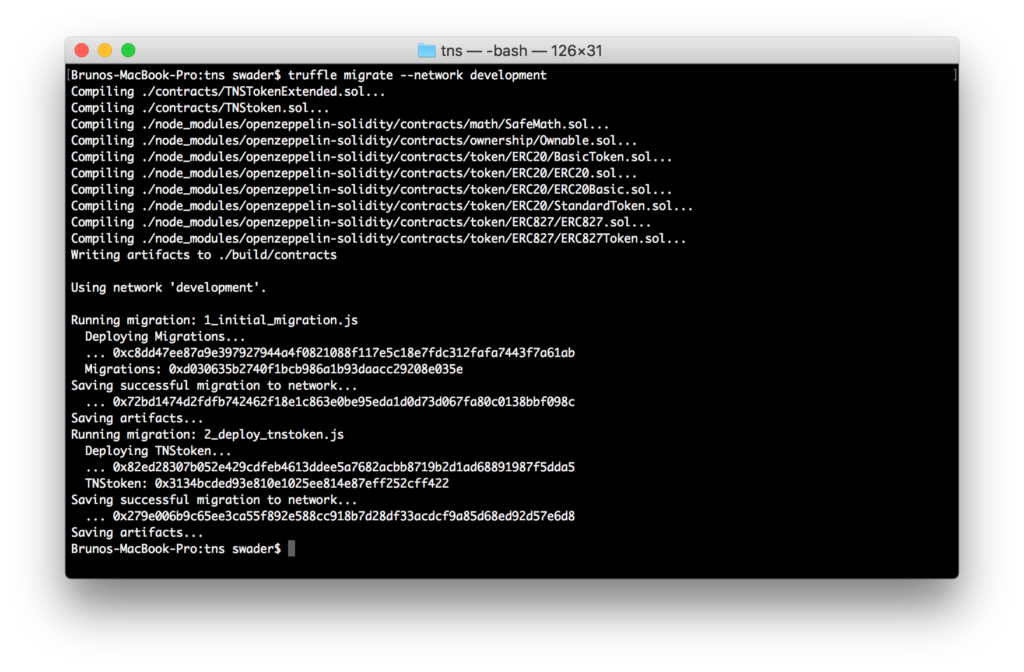
Finally, in the project folder, run truffle migrate. You should see something like this:

Notice the Ethereum address next to TNStoken: 0x3134bcded93e810e1025ee814e87eff252cff422. This is where our token was deployed. Now let’s see it in action.
The post Ethereum DApps: Compiling, Deploying, Testing TNS tokens appeared first on SitePoint.
by Bruno Skvorc via SitePoint
No comments:
Post a Comment